


Quick Facts:
- Topic: Rock crawling technique for full-size 4x4s and SUVs
- Skill level: Beginner to intermediate
- Core skills: Line selection, wheel placement, throttle and brake control, spotter communication
- Tire pressure range: 15 to 20 PSI on standard wheels, 6 to 8 PSI on beadlocks
- Gear range: Low range, first gear
- Difficulty scale: Numeric Trail Rating System, 1 (easy) to 10 (extreme)
- Best for: Drivers moving from graded trails to rocky, technical terrain
9 min read
In This Guide
- Overview: What Rock Crawling Technique Actually Involves
- Trail Difficulty at a Glance
- Line Selection: Reading the Trail First
- Wheel Placement and Traction
- Throttle and Brake Control
- Spotter Hand Signals Off-Road
- Airing Down for Rock Crawling
- Rock Crawling Tips for Beginners: Common Mistakes
- Rock Crawling vs. Sand and Water Crossing Technique
- Building Rock Crawling Confidence
- FAQ
Overview: What Rock Crawling Technique Actually Involves
Rock crawling technique is the set of driving skills needed to climb, descend, and pick through rocky, uneven terrain without breaking parts. Rocks do not move out of the way, unlike sand or mud. Every wheel placement decision carries a consequence, so the driver reads the obstacle first and moves second.
A stock SUV with all-terrain tires handles a rating of 3 on the Numeric Trail Rating System. A modified rig with lockers and 35-inch tires opens up ratings of 5 and 6. Technique matters more than horsepower here. A vehicle with locking differentials, low-range gearing, and a spotter outside the truck will out-climb a more powerful rig driven without a plan.
This guide on how to rock crawl covers six skills separating a controlled climb from a broken axle: line reading, wheel placement, throttle and brake control, spotter communication, airing down, and avoiding common mistakes. Before attempting technical terrain, confirm your vehicle setup for rock crawling, including ground clearance, skid plates, and tire choice.
Nobody masters rock crawling on the first trail, so start on an easy-rated obstacle and bring a second vehicle. Build skill in layers: each section below adds to the last, moving from reading the obstacle to talking with a spotter once you get underway.
What You’ll Need
Tools
- Accurate tire pressure gauge (0 to 30 PSI range)
- Portable air compressor to re-air before pavement
- Recovery gear: kinetic rope or strap, rated shackles
- A second vehicle or trail partner
Materials
- 4×4 with a functioning low range gearbox
- Roughly 8.5 inches of ground clearance as a starting point for beginner trails
- All-terrain tires or better, non-highway tread
- Seatbelts worn at all times, even at walking speed
Trail Difficulty at a Glance
Rock crawling clubs and event organizers rate trails on a Numeric Trail Rating System from 1 to 10. Groups including Jeep Jamboree USA and the Red Rock 4-Wheelers, who run the Easter Jeep Safari in Moab, built and maintain the scale. It is community-run rather than federally administered, but it remains the closest thing the sport has to a shared standard. Knowing your rating before leaving the trailhead tells you whether your vehicle and skill level match the obstacle ahead.
| Rating | Category | What to Expect | Vehicle and Driver Needs |
|---|---|---|---|
| 1 to 2 | Easy | Maintained gravel or dirt roads, mild ruts, washboard bumps, small rocks | Stock 4x4s and SUVs, average driver skill |
| 3 to 4 | Moderate | Steeper grades, ledges up to 12 inches, larger rocks, mild water crossings | Stock 4×4 with all-terrains, or high-clearance 4×4 with skid plates |
| 5 to 6 | Difficult | Narrow trail, deep ruts, rocks or ledges up to 24 inches, steep off-camber climbs | 33 to 35 inch tires, lockers, armor, winch recommended, spotter needed |
| 7 to 10 | Extreme | Steep rock ledges and waterfalls needing a spotter, up to routes reserved for expert-level drivers | Custom-built rigs, expert skill, spotter required |
A second system exists: the color and symbol rating used by the Forest Service and BLM on general OHV trails. It marks routes with a green circle for easiest, a blue square for more difficult, and a black diamond for most difficult. Both systems describe similar terrain, so check which one your trail uses before you go.
Essential Airing-Down Tools


ROAD2SUMMIT Heavy Duty Portable 12V Air Compressor Kit Inflate 6.35…

Line Selection: Reading the Trail First
Line selection means choosing the exact path your tires follow before touching the throttle. Stop the vehicle and walk the obstacle if you have any doubt. Look for the path keeping the most rubber on solid rock and avoiding sharp drops on either side.
Memorize the line in sections. You often cannot see your front tires from the driver seat. Break the obstacle into three or four points and commit each one to memory before moving. Following too closely behind another vehicle removes your ability to see and plan your own line. Hang back until the vehicle ahead clears the obstacle.
Patience beats speed on every technical section. A slow, deliberate line beats a fast one nearly every time. Speed reduces your ability to stop or adjust once a tire finds an unexpected drop.
Wheel Placement and Traction

Place your tires on top of rocks whenever possible, not in the low points between them. Driving through a rut or gap between rocks feels smoother. However, it drops your ground clearance exactly when you need it most. It also raises the odds of hanging up on the frame or differential.
Straddle ruts instead of driving through them. Letting one tire drop into a rut while the other stays on the high side reduces available traction by as much as 25 percent. The dropped tire loses contact pressure against the terrain. If your vehicle has a locking differential, engage the rear locker before entering the obstacle rather than mid-climb. A locker sends equal torque to both wheels on the axle. As a result, a tire losing contact will not spin uselessly while the other wheel with grip sits idle. For a full breakdown of timing, see this guide to how locking differentials help on rocks.
Ground clearance changes the math on every line you pick. As an example, a vehicle running 10 inches of clearance clears obstacles able to high-center a stock SUV running only 8 inches. Know your specific number before comparing your line to someone else’s.
Throttle and Brake Control
Shift into low range before reaching the obstacle, not after you are already on it. Low range multiplies torque at low RPM. This lets the vehicle creep forward under full control instead of needing throttle input heavy enough to spin a tire loose. For the full case on low range versus high range, read this guide to when to shift into 4-Low. This companion piece covers using low range as a beginner.
Aim for what experienced crawlers call threshold traction: the throttle input right below the point where a tire starts to spin. This mirrors threshold braking on pavement, where the goal is maximum grip right before losing it. Too much throttle causes a tire to bounce or hop over an obstacle instead of climbing it smoothly. This bounce ranks among the most common causes of broken axles and CV joints in rock crawling.
Safety note: Excess throttle on a rock ledge ranks as a leading cause of broken axles in beginner rock crawling. If a tire starts to bounce or spin, ease off immediately instead of adding more throttle to power through.
On descents, use engine braking in low range first and reserve the brake pedal for fine adjustments. Riding the brake on a steep, loose descent locks a tire and starts a slide. Low range alone often controls your speed without any pedal input at all.
Spotter Hand Signals Off-Road
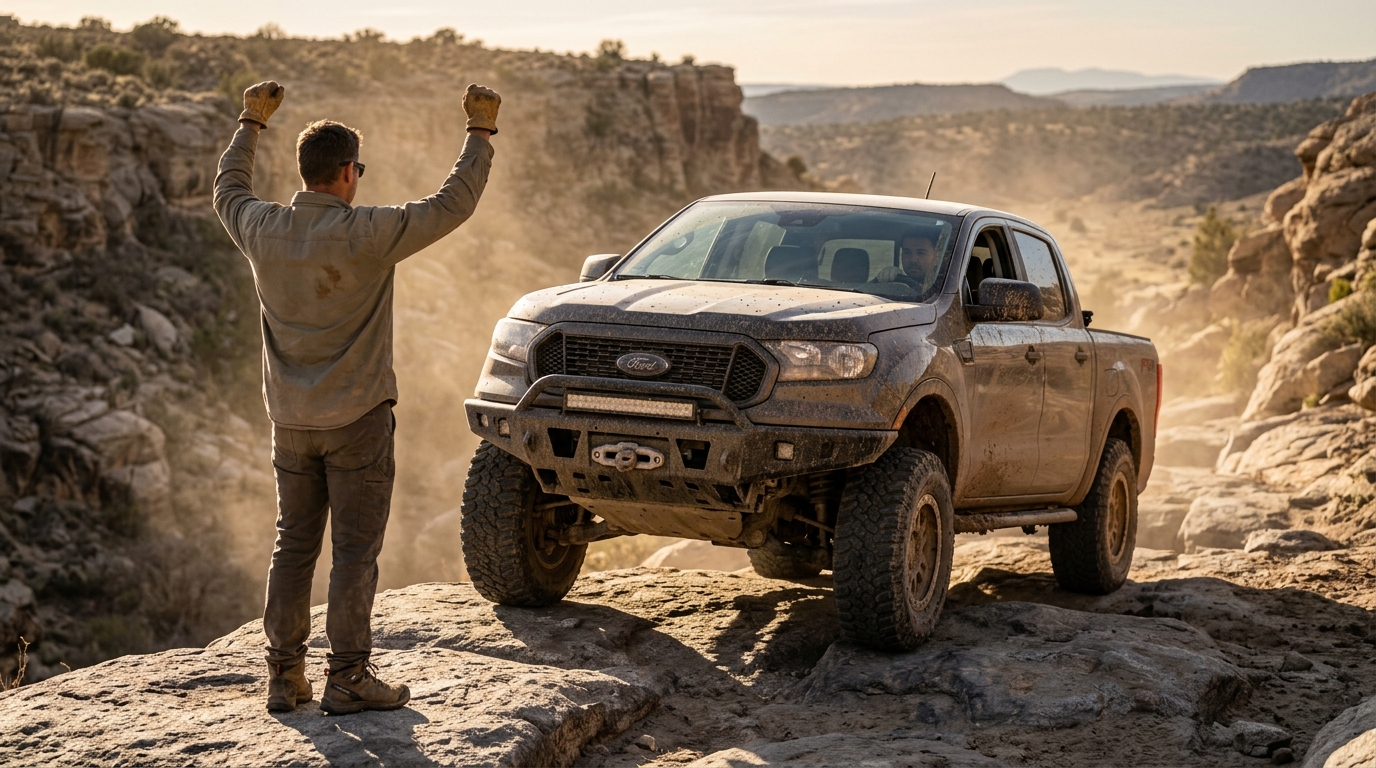
Use a single spotter for any obstacle challenging your sightlines. Agree beforehand: the driver follows the spotter’s signal exactly, no more and no less. Multiple people shouting directions create confusion at the worst possible moment.
Position the spotter where the driver sees them at all times, close enough to communicate. The spotter should never stand where a vehicle would reach them if it slips. Experienced spotters use “driver side” and “passenger side” instead of “left” and “right.” Left and right change meaning depending on which direction each person faces.
Spotter hand signals off-road follow a standard set covering most situations. A closed fist means stop. A palm waved toward the driver means come forward. Pointing toward a side means turn toward it, and thumbs pressed together or pulled apart signal winch in or winch out. Our full spotter hand signal guide covers all twelve core signals plus the separate set used during winching.
Many experienced teams also use a click system for fine steering input. One click equals roughly a quarter turn of the wheel. This gives the spotter a precise way to request a small correction instead of a vague “turn a little.” Some crews pair hand signals with two-way radios for long sightlines, though hand signals remain the standard for close-quarters obstacles.
Airing Down for Rock Crawling
With line selection, throttle, and spotter communication set, tire pressure is the last variable to dial in before the obstacle. Lower tire pressure increases the tire’s contact patch. It lets the tread wrap around rock edges instead of bridging over them, adding real traction on technical terrain. The right pressure for airing down for rock crawling depends on your wheel setup.
| Wheel Setup | Recommended PSI for Rocks | Notes |
|---|---|---|
| Standard, non-beadlock | 15 to 20 PSI | Conservative beginner range; de-beading risk rises sharply below roughly 10 PSI |
| Beadlock wheels | 6 to 8 PSI | Beadlocks clamp the tire to the wheel, so it will not de-bead at low pressure |
| Advanced or expert only | 11 to 15 PSI | Only with experience reading how your specific tire and wheel combination behaves |
Always air back up before returning to pavement, since underinflated tires overheat and wear unevenly at highway speed. Our complete airing-down PSI guide breaks down pressure targets for every terrain type, not only rocks. Exact numbers vary by tire size, vehicle weight, and trail conditions, so treat this table as a starting point and adjust from there.
Rock Crawling Tips for Beginners: Common Mistakes
These rock crawling tips for beginners trace back to a short list of repeated mistakes. Each one is avoidable with the technique above. Too much throttle over an obstacle causes the vehicle to bounce. This ranks among the most common causes of broken axles and CV joints.
Not airing down before the trail ranks as another common mistake. Full street pressure removes most of the traction benefit a tire offers on rock. Letting a tire drop into a rut instead of straddling it costs real traction, as covered above. Driving around rocks instead of over them gives up the ground clearance advantage those rocks provide.
Wheeling alone, without a second vehicle or a way to call for help, turns a minor mechanical failure into a serious problem in a remote area. Finally, skipping the seatbelt because the vehicle moves at walking speed still risks rollover injury. Rock crawling speeds run low, but the angles involved do not, and a seatbelt costs nothing to use.
Recovery Gear for Remote Wheeling
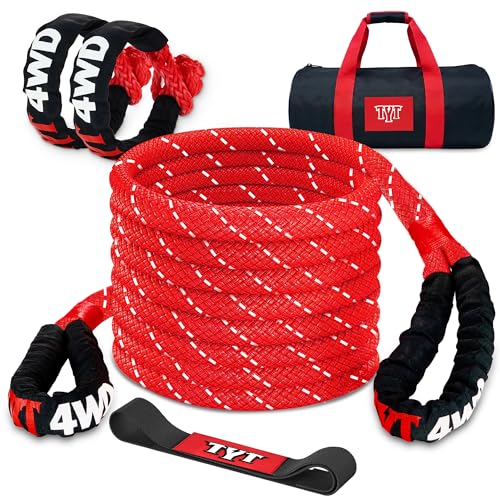


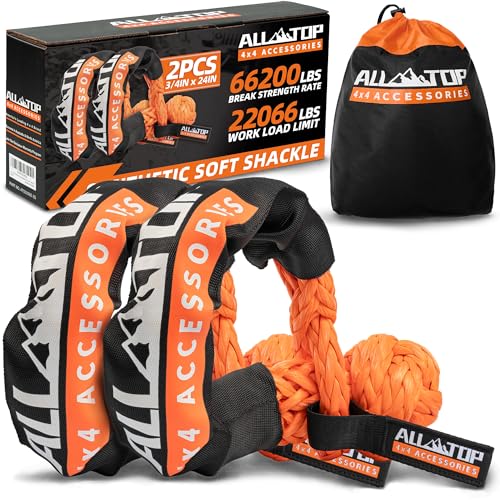
ALL-TOP Synthetic Soft Shackle Rope 3/4in x 24in (66200Lbs Max Brea…
Rock Crawling vs. Sand and Water Crossing Technique
Rock crawling technique does not transfer directly to every terrain type, and treating every trail the same way causes problems. Sand rewards momentum and higher tire pressure to keep the vehicle floating on top of loose ground. This is nearly the opposite of rock crawling’s slow, low-pressure creep.
Water crossings add a different risk profile entirely, since depth and current matter more than traction. A wrong line choice risks flooding an engine rather than merely scraping a rocker panel. Recognizing which terrain you face, and switching technique accordingly, separates an experienced driver from one who got lucky on their last trip.
Building Rock Crawling Confidence
Learning how to rock crawl rewards drivers who start small and build skill in layers rather than jumping straight to a difficult-rated trail. A trail rated 1 or 2, driven slowly with attention to line selection and wheel placement, teaches the same fundamentals as a harder trail. The consequences for a mistake stay much smaller.
Drivers skipping this foundation often struggle once they reach an obstacle rated 5 or 6. The margin for error shrinks fast once ledges exceed 24 inches and lines narrow. Practicing throttle control and spotter communication on easy terrain first makes the jump far more manageable.
Solid line selection, wheel placement, airing down, and throttle control show up together as fewer broken parts, less time spent on recovery, and more time enjoying the trail. A stock vehicle driven with good technique often outperforms a heavily modified rig driven without a plan. Start on a trail rated 2 or 3 with an experienced partner or a local club run, and air down before leaving the trailhead. Treat every obstacle as a line-selection exercise before it becomes a throttle exercise.
FAQ
How do you pick a line when rock crawling?
Stop and look at the obstacle before moving. Choose the path keeping your tires on top of rocks rather than in the gaps between them. Break the line into two or three memorized points, since you often cannot see your front tires from the driver seat.
What hand signals do off-road spotters use?
A closed fist means stop. A palm wave toward the driver means come forward. Pointing to a side means turn toward it, and thumbs together or apart signal winching in or out. A single spotter should give every signal to avoid confusing the driver.
What PSI should I air down to for rock crawling?
Standard, non-beadlock wheels do well at 15 to 20 PSI. Beadlock wheels safely go much lower, typically 6 to 8 PSI. The beadlock clamps the tire to the wheel and prevents it from separating at low pressure.
What gear should I use for rock crawling?
Shift into low range before reaching the obstacle, then use first gear low. Low range multiplies torque at low RPM. This lets the vehicle creep forward under control instead of relying on throttle input risking wheel spin.
Should I use the brake or throttle on rocks?
Use throttle to climb and low range engine braking to descend, saving the brake pedal for fine adjustments only. Riding the brake on a loose descent locks a tire and starts a slide.
What is the biggest mistake beginners make rock crawling?
Using too much throttle over an obstacle. The vehicle bounces instead of climbing smoothly, and this bounce ranks among the most common causes of broken axles and CV joints.