



At 4WD Talk, the team has spent years covering off-road recovery techniques, gear, and real-world trail scenarios. This off road recovery guide draws on firsthand testing of recovery equipment and interviews with experienced overlanders. It covers how recoveries go wrong in the field. What separates a controlled situation from a dangerous one almost always comes down to preparation and decision-making, not the severity of the problem itself.
Trail problems follow predictable patterns. A vehicle gets high-centered on a rock shelf. A tire goes flat on a loose slope. The engine temperature gauge creeps into the red 15 miles from the trailhead. Each scenario has a sequence of steps worth knowing before you need them. This guide covers the most common trail failures and the gear required to handle them. It also covers the decision framework for knowing when to stop and call for help.
Quick Facts:
- Guide type: Off road recovery guide; field problem-solving for trail emergencies
- Skill level: Beginner to intermediate (prior off-road experience helpful)
- Scenarios covered: Getting stuck, flat tires, overheating, dead battery, high-centering
- Essential gear: Recovery boards, kinetic rope, hi-lift jack, compressor, shovel
- Air management: MORRFlate TenSix PSI Pro Gen 2 recommended for trail airing cycles
- Decision rule: Stop self-recovering when each attempt causes more damage or risk than the last
- Solo vs. group: Solo drivers need satellite communication and a filed trip plan before any remote trail
- Best practice: Know your recovery sequence before you leave the trailhead, not after you’re stuck
13 min read
In This Guide
- Why Trail Problems Are Manageable With the Right Off Road Recovery Guide
- Common Trail Scenarios at a Glance
- Getting Unstuck: Mud, Sand, and Snow
- High-Centering and Rock Recovery
- Flat Tire on the Trail
- Trail Mechanical Problems: Overheating, Battery, and Fluids
- When to Stop and Call for Help
- Pros and Cons of Self-Recovery
- Final Verdict
- Frequently Asked Questions
Why Trail Problems Are Manageable With the Right Off Road Recovery Guide
An off road recovery guide is only useful if you’ve read it before the trail. The most common mistake is improvising a recovery sequence you’ve never thought through. Doing so escalates a manageable situation into one requiring outside help. Getting stuck in soft mud, for example, is almost always recoverable with the right steps taken in the right order. It becomes difficult when those steps are taken out of sequence, or when the driver panics and spins the tires deeper.
Off road self recovery starts with assessment. Before touching the vehicle, walk around it. Identify what’s holding you: soft ground under the tires, a high-center contact point, or a front-end obstruction. Understand what direction gives you the easiest exit. On steep terrain, for instance, reversing out is frequently safer than continuing forward. The initial 60-second assessment shapes every step after it.
Overlanding breakdown preparedness means having the right gear before you need it. A recovery kit in every rig should include: two recovery boards (full-length, not budget half-boards), a kinetic recovery rope rated for your rig’s weight, and a hi-lift jack with a base plate. Also carry a folding shovel, rated shackles, and a capable compressor. Each piece of gear corresponds to a specific failure mode covered in this guide. According to the Tread Lightly off-road ethics guidelines, preparation before departure is the single most effective way to prevent trail emergencies from becoming rescues.
Essential Recovery Kit Before Every Trail Run
What You’ll Need
Tools
- Tire pressure gauge (accurate to 1 PSI)
- Quality air compressor (6+ CFM recommended)
- Hi-Lift jack with 48″ minimum lift height
- Floor jack base plate (for soft ground)
- Rated D-ring shackles (rated 3/4″ or larger)
- Folding or collapsible shovel
Materials / Supplies
- Two full-length recovery boards (polypropylene)
- Kinetic recovery rope (rated for rig GVW)
- Tree saver strap (minimum 8 ft, 2″ wide)
- Spare tire (mounted and aired to spec)
- Gloves (leather, not fabric)
- Satellite communicator or PLB
| Trail Problem | First Step | Primary Tool |
|---|---|---|
| Stuck in mud or sand | Air down tires to 15–18 PSI | Recovery boards |
| High-centered on rock | Assess contact point; chock tires | Hi-Lift jack + shovel |
| Flat tire on trail | Find level ground; chock opposite tires | Spare + floor jack or Hi-Lift |
| Overheating engine | Stop immediately; do not open radiator cap | Coolant + shade + time |
| Dead or weak battery | Check terminals; attempt jump | Jump pack or buddy cables |
Off Road Recovery Guide: Common Trail Scenarios at a Glance
Trail problems cluster into five categories: traction loss (stuck in soft terrain), high-centering (vehicle body contacts the ground), tire failure, mechanical breakdown, and navigation or communication failure. Each category has a different first response. Traction problems respond to aired-down tires and boards. High-centering requires lifting the vehicle before any driving attempt. Tire failure needs the vehicle on stable ground before any jack work begins. Knowing which category you’re in shapes the first three steps.
The severity of each situation depends on three variables: remoteness, whether you’re solo or in a group, and how much daylight you have. A stuck vehicle 2 miles from the trailhead with two other rigs is a 20-minute recovery. The same vehicle 20 miles in, solo, at 4 PM in November, is a different calculation entirely. Use those variables to set your urgency level before starting any recovery attempt.
Trail Air Management
Air Down Before You Get Stuck. Air Up Fast After.
The MORRFlate TenSix PSI Pro Gen 2 runs 10.6 CFM and airs four 35″ tires simultaneously in under 5 minutes. No waiting at the trailhead exit.
Getting Unstuck: Mud, Sand, and Snow
Traction recovery starts with tires. Before placing boards, air down to 15–18 PSI for mud and sand, or 18–22 PSI for snow. Lower pressure spreads the contact patch and increases traction on soft terrain. Many stuck situations resolve at this step alone, especially in sand where the tire simply needed more flotation. Wrong PSI is the leading cause of avoidable stuck situations. Review the tire pressure mistakes off-roaders make before your next run.
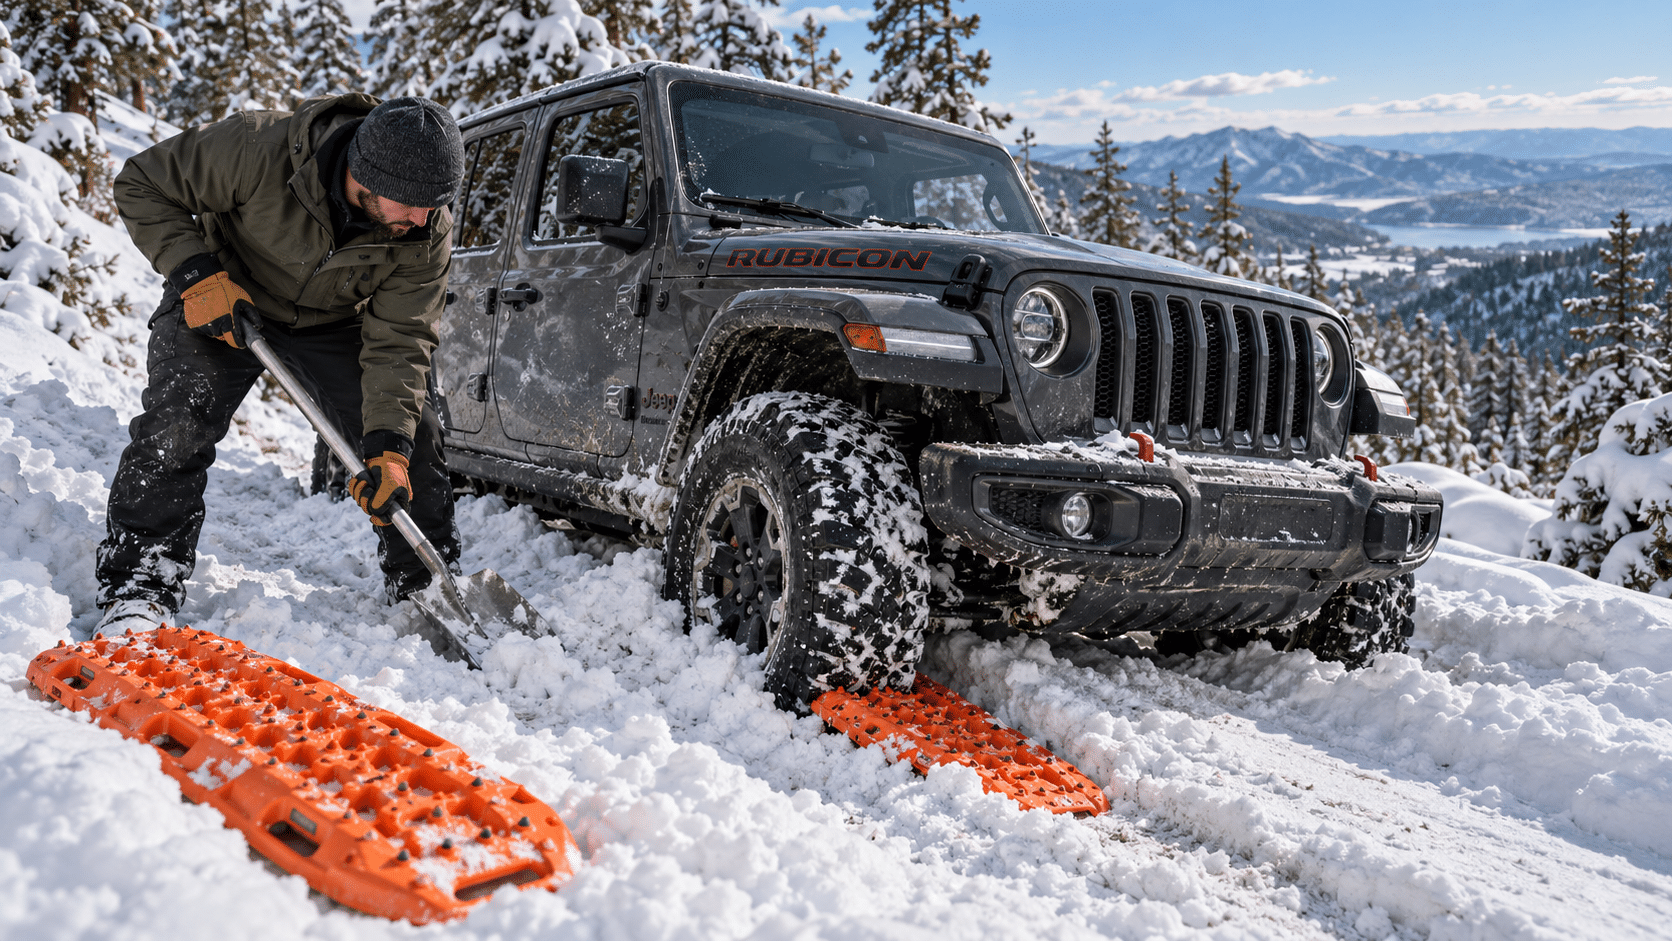
If airing down doesn’t free the vehicle, place recovery boards under the drive wheels in the direction of travel. Dig out in front of the boards first, removing any soft material the tire would push against. Place the boards at a slight angle ramp, not flat, so the tire climbs onto the board surface rather than pushing it forward. Drive at low speed with steady throttle and no spinning. If the first attempt fails, reset the boards and remove more material from the exit path before a second try.
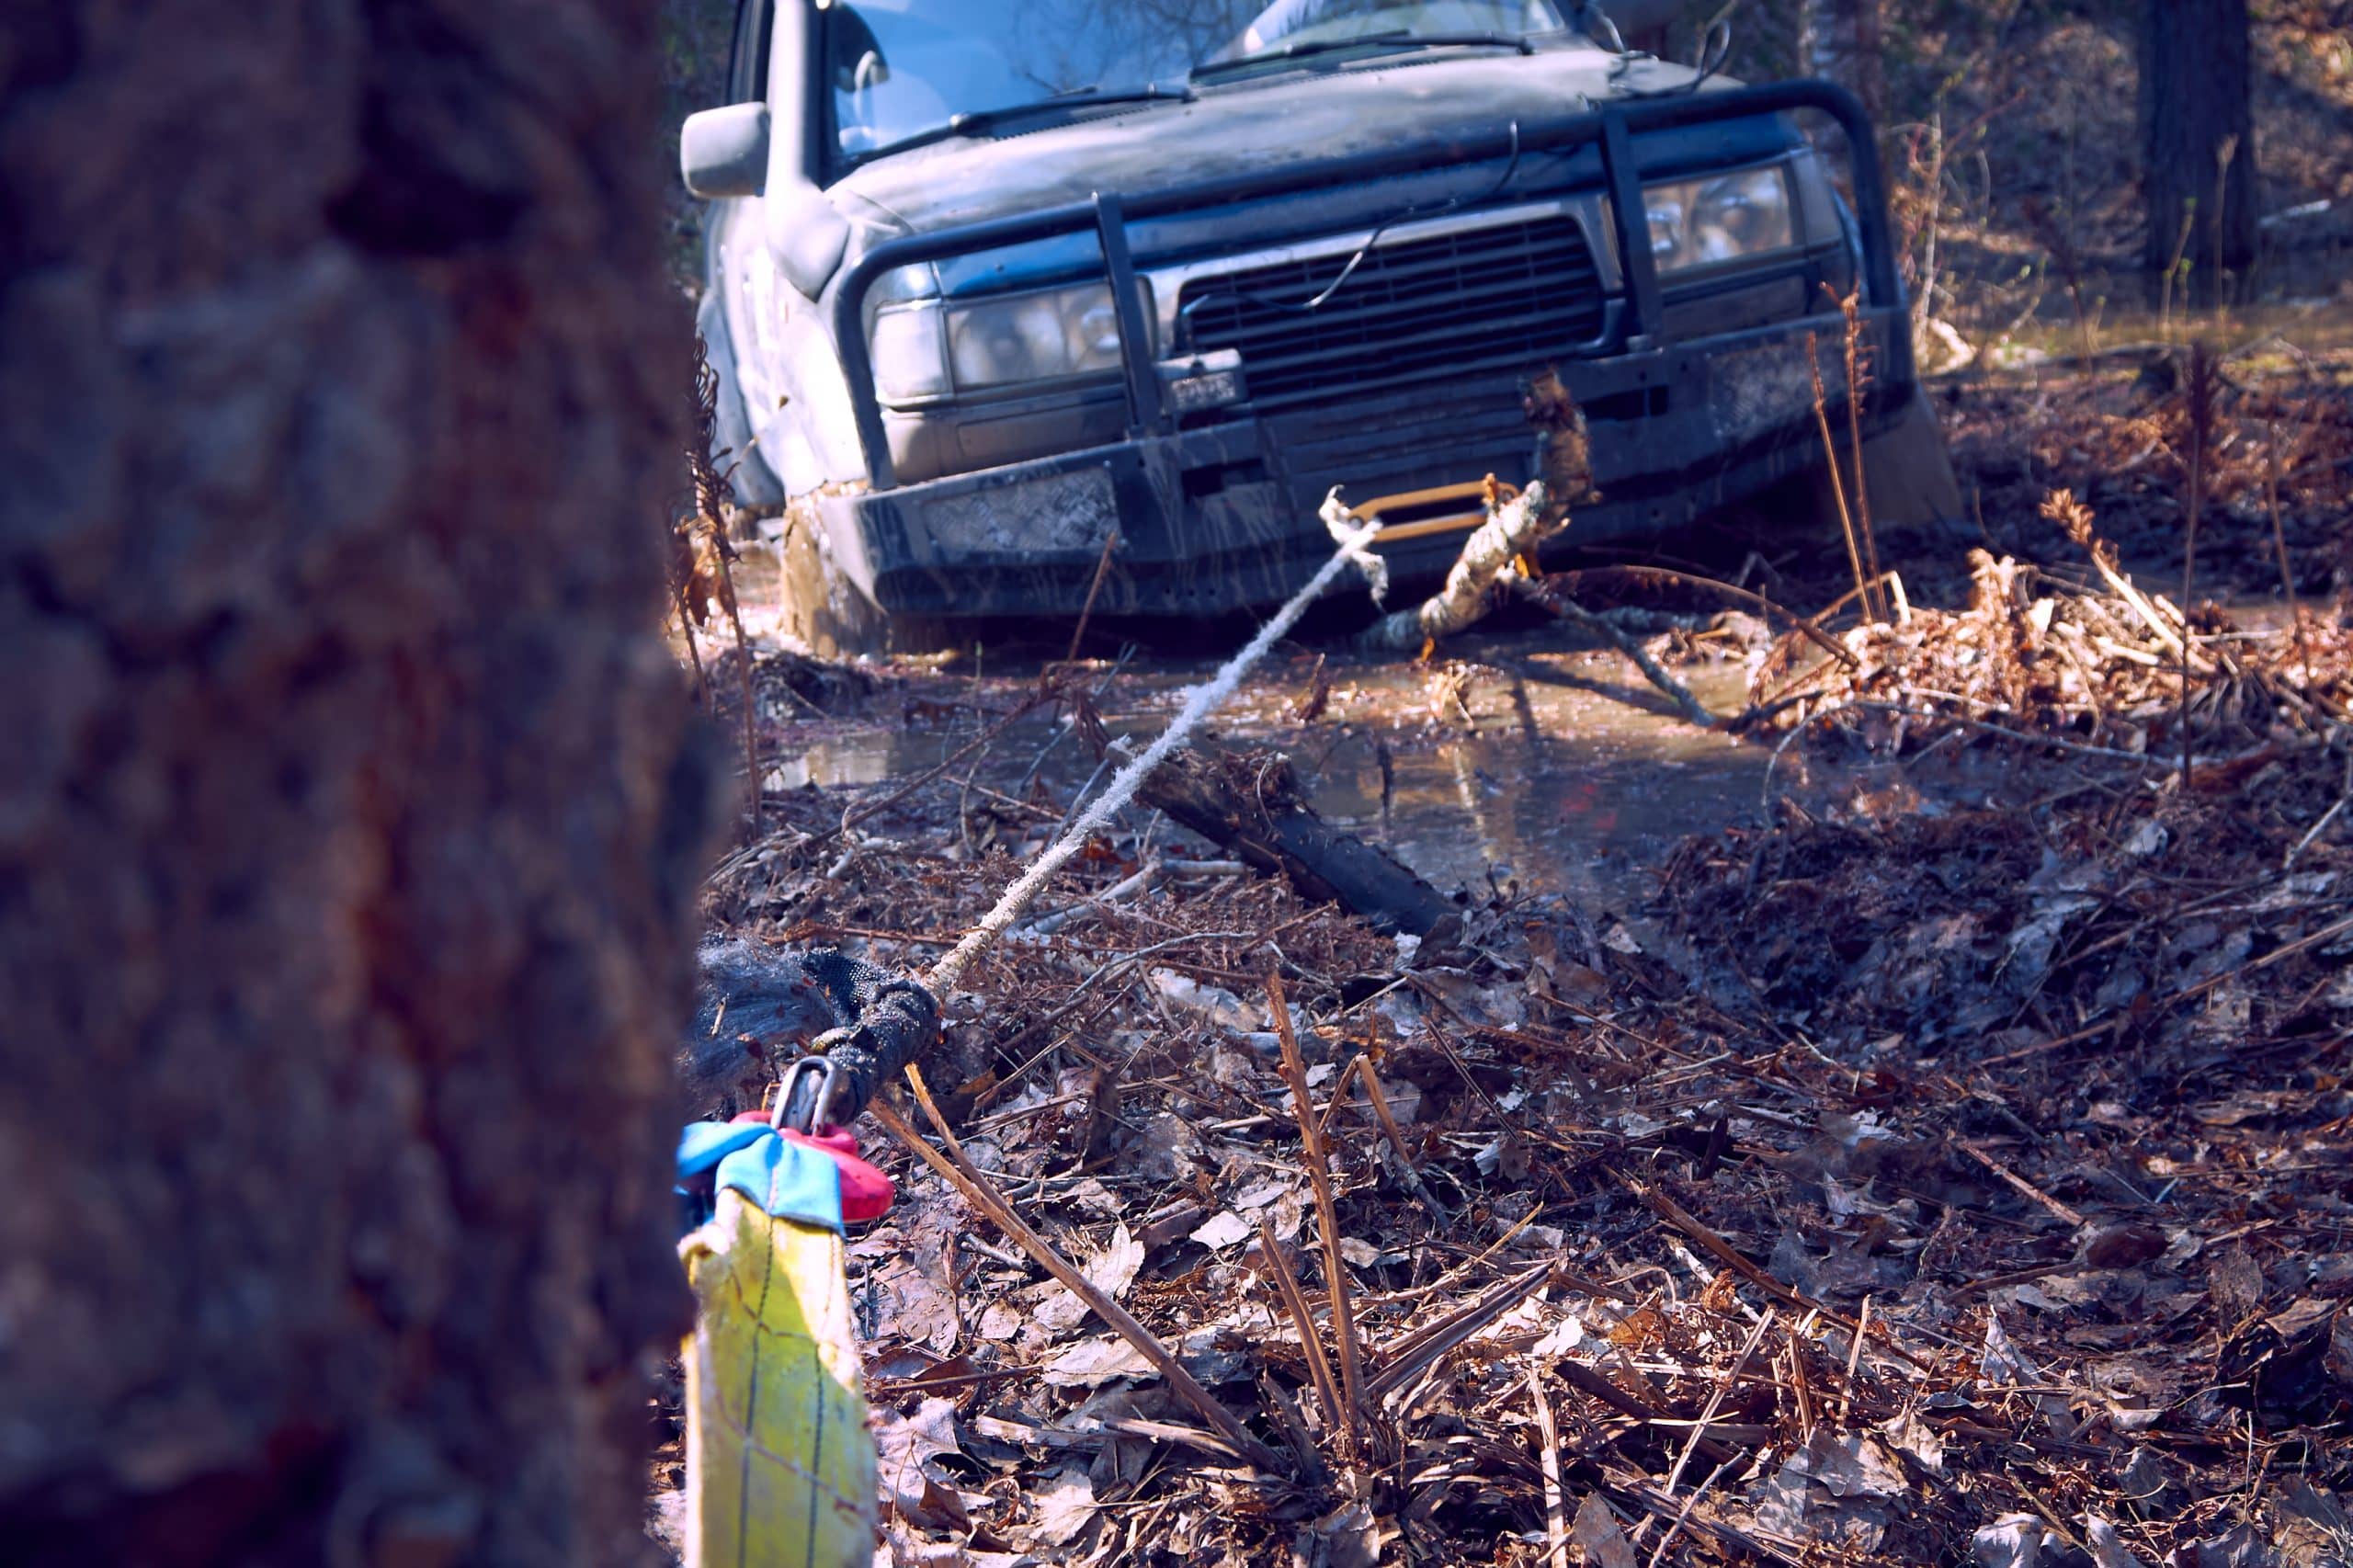
For a group recovery with a second vehicle, a kinetic recovery rope provides the most controlled pull. Unlike a tow strap, a kinetic rope stretches 20–30% under load. It releases energy progressively, reducing shock to both vehicles’ recovery points. The pulling vehicle should be on firmer ground than the stuck vehicle. Both drivers agree on a signal before the pull begins. Two horn beeps to start is a common standard. After any traction recovery, re-check the best recovery tracks for getting unstuck to understand which board designs perform best in each terrain type.
High-Centering and Rock Recovery
Safety note: Never work under a vehicle supported only by a hi-lift jack. Hi-lift jacks slip on angled or soft terrain. Always chock the other three tires before lifting and use a second support point (rock, log, recovery board stack) before placing any part of your body near the lifted side.
High-centering happens when the vehicle’s frame or skid plate contacts the ground while the tires have little or no weight on them. The vehicle is effectively resting on its belly. Attempting to drive out without lifting first grinds the skids and often digs deeper. The first step is assessing which contact point is bearing the most weight and whether forward or reverse gives a shorter path to clear ground.
A hi-lift jack is the primary tool for high-centering recovery. Attach the foot of the jack to a frame-mounted recovery point, not a bumper lip. Lift the high-centered side until the belly clears the obstruction, then place rocks, boards, or a traction pad under the tire to build a ramp. Lower the vehicle onto the ramp, then drive off the obstruction at a slight angle to the original stuck line.
In rock gardens, 4×4 recovery techniques differ from mud or sand recovery. Wheel placement matters more than power. If you high-centered going in, retrace your line exactly in reverse rather than attempting a new line forward. A spotter outside the vehicle is worth more than any piece of gear for rock recovery. Narrow shelves or ledges leave no margin; one tire off-line is the difference between recovery and rollover risk.
Flat Tire on the Trail
Trail mechanical problems often start with a flat, especially on rocky terrain where sidewall punctures are common. When you hear or feel a flat, reduce speed and steer to the safest stable ground available before stopping. Avoid stopping on a slope. A vehicle on a slope with a flat tire is harder and more dangerous to jack than the same vehicle on level ground 50 meters further down the trail.
Chock the three tires you’re not changing before placing any jack. On soft terrain, a hi-lift jack base plate or a flat rock under the jack prevents it from sinking. Loosen the lug nuts before lifting, not after; breaking a lug nut loose while the tire is in the air risks shifting the vehicle off the jack. After swapping the spare, torque the lug nuts in a star pattern. For most full-size trucks, the spec is 120–140 ft-lbs.
After the swap, air up the spare to operating pressure. The MORRFlate TenSix PSI Pro Gen 2 runs 10.6 CFM at 0 PSI with an 80% duty cycle. On a remote trail where you’ve aired down three other tires for traction, airing the full set back up with the quad hose kit takes under five minutes. Slow compressors turn a 15-minute tire change into a 45-minute ordeal.
No Spare: Using a Tire Plug Kit
If you have no spare and a severely damaged tire, a tire plug kit handles most punctures under 6mm diameter. Insert the plug dry, without lubricant, and inflate to no higher than 25 PSI for the remainder of the trail out. Monitor the plug for leaks every 15 minutes.
When Every Minute Counts
Air Up Four Tires in Under Five Minutes
MORRFlate TenSix PSI Pro Gen 2. 10.6 CFM, 80% duty cycle, Quad hose kit. Built for recovery situations where slow isn’t an option.
Trail Mechanical Problems: Overheating, Battery, and Fluids

Trail mechanical problems get less attention than stuck-vehicle recovery, but they account for a significant share of serious trail incidents. Overheating is especially common on hot days with slow crawling in low range, where the engine generates heat faster than the cooling system dissipates it at low vehicle speeds. When the temperature gauge reaches the top third of the range, stop and shift to neutral. Let the engine idle for 5 minutes before turning it off. Shutting off a hot engine immediately traps heat and increases the risk of warping the head gasket.
Safety note: Never open a radiator cap on a hot engine. Coolant in an overheated system is pressurized above 212°F and will erupt when the cap is released. Wait at least 30 minutes after the engine cools before opening the radiator or overflow reservoir.
Battery and Fluid Failures on the Trail
A dead or weak battery on the trail often traces back to an alternator not keeping up with electrical load: lights, a fridge, a winch, and a compressor all drawing simultaneously. A portable jump pack rated at 1,000 peak amps handles most 4-cylinder and V6 starts. V8 diesel engines need a unit rated at 2,000 peak amps or a buddy jump. After a successful jump, run the engine for at least 20 minutes at moderate RPM before adding any electrical load, giving the alternator time to recover the battery.
Fluid leaks discovered mid-trail fall into two categories: drive-home and park-it. A small coolant leak from a hose clamp is a drive-home issue if you carry a liter of coolant and monitor the temperature gauge. A transmission fluid leak from a cracked pan or a differential cover knocked loose is also a drive-home issue if you carry the right fluid and re-fill on-trail. An engine oil leak producing smoke or a drastic pressure drop is a park-it issue. Driving a low-oil engine destroys it in minutes. An overlanding breakdown preparedness kit should include at minimum one quart of engine oil, one quart of coolant, and a basic fluid-check routine at every fuel stop.
When to Stop and Call for Help

The hardest decision in off road self recovery is knowing when to stop. Most drivers who end up in serious trouble made two or three additional recovery attempts after the point where stopping would have been the right call. A clear decision framework prevents this. Stop self-recovering and call for outside help when any of these conditions are true: the vehicle sinks further with each attempt; you see visible structural damage to the frame, axle, or drivetrain; you are losing daylight with no shelter; or a recovery maneuver carries real rollover risk.
Solo drivers need a higher threshold for calling help than group drivers, since there is no second vehicle to attempt a recovery. Before any remote solo run, file a trip plan with someone not on the trail. Include your route, expected return time, and what to do if you don’t check in. Carry a satellite communicator as your primary communication option; cell signal is absent on most off-road trails more than 5 miles from a highway. Devices like the Garmin inReach Mini 2 allow two-way messaging and SOS activation from any location globally, with plans starting at $15 per month.
When you call for help, give your location in GPS coordinates, not trail names. Trail names are inconsistent across different maps and apps. Coordinates work everywhere. Note them before you leave the trailhead by dropping a pin at the start, and note them again when you stop. The difference between “I’m on the south fork trail near the big rock” and “37.4851, -106.9382” is the difference between a 3-hour and a 6-hour rescue response in remote terrain.
Pros and Cons of Self-Recovery
Pros
- No wait time for outside help; most traction recoveries take 10–20 minutes with the right gear
- Builds real competence; knowing how to get unstuck off road changes how you read terrain
- Recovery gear serves multiple purposes: boards double as ramps, hi-lift jacks work for tire changes
- No tow fees; professional off-road recovery costs $250–$600+ depending on remoteness
- Group recoveries build trust and coordination skills, improving future trail decisions
Cons
- Poor execution makes situations worse; a winch snap or kinetic rope failure at speed causes serious injuries
- Correct gear costs $500–$1,500 to assemble and needs periodic inspection and replacement
- Inexperienced solo recovery on steep terrain carries rollover and entrapment risk
- Sunk cost thinking keeps drivers attempting recovery past the safe stopping point
Final Verdict

An off road recovery guide is most useful as a preparation tool, not a crisis reference. The drivers who handle trail problems calmly and efficiently are the ones who walked through these scenarios mentally before they encountered them. For a driver building their first recovery kit and learning the basics of how to get unstuck off road, this guide covers the sequence and the decision-making. The gear matters less than knowing how to use it and when to stop.
For experienced overlanders, the value here is in the framework for when to call for help. Most serious recovery incidents share the same pattern: a driver who kept trying past the point where calling for help would have been faster, safer, and less expensive. Building this stopping criterion into your pre-trip mental preparation is as important as carrying the gear. Solo drivers especially benefit from setting the threshold before they leave, not in the field.
The nearest alternative to a full self-recovery kit is a tow membership, specifically one covering off-road terrain. AAA and similar standard roadside services do not cover off-pavement recovery; off-road-specific memberships including SDHQ’s Recovery Program and similar services charge $100–$300 per year and cover trail extraction. For drivers not willing to invest in gear and training, a membership plus a satellite communicator is a reasonable baseline. For drivers who want the capability to handle most situations independently, the full kit is worth the investment.
Complete Your Recovery Kit
The Compressor Your Recovery Kit Has Been Missing
MORRFlate TenSix PSI Pro Gen 2. Four tires aired up simultaneously in under five minutes. 10.6 CFM, 80% duty cycle, Quad hose kit included.
Frequently Asked Questions
What do you do when you get stuck off road alone?
Start by turning off the engine and assessing the situation on foot. Identify what’s holding you, whether it’s soft terrain under the tires or a contact point under the body. Air down to 15–18 PSI, place recovery boards under the drive wheels in the direction of travel, and attempt a slow, steady drive-out without spinning the tires. If two attempts fail, stop trying and evaluate whether you have the gear and daylight for additional recovery steps or whether it’s time to use your satellite communicator.
How do you get a truck unstuck in mud without a winch?
Recovery boards are the most reliable tool for mud recovery without a winch. Air down the tires first, then dig out in front of the boards to clear a path, and place the boards at a slight ramp angle under the drive wheels. A steady throttle without tire spin gives you the best chance. If boards are unavailable, floor mats, branches, or cargo straps laid flat under the tires provide some traction on shallow mud.
What should you do if your 4×4 overheats on the trail?
Stop the vehicle and shift to neutral immediately when the temperature gauge enters the red zone. Let the engine idle for 3–5 minutes, then turn it off. Do not open the radiator cap until the engine has cooled for at least 30 minutes. Add coolant to the overflow reservoir only, not directly to the radiator, and check hoses for leaks before restarting. If the engine overheats again within a few miles, park and call for help rather than attempting to drive out.
When should you call for help instead of self-recovering?
Call for help when each recovery attempt is making the situation worse rather than better, when there is visible structural damage to the drivetrain or frame, when you are losing daylight with no camp gear, or when a recovery maneuver would require placing the vehicle at rollover risk. Solo drivers should set a lower threshold than group drivers. Always carry a satellite communicator, such as a Garmin inReach Mini 2, for communication in areas without cell coverage.
How do you change a tire on uneven off-road terrain?
Find the most stable ground available before stopping, even if it means driving slowly on the flat for an extra 100 meters. Chock the three tires you’re not changing before placing the jack. Loosen the lug nuts before lifting the vehicle. On soft ground, place the jack base plate or a flat rock under the jack to prevent sinking. Tighten lug nuts in a star pattern after the tire is lowered to full vehicle weight.
How do you high-center a vehicle and get it unstuck?
High-centering means the vehicle’s frame or skid plate is resting on an obstacle with the tires carrying little or no weight. The fix requires lifting the vehicle before attempting to drive off. Attach a hi-lift jack to a frame-mounted recovery point, lift the high-centered side until the belly clears the contact point, then build a ramp under the tires using boards or rocks. Lower the vehicle onto the ramp and drive off the obstacle on a slightly different line than the one you came in on.
Heads up: Clicking on our affiliate links and exploring our sponsored content helps us at no extra cost to you, and we only recommend gear we’re absolutely crazy about!