


I live in Wyoming, where gravel roads, spring mud and long winters wear on every piece of gear you own. As a result, maintenance stays on my mind every week. A rig built for the backcountry only stays reliable when you check it on a schedule, and a trailer follows the same rule.
Off-road trailers take a harder beating than any highway camper. For example, corrugated roads shake fasteners loose, creek crossings push water toward hubs, and dust works into every seal. This guide gives you a simple off-road trailer maintenance checklist split into two parts. First, you’ll prep the trailer before the season starts. Then, you’ll clean, winterize and store it once the season ends.
Quick Facts:
- Topic: Off-road trailer maintenance checklist, pre-season and post-season
- Skill level: Beginner to intermediate
- Time required: 3 to 5 hours per checkpoint
- Bearing service: Every 12 months or 12,000 miles, per Dexter
- Brake test: Before every trip
- DIY bearing cost: About $25 to $40 in parts per axle
- Shop bearing cost: About $100 to $240 per axle
- Best for: Owners of teardrop, squaredrop and expedition trailers
8 min read
In This Guide
- Why Off-Road Trailers Need a Seasonal Checklist
- Maintenance Intervals at a Glance
- Pre-Season Off-Road Trailer Maintenance Checklist
- Suspension, Hitch and Chassis Checks
- Electrical, Water and Propane Checks
- Post-Season Off-Road Trailer Maintenance Checklist
- What Trailer Maintenance Costs
- DIY Maintenance vs. Dealer Service
- Final Verdict
- Frequently Asked Questions
Why Off-Road Trailers Need a Seasonal Checklist

An off-road trailer maintenance checklist keeps small problems from turning into trail-ending failures. Most breakdowns start as a dry bearing, a loose bolt or a weak breakaway battery. Because you tow far from help, catching these at home matters more than it does for a highway camper.
This guide fits owners of teardrops, squaredrops and expedition trailers. Brands such as Iron Peak build trailers with independent suspension, articulating hitches and lithium power. For example, the Iron Peak XTR-10 uses a Cruisemaster CRS2 suspension, a DO35 coupler and a 300 Ah EPOCH battery. Read our XTR-10 review for a full look at those parts.
The alternative is paying a dealer for every service. However, most checks on this list take basic hand tools and an afternoon. Follow this trailer maintenance schedule twice a year, and you’ll know your trailer better than any shop.
What You’ll Need
Tools
- Floor jack rated for 3,000 lbs or more
- Two jack stands rated for the trailer’s weight
- Torque wrench, 20 to 150 ft-lbs
- Digital tire pressure gauge
- Multimeter for 12V checks
- Grease gun
Materials
- 1 tube high-temp wheel bearing grease
- 1 set of hub seals per wheel
- 1 spray bottle of soapy water for leak checks
- Dielectric grease for plugs
- RV antifreeze, 1 to 2 gallons
- Breathable trailer cover
Maintenance Intervals at a Glance
Dexter, one of the largest trailer axle makers, publishes a trailer maintenance schedule. Use it as a baseline, then follow your own trailer maker’s manual first.
| Interval | What to Check |
|---|---|
| Every trip | Brake operation, breakaway system, tire pressure |
| Weekly in use | Tire cuts, wear and bulges |
| 3 months or 3,000 miles | Brake adjustment, suspension grease points, wheel nut torque |
| 6 months or 6,000 miles | Brake magnets, brake controller, suspension parts, wheels |
| 12 months or 12,000 miles | Trailer wheel bearings, seals, brake linings, wiring, hubs |
Built for Hard Miles
Meet the Iron Peak XTR-10
A galvanized chassis, Cruisemaster suspension and an aluminum skid plate start you off with fewer weak points to maintain.
Pre-Season Off-Road Trailer Maintenance Checklist
Start the season with the parts holding the trailer off the ground. Tires, brakes and bearings fail most often, and they fail hardest. Plan three to five hours for this first pass.
Tires and Wheels
Set tire pressure cold, using the trailer maker’s spec on the placard. Next, inspect each tire for cuts, sidewall bulges and uneven wear. Uneven wear often points to an alignment or suspension issue. Also check the wheels for cracks, then torque every lug nut to spec in a star pattern.
Don’t skip the spare. A spare sitting all winter loses pressure, and you only learn this on the trail. If your trailer runs the same tire size as your tow rig, check both spares together.
Brakes and Breakaway System
Test the brakes before every trip, per Dexter’s schedule. With the trailer hitched, roll forward slowly and apply the manual lever on your brake controller. You should feel the trailer pull back evenly. Then, test the breakaway switch and confirm its battery holds a charge.
Wheel Bearings and Hubs
Dexter calls for inspecting, cleaning and repacking trailer wheel bearings every 12 months or 12,000 miles. Off-road use pushes this closer, because water crossings and dust attack the seals. Replace a seal any time you remove it.
Safety note: Never work under a trailer held up by a jack or a stabilizer jack alone. Set rated jack stands under the frame, chock the opposite wheels, and stop if the trailer shifts at all.
Jack one wheel at a time onto a stand. Spin the wheel by hand and listen for grinding. Next, rock it top to bottom to feel for play. Any noise, play or grease on the inside of the wheel means a bearing or seal needs service now.
Suspension, Hitch and Chassis Checks

Trailer maintenance off-road goes beyond the wheels, since articulation loads every joint. Washboard roads loosen bolts faster than pavement. As a result, these checks deserve the same attention as the bearings.
Independent Suspension and Bushings
Look over each control arm, spring and shock for leaks, cracks and worn bushings. Then grease every fitting your suspension maker lists; Dexter pegs grease points at every 3 months or 3,000 miles. Independent systems such as Cruisemaster’s carry their own service schedule, so follow it over generic axle advice.
Articulating Hitch and Jacks
Articulating couplers take more stress than a standard ball. Inspect the coupler body for cracks and wear, and check its mounting bolts for torque. Similarly, run every tongue jack and stabilizer jack through its full travel, then clean grit off the threads.
Chassis, Fenders and Skid Plates
Crawl under the trailer with a bright light. Specifically, look for cracked welds, loose rivets, bent skid plates and rubbing wiring. A galvanized or powder-coated frame resists rust well, although chips still need touch-up. For a look at how one builder handles frame construction, see how Iron Peak builds the XTR-10.
Electrical, Water and Propane Checks

Camp systems fail quietly, so test each one before you leave home. A dead battery or a cracked water line ruins a trip as fast as a flat tire.
Battery and Wiring
Charge the house battery to full, then run every light, pump, fan and outlet. Use a multimeter to confirm each circuit gets 12V. Also inspect the 7-pin plug, since corroded pins cause brake and light faults. Clean them, then add a thin coat of dielectric grease.
Water System
Refill the fresh tank and flush the lines with clean water. Next, run the pump and check every fitting for drips. Finally, sanitize the tank if it sat all winter, following your trailer maker’s instructions.
Safety note: Never check for propane leaks with a flame. Spray soapy water on each fitting and watch for bubbles. If you smell gas or see bubbles, shut the tank valve and have a certified technician repair the line.
Propane System
Inspect hoses for cracks and check tank dates before refills. Then run the stove, heater and water heater for a few minutes each. A lazy yellow flame instead of a crisp blue one points to a regulator or burner issue.
Post-Season Off-Road Trailer Maintenance Checklist

The end of the season is the best time to find damage, while the trip is fresh in your mind. Clean first, inspect second, then winterize and store.
Deep Clean and Inspect
Pressure-wash the underside to remove mud, dust and road treatments. Clay and mud hold moisture against metal all winter. After washing, repeat the chassis and suspension walk-around while damage stands out.
Winterize the Water and Propane Systems
To winterize a trailer, drain the fresh tank, water heater and lines completely. Then blow out the lines with low-pressure air or pump RV antifreeze through them. Many water heaters, including Truma units, have their own drain steps, so follow the manual. Finally, close every propane tank valve.
Battery Storage and Covering
Lithium batteries prefer storage at a partial charge, cut off from all loads. Check your battery maker’s storage guidance for the exact level. Meanwhile, set tires to full pressure, block them off the ground if possible, and cover the trailer with a breathable cover.
What Trailer Maintenance Costs

Bearing service is the biggest recurring cost. According to LatestCost’s 2026 pricing guide, shops charge about $100 to $240 per axle for a repack. In contrast, a DIY repack runs about $25 to $40 in parts.
| Cost Item | DIY | Hiring a Pro |
|---|---|---|
| Bearing repack, per axle | $25 to $40 in parts | $100 to $240 |
| Shop labor | $0 | $60 to $120 per hour |
| Premium repack with new seals or races | $40 to $120 in parts | $240 to $400 |
Prices vary by region. For example, the same guide lists two-axle service at $180 to $320 in the Northeast and $120 to $230 in the South. Get two local quotes before you book.
Buy Direct From Iron Peak
An Off-Road Trailer Built to Last
The XTR-10 pairs a made-in-the-USA build with name-brand parts you service and source with ease.
DIY Maintenance vs. Dealer Service
DIY trailer maintenance wins on cost and knowledge. You save roughly $75 to $200 per axle on bearings alone. Also, you learn how every part looks when healthy, which helps you spot trouble on the trail.
Dealer service wins on time and specialty work. Shops handle brake magnet replacement, suspension rebuilds and propane repairs with the right tools. Therefore, many owners split the job. They handle the checklist themselves and send bearings or gas work to a pro.
Pros
- Saves about $75 to $200 per axle on bearing service
- Catches loose bolts and leaks before a trip
- Takes 3 to 5 hours per checkpoint
- Needs common tools under $300 total
- Builds trail repair skills
Cons
- Bearing work takes 1 to 3 hours per axle
- Propane repairs need a certified technician
- Jacking a 2,000-plus-pound trailer carries real risk
- Warranty terms sometimes require dealer records
From experience: Building out my truck taught me to treat maintenance as part of the build, not a chore after it. The same goes for a trailer. Keep a simple log of every check, part and date. When something feels off on the trail, the log tells you where to look first.
Final Verdict
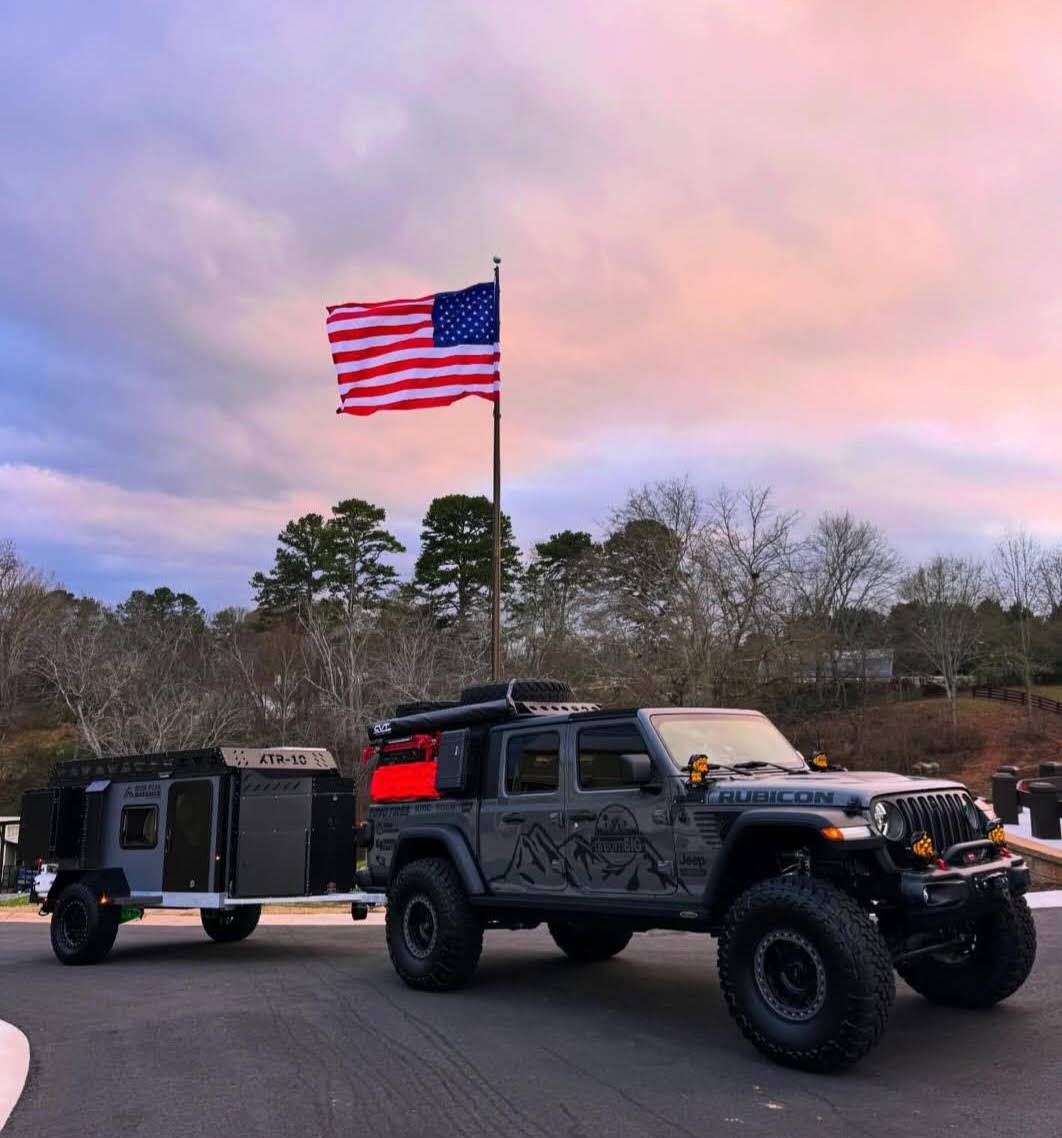
This off-road trailer maintenance checklist suits any owner who tows past cell service. Its biggest strength is simplicity: two checkpoints a year, plus a brake and tire check before every trip. Follow it, and most failures show up in your driveway instead of on a shelf road.
The trade-off is time and some risk under the trailer. Owners without a jack, stands or a flat work area should hand bearing and brake work to a shop. Likewise, anyone uneasy around propane lines should leave gas repairs to a certified technician.
On value, the math favors DIY. One shop repack per axle costs about $100 to $240, while parts run about $25 to $40. Over a few seasons, the tools pay for themselves.
My recommendation: do the full checklist each spring and fall, and keep a log. If you’d rather pay for service, a dealer works too. For a sense of the terrain these checks protect you on, read how the XTR-10 handles remote trails.
Ready for Next Season?
Start Your Iron Peak XTR-10 Build
Configure an XTR-10 with Cruisemaster suspension, REDARC power and a 38-gallon water system.
Frequently Asked Questions
How often should you repack trailer wheel bearings?
Dexter recommends inspecting, cleaning and repacking trailer wheel bearings every 12 months or 12,000 miles. Off-road trailers see water and dust, so service them on the early side. Always replace the seals when you remove them.
What should an off-road trailer maintenance checklist include?
Cover tires, brakes, the breakaway system, bearings, suspension, the hitch and the chassis. Then add the battery, wiring, water lines and propane. Finish the season with cleaning, winterizing and storage.
How do you winterize a trailer water system?
Drain the fresh tank, water heater and all lines. Next, blow out the lines with low-pressure air or pump RV antifreeze through them. Follow your water heater’s manual for its drain steps.
How often should you test trailer brakes?
Test the brakes before every trip, per Dexter’s schedule. Adjust drum brakes every 3 months or 3,000 miles unless they self-adjust.
How should you store a lithium trailer battery for winter?
Store it at a partial charge with all loads disconnected. Check your battery maker’s guidance for the exact storage level and temperature range.
Heads up: Clicking on our affiliate links and exploring our sponsored content helps us at no extra cost to you, and we only recommend gear we’re absolutely crazy about!