


Quick Facts:
- Topic: Planning a lighter overland build
- Skill level: Beginner to intermediate
- Core principle: The more you know, the less you carry
- Main constraint: Vehicle payload (GVWR minus curb weight)
- Typical payload range: 1,100 to 1,700 lbs on many midsize rigs
- Time to audit your load: 1 to 2 hours
- Cost: Free
- Best for: Overlanders fighting weight, gear creep, or sagging suspension
8 min read
In This Guide
- Why a Lighter Build Wins
- The Payload Ceiling: What Your Rig Carries
- Payload by Platform: Quick Reference
- Gear Creep: How an Overland Build Gets Heavy
- Where You Carry Weight Changes How It Feels
- How to Plan a Lighter Overland Build
- Heavy Build vs. Lighter Overland Build
- Final Verdict
- Frequently Asked Questions
Why a Lighter Overland Build Wins
Every overland build starts with good intentions and a long shopping list. However, weight is the quiet limit on what your rig does well. A heavier truck rides worse, takes longer to stop, and burns through fuel and parts faster. The phrase “the more you know, the less you carry” captures a lesson most overlanders learn the hard way. This guide shows new and intermediate drivers how to plan around weight first.
Beginners feel the pull of gear creep the strongest. Catalogs, videos, and forums all push more equipment. Meanwhile, your vehicle has a fixed payload number set by the factory. Once you cross it, handling and safety suffer. Therefore, the smartest first move is learning what your platform carries before you spend a dollar.
Lighter does not mean unprepared. Instead, it means every item earns its place. A focused kit sets up faster, packs smaller, and leaves room for water and recovery gear. For many drivers, a trimmed overland build also rides closer to stock comfort. Below, this guide breaks down payload, gear creep, weight placement, and a simple plan to cut pounds.
The Payload Ceiling: What Your Rig Carries
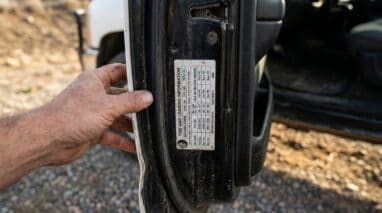
Payload is the weight your vehicle carries above its own curb weight. Manufacturers set it as GVWR minus curb weight. GVWR means gross vehicle weight rating, the most your loaded truck should weigh. You find both numbers on the driver door-jamb sticker. Subtract one from the other, and you have your starting budget.
Here is the part beginners miss: payload includes people, fuel, and accessories, not only camp gear. Picture a midsize truck with 1,300 pounds of payload. Two adults take roughly 350 pounds. A full tank, a rooftop tent, and a rack add several hundred more. Suddenly your gear budget is half of what the brochure implied.
Crossing the payload number is common and risky. An overloaded rig wears brakes faster and stresses suspension, axles, and tires. If you do load heavy, match it with correctly rated rubber; our guide to choosing the right overlanding tires explains the link between weight and tire ratings. Because water and fuel are non-negotiable, they deserve first claim on every spare pound. Staying under your ceiling keeps your rig safer on every trail.
Payload by Platform: Quick Reference
Figures vary by trim, engine, and model year, so always check the door-jamb sticker on your specific vehicle. Outlets such as Car and Driver also publish payload by trim. Use the numbers below as a starting reference, not a final spec.
| Vehicle or Item | Typical Figure | Why It Matters |
|---|---|---|
| Toyota Tacoma payload | ~1,100 to 1,700 lbs | Midsize trucks start lower than buyers expect |
| Toyota 4Runner payload (5th gen) | up to ~1,700 lbs | SUV payload drops fast once people climb in |
| 6th-gen 4Runner Trailhunter | ~895 lbs | Newer trims sometimes carry less, not more |
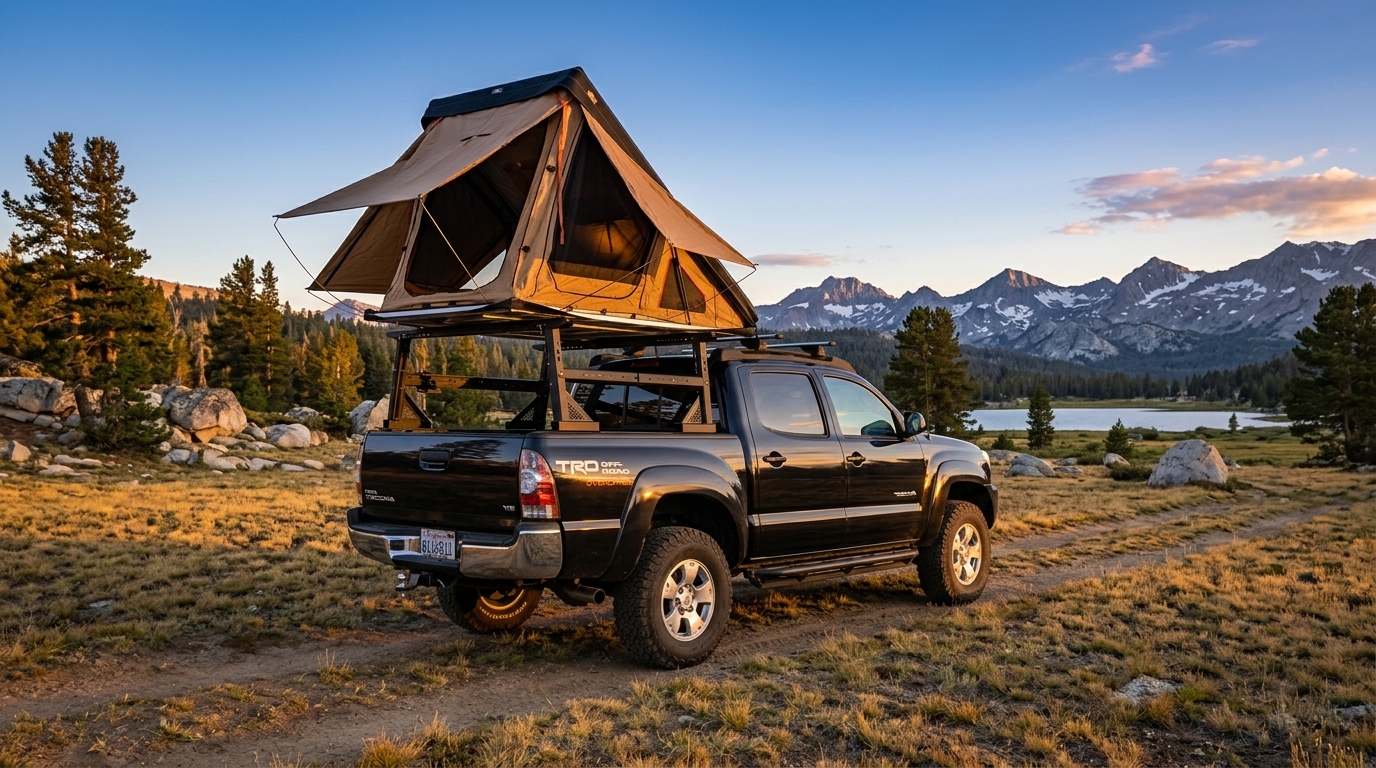
| Rooftop tent weight | 100 to 200 lbs | One accessory eats 5 to 15 percent of payload |
| Dynamic roof load (many vehicles) | 100 to 165 lbs | Limits what rides up top while moving |
| Water | 8.34 lbs per gallon | A 5-gallon jug adds about 42 lbs |
Gear Creep: How an Overland Build Gets Heavy
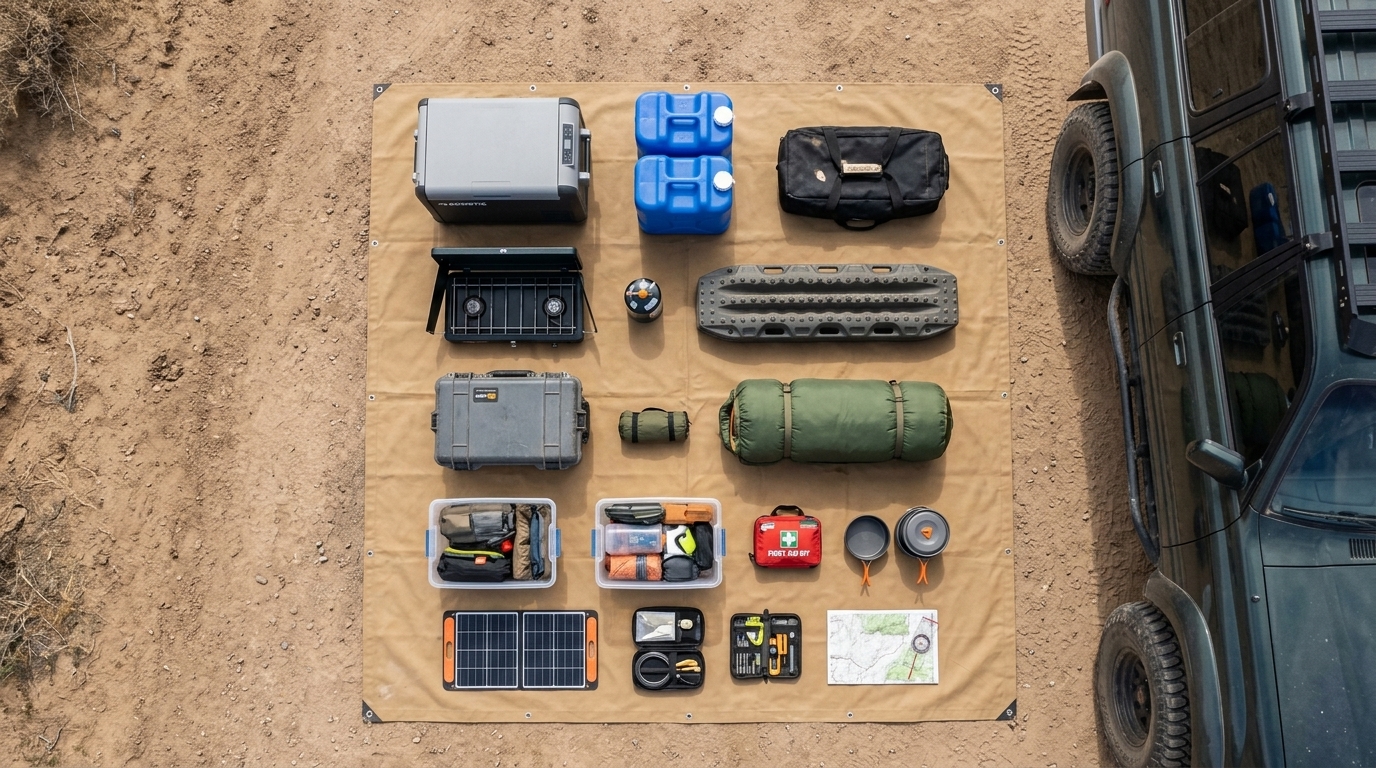
Gear creep happens one reasonable purchase at a time. A drawer system, a second battery, an awning, a fridge, recovery boards, and a full toolkit each make sense alone. Together, they pile on hundreds of pounds. Most overlanding gear lists grow faster than the trips ever require. A capable overland rig tempts you to fill every cubic foot, yet empty space is a feature worth keeping.
The fix starts with honesty about use. Track what you touch on a trip. Many drivers find they reach for the same short set of items every night and ignore the rest. Before your next trip, pull everything out and sort it into three piles: used every trip, used rarely, and never used. The middle and last piles are your weight savings. Afterward, turn the “used every trip” pile into your standing overland packing list.
Duplicate function is another hidden tax. A stove, a fire pit, and a grill cover one job three times over. Often one multi-use tool replaces two single-use ones. For a baseline of true overlanding essentials, compare your kit against our overlanding gear checklist and cut anything it does not list. A lean kit leaves room for the heavy items you truly need, like water.
Where You Carry Weight Changes How It Feels
Two rigs at the same total weight handle differently based on placement. Weight high on the roof raises the center of gravity and increases body roll. Low, centered weight keeps the overland rig planted instead. Therefore, where you store gear matters almost as much as how much you bring.
Roof load is the clearest example. Many vehicles allow only 100 to 165 pounds moving down the road, known as the dynamic rating. A rooftop tent alone weighs 100 to 200 pounds, so it often uses the entire roof budget by itself. Because of this, heavy items belong low, inside the cab or in the bed, never up top.
Storage choice drives placement. A bed rack keeps weight lower than a tall roof rack, while a roof rack frees up bed space at a stability cost. Our breakdown of roof rack versus bed rack weighs the trade for different rigs. Plan placement early, since moving a loaded rig around later is harder than planning it once.
How to Plan a Lighter Overland Build
Start with your payload number, not a wish list. Write it down, subtract passengers and a full tank, and the remainder is your real gear budget. Then build the kit to fit the number instead of hoping it fits later.
Next, rank gear by how often it earns its keep. Water, shelter, recovery basics, and navigation come first. Comfort items come after, and only if weight remains. This order keeps the rig safe before it gets plush.
Afterward, weigh the big items honestly. A heavy steel bumper, a full-size spare, and a loaded drawer system add up quickly. Lighter alternatives often exist, though they cost more. Spend where weight savings matter most: high on the vehicle and far from the axles. Keep the budget on a card in the glovebox as a constant check.
Finally, test and trim. After each trip, note what you never touched and remove it. A short overland packing list you refine over time beats a giant bin you repack every weekend. Platform choice helps too; our look at the best cars for overlanding covers payload-friendly options for a lighter build.
Heavy Build vs. Lighter Overland Build: Which Should You Aim For?
A heavy, fully built rig wins on long, remote expeditions where self-sufficiency matters most. Big tanks, dual batteries, and full kitchens support weeks off the grid. The cost is worse fuel economy, slower handling, and more strain on every part. For trips measured in weeks, the extra capacity earns its weight.
A lighter overland build wins for weekend and week-long trips, which describe most overlanders. It rides better, returns better mileage, and sets up in minutes. The trade is fewer comforts and tighter packing discipline. Even so, most lightweight overland builds still cover the core overlanding essentials without strain.
Match the build to your real trips, not your dream trips. Most drivers overbuild for expeditions they rarely take. Start light, add only what repeated trips prove you need, and let the overland build grow with experience rather than ahead of it.
Final Verdict
A lighter rig is the right target for most overlanders, especially beginners. Its biggest strength is margin: staying under payload keeps handling, braking, and reliability close to stock. This margin matters more on the trail than any single accessory.
Heavier overland builds still have their place. Full-time travelers and remote expedition drivers need the capacity, and they accept the trade-offs knowingly. If your trips run short, though, the extra capacity mostly costs you fuel and comfort.
Value comes from discipline, not spending. The cheapest weight savings is leaving gear at home. A free afternoon sorting your kit often improves an overland build more than a costly part ever will. Discipline scales with every trip, while parts only add up on the scale.
Begin with your payload number and build to fit it. Bring water, shelter, recovery, and navigation first, then add comfort only as weight allows. Plan the overland build around your payload number, and the trail rewards you with a rig built to drive better everywhere.
Frequently Asked Questions
What does payload capacity mean?
Payload capacity is the total weight your vehicle carries beyond its own curb weight. It includes passengers, fuel, accessories, and cargo, not only camp gear. You find the number on the driver door-jamb sticker. Subtract passengers and fuel to see your real gear budget.
What does GVWR mean on a truck?
GVWR means gross vehicle weight rating. It is the maximum your fully loaded truck should weigh, set by the manufacturer. Your payload equals GVWR minus the vehicle’s curb weight. Staying under GVWR keeps braking and suspension within spec.
How do you calculate payload capacity?
Find your GVWR and curb weight on the door-jamb sticker or owner’s manual. Subtract curb weight from GVWR, and the result is payload. Then subtract passengers, fuel, and accessories to learn how much gear weight remains for your overland build.
How do you increase payload capacity?
True payload is fixed by the manufacturer, so the rating itself does not change. Heavier-duty suspension improves how a loaded rig feels, yet it does not raise the legal limit. The reliable way to gain usable capacity is removing weight or choosing a higher-payload platform.
Is GVWR the same as towing capacity?
No. Towing capacity is the weight your vehicle pulls behind it on a trailer. Payload is the weight it carries on board. A truck might tow 6,000 pounds yet carry only 1,300 pounds of payload, so the two limits stay separate.
What is a good payload buffer for an overland build?
Aim to finish your overland build with payload to spare, not maxed out. Leave a cushion of at least 10 to 15 percent for water, fuel swings, and extra passengers. A rig loaded to its exact limit handles poorly and wears faster.