



Quick Verdict: Overloading your cooler ruins food faster than any single ingredient mistake. Most spoilage happens when warm air gets trapped, raw juices contaminate ready-to-eat items, or melted ice floods your produce. Learning how to pack a cooler for camping, plus knowing when to upgrade to a 12V fridge like the TRP 4×4 Mammoth 40L at $450 and 15 pounds, prevents the seven failures below. Apply these fixes before your next trip and your food survives even four-day overlanding runs.
| 9 min read
In This Article
- Cooler Packing Foundation
- Quick Facts on Cooler and Fridge Failure
- Mistake 1: Cramming Food Too Tight
- Mistake 2: Skipping the Pre-Cool
- Mistake 3: Mixing Raw and Ready-to-Eat
- Mistake 4: Overloading Ice Coolers Past 48 Hours
- Mistake 5: Stacking Heavy Items on Soft Produce
- Mistake 6: Ignoring Meltwater and Drainage
- Mistake 7: Loading Without Securement
- Cooler Packing vs. 12V Fridge
- Pros and Cons of Cooler Packing Strategies
- Final Verdict
- Frequently Asked Questions
How to Pack a Cooler for Camping: The Foundation
How to pack a cooler for camping starts with one principle: less is often more. Overloaders treat food storage like a Tetris challenge, cramming every gap with extra hot dogs, eggs, and beer until cold air has nowhere to circulate. Within 24 hours, beef thaws, lettuce wilts against the ice, and cross-contamination risks spike sharply.
Both weekend off-roaders and multi-day overlanders fall into this trap. Weekend campers stuff a 40-quart cooler before a 90-minute drive to the trailhead, while overlanders try to pre-load five days of meals into a 60-quart fridge. The result is the same: failed cold zones, soggy produce, and food poisoning risk.
This article covers seven specific camping food storage mistakes documented by food safety researchers and field-tested across hundreds of overland trips. Each mistake includes the failure mechanism, the temperature impact, and a fix to apply before your next trip. Notably, one mistake involves how to keep food cold camping during multi-day adventures, where moving from an overloaded ice cooler to a 12V fridge solves several problems at once. For context on full meal planning, our camp cooking for overlanders guide pairs well with the storage tactics below.
Quick Facts on Cooler and Fridge Failure
| Key Data Point | Impact on Food Safety |
|---|---|
| USDA danger zone | Above 40°F, bacteria double every 20 minutes |
| Ice cooler typical hold time | 36 to 72 hours under ideal packing |
| 12V fridge typical hold temp | 35°F to 38°F indefinitely with power |
| Recommended fill ratio | 75 to 80% of total capacity |
| Pre-cool time before loading | Minimum 24 hours for vessel and food |
| TRP 4×4 Mammoth 40L weight | 15 pounds, lighter than most empty 50qt coolers |
Mistake 1: Cramming Food Too Tight
When learning how to pack a cooler for camping, cold air must circulate around each item to maintain a uniform 40°F or below. Specifically, USDA guidelines flag the danger zone above 40°F where bacteria double every 20 minutes. As a result, overpacked coolers create dead-air pockets where surface temps spike 10 to 15°F above the ice line.
In a fridge, the same problem chokes the compressor. When you wedge groceries against the cold plate, the thermostat sensor reads cold, but the pile of food in the middle stays warm. As a result, the TRP 4×4 Mammoth manual recommends a 1-inch gap between items and the wall.
Fix: Pack at 75 to 80% capacity. Use a temperature gun to verify the warmest spot reads 40°F or below within four hours of loading. For coolers specifically, leave a vertical channel along one wall so cold air sinks past every layer.
Mistake 2: Skipping the Pre-Cool
Loading warm groceries straight from a hot truck cab into your cooler or fridge forces the cold source to fight ambient heat for hours. Consequently, ice melts twice as fast in this scenario, while a 12V fridge compressor runs continuously, draining your battery 30 to 40% faster than necessary.
Pre-cooling sits at the heart of how to pack a cooler for camping properly. It means two things: chill the storage vessel for at least 24 hours before the trip, and chill the food itself in your home fridge or freezer overnight. For instance, fill the cooler with sacrificial ice the night before; for a 12V fridge, plug it into your house outlet and set the target temp 24 hours ahead.
Fix: Pre-chill both food and storage. Frozen meats placed inside a pre-cooled fridge act as backup cold mass. Independent field tests in 90°F ambient conditions show this single habit roughly doubles ice life inside a sealed rotomolded cooler.
Mistake 3: Mixing Raw and Ready-to-Eat
Raw chicken, ground beef, and uncured meats produce juices loaded with salmonella and E. coli. When those juices drip onto ready-to-eat items like bagged lettuce or sliced cheese, you have a textbook cross-contamination scenario. Notably, the CDC links a significant share of camping foodborne illness reports to this exact pattern.
Overloading worsens the problem. Without dedicated zones, raw packs migrate as ice shifts and cooler contents jostle on rough trails. By trip day three, your salad greens often sit in a puddle of beef-juice meltwater.
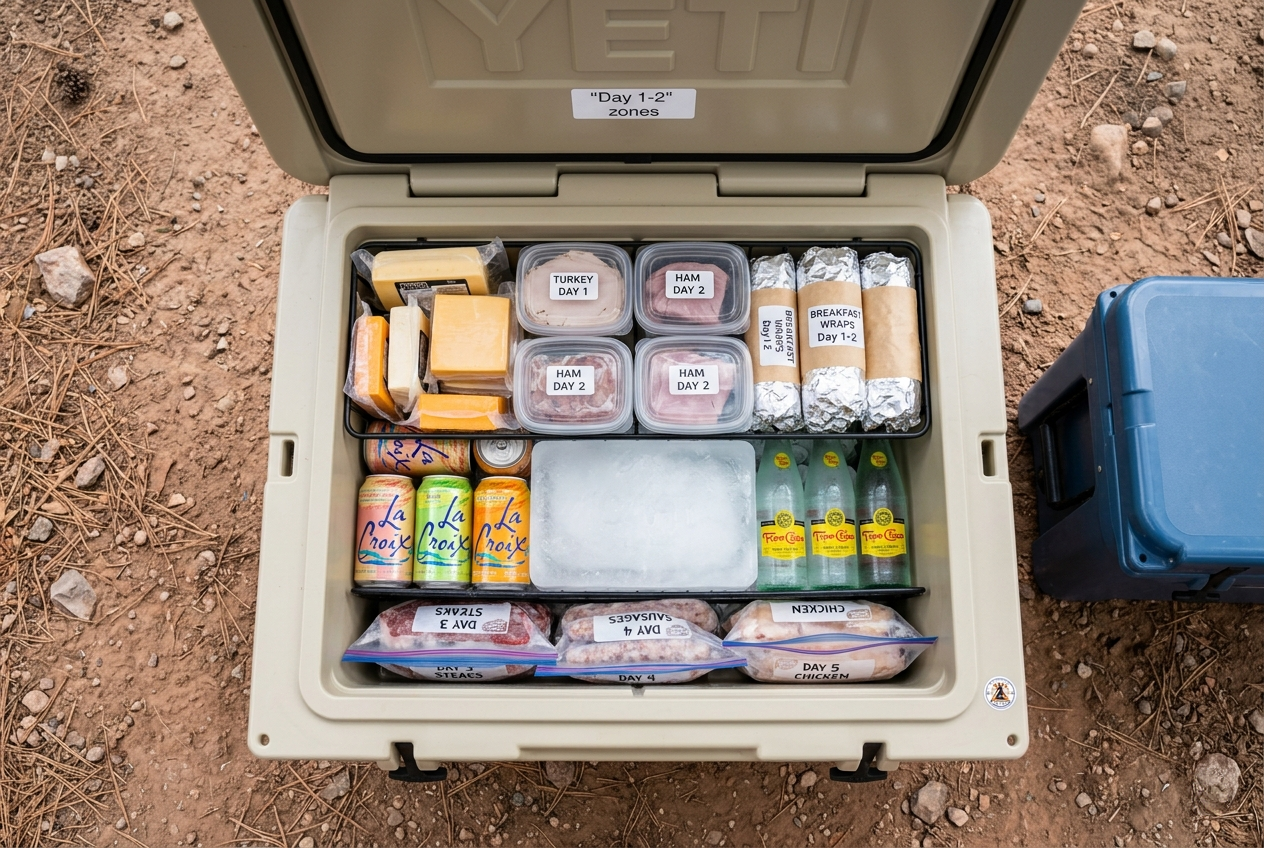
Fix: Use sealed bins or freezer-grade Ziploc bags for raw proteins, and store them on the bottom layer below ready-to-eat foods. Color-coded containers prevent mix-ups on family trips. For longer expeditions, dedicate one cooler to proteins and another to produce and condiments. Our cooking and food storage solutions guide walks through dual-cooler setups in detail.
Mistake 4: Overloading Ice Coolers Past 48 Hours
Past 48 hours, ice coolers lose the math battle. Even a high-end Yeti Tundra 65 with proper packing holds 40°F for three to four days under perfect conditions. However, those conditions rarely apply to off-road trips with door slams, temperature swings, and direct sun. Instead, overloaders stuff in extra ice to compensate, which only displaces food and creates more meltwater.
A 12V fridge solves this completely. Compressor-driven cooling holds 35 to 38°F indefinitely as long as you have power. After three months of testing the TRP 4×4 Mammoth 40L fridge during overland trips around Big Bear and the Mojave, I watched it hold target temps through 95°F afternoons while pulling under 1 amp on its ECO mode. At 15 pounds and $450, it weighs less than most empty 50-quart coolers and costs less than a season of premium ice runs.
How to Pack a Cooler for Camping vs. a 12V Fridge: Power Trade-Offs
However, the trade-off is power management. Specifically, you need a dual battery, a portable power station, or solar input. For a deeper breakdown, see our comparison of portable fridge vs. cooler choices for camping.
Fix: For trips longer than 48 hours, switch from ice cooler to 12V fridge. The Mammoth 40L’s EPP shell skips the need for a heavy fridge slide, which addresses one of the biggest install hurdles for first-time fridge buyers. My full video review of the TRP4x4 Mammoth 40L walks through power draw numbers and a real-world cooldown test from Big Bear.
Featured on TRP 4×4
TRP 4×4 Mammoth 40L Freezer & Fridge
15 pounds, EPP shell, Bluetooth app control, and freezer-capable cooling for $450. Skip the fridge slide and the daily ice runs.
Mistake 5: Stacking Heavy Items on Soft Produce
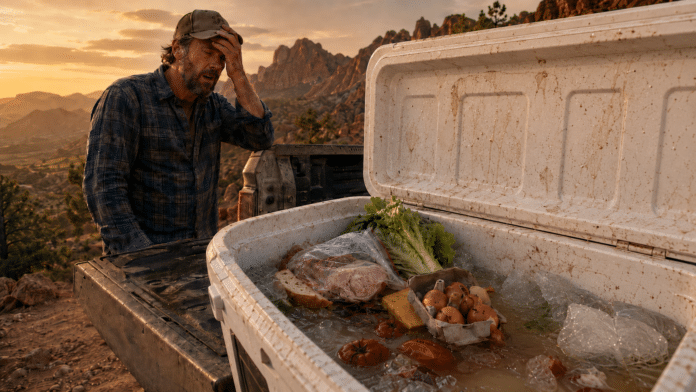
Bricks of cheese, gallon jugs, and frozen meat packs crush eggs, tomatoes, and herbs at the bottom of an overloaded cooler. By day two, your salad ingredients turn into bruised mush. Worse, broken egg yolks contaminate everything around them and accelerate spoilage.
Vehicle vibration multiplies the damage. A 5-pound watermelon riding on top of a tomato bag generates roughly 25 pounds of impact force every time you hit a washboard road. Similarly, off-road suspension travel data shows G-forces hitting 3 to 4 G in moderate terrain.
Fix: When you know how to pack a cooler for camping correctly, the order goes: heaviest at the bottom (drinks, frozen blocks), proteins in the middle in sealed bags, and soft produce on top in rigid containers. Use silicone egg holders or plastic bento boxes. For multi-day trips, switch fragile items to a hard-sided fridge basket where stacking pressure stays under 2 pounds per square inch.
Mistake 6: Ignoring Meltwater and Drainage
Ice always melts. However, overloaders who skip how to pack a cooler for camping basics treat the resulting meltwater as background noise, when in reality it raises ambient cooler temp by trapping warm air, soaks paper packaging, and drowns produce in 50°F bacteria-friendly water.
Most coolers ship with a drain plug, yet many users never open it during a trip. Additionally, the meltwater pool creates a thermal sink: once it warms above 38°F, it actively heats your food instead of cooling it.
Fix: Drain meltwater every 12 hours. Keep food elevated using a wire rack or freeze a few water bottles to use as ice replacements. Frozen bottles melt slowly and produce drinkable water rather than a contaminated swamp. Better yet, switch to a 12V fridge where drainage is not a concern at all.
Mistake 7: Loading Without Securement
Off-road trails generate impact forces a kitchen never sees. Specifically, an unsecured 40-pound cooler shifts during off-camber descents, slams into the tailgate, and pops the lid open. As a result, cold air escapes, lettuce launches into the cargo area, and your eggs explode.
Even properly latched lids fail when overpacked. Excessive contents stress the hinges, and one bumpy switchback turns the cooler into a snack grenade. Reports from overlanding forums consistently identify lid failures as a leading cause of food-spoilage incidents on technical routes.
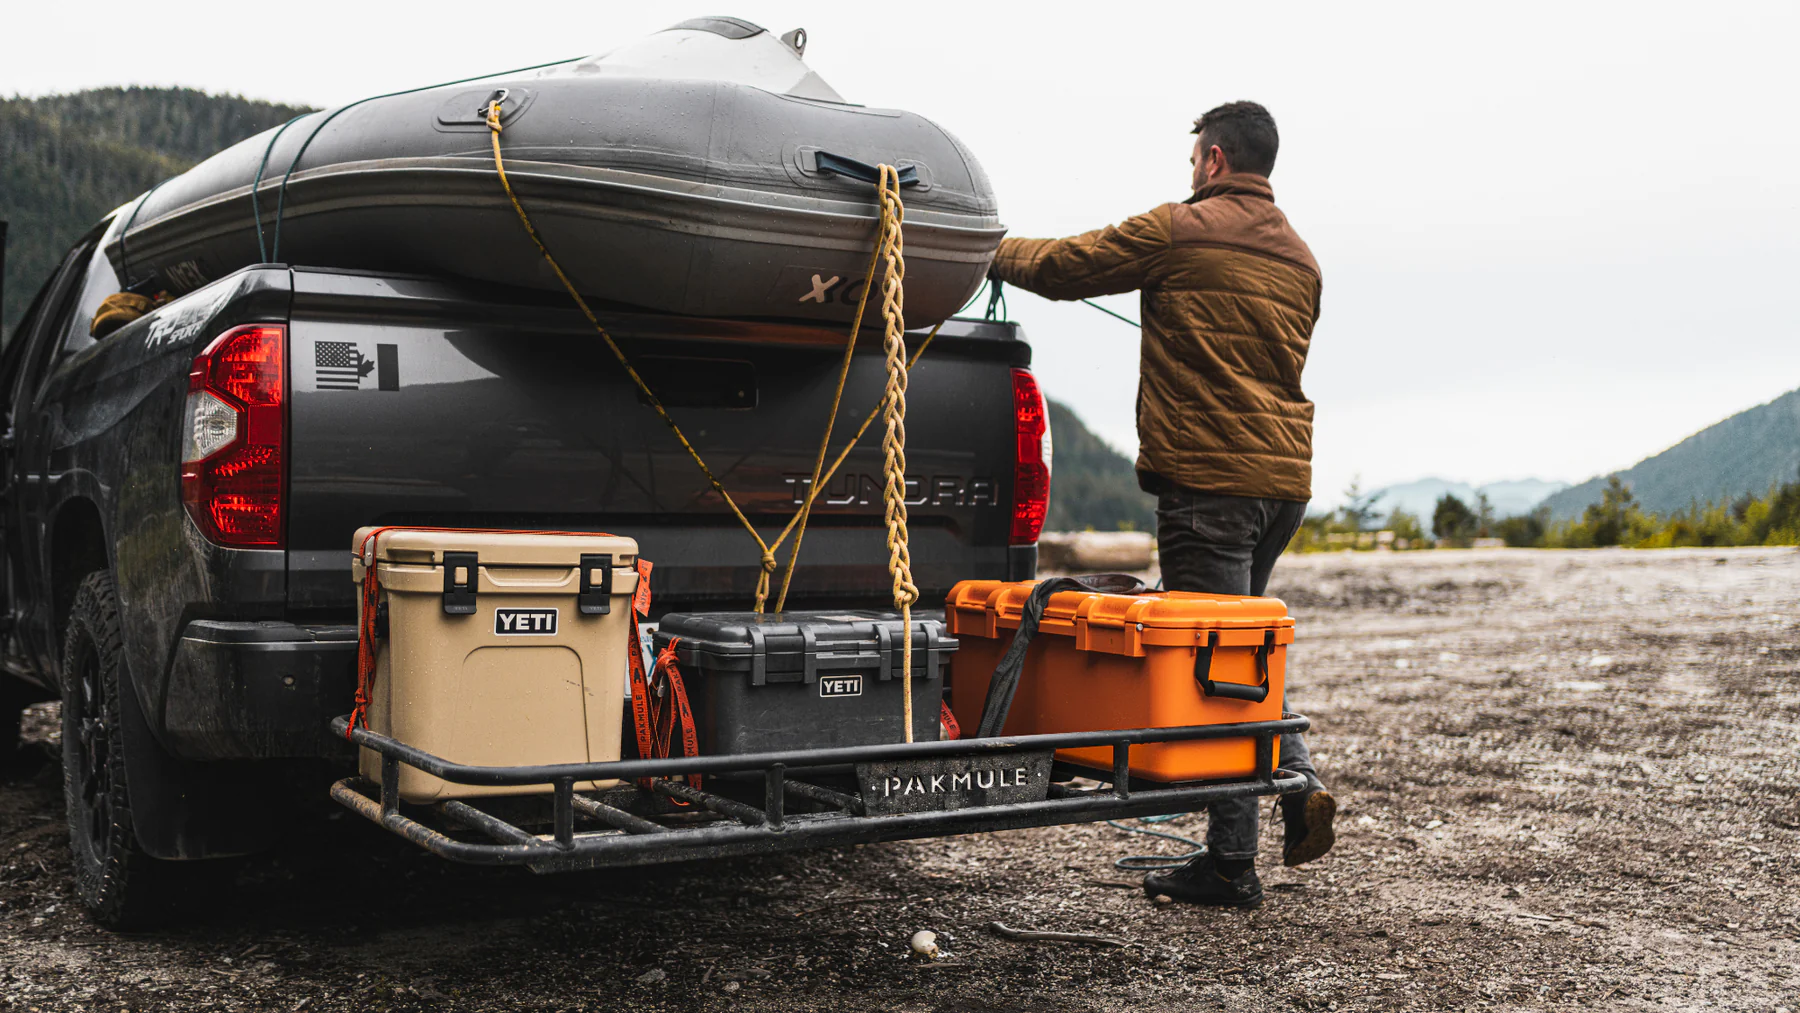
Fix: Knowing how to pack a cooler for camping in off-road conditions starts with proper securement. Tie down with ratchet straps to vehicle anchor points. Pack contents below the rim, and verify the latch closes without resistance. For a 12V fridge, mount with a slide or use the TRP Mammoth’s molded handles to lash directly to roof rack tie-downs.
How to Pack a Cooler for Camping vs. Running a 12V Fridge
Both approaches keep food cold, however the trade-offs differ sharply. For example, a 65-quart hard cooler costs $300 to $400 and needs $20 to $40 of ice every two days. In contrast, the TRP 4×4 Mammoth 40L runs $450 once and uses $0 in ice across its lifespan.
Cooler advantages stop at portability and zero-power simplicity. Specifically, a Yeti or Igloo works wherever you set it down, with no battery, wiring, or compressor noise. For a one-night car-camping run, an ice cooler still wins on simplicity for short-term camping food storage.
Beyond two nights, the 12V fridge dominates. Steady temps, no meltwater, no daily ice runs, and dramatically lower long-term cost shift the math. For trips of three nights or more, the upgrade pays for itself within a season of regular use. Our no-cook camping meals roundup shows how a 12V fridge expands your menu options well beyond what an ice cooler supports.
Pros and Cons of How to Pack a Cooler for Camping
Pros of Smart Cooler Packing
- Extends ice life from 36 hours to 60+ hours with pre-cool habits
- Zero power draw and silent operation
- Cooler hardware costs $80 to $400 once
- Works in any weather, any altitude, any terrain
- Lightweight options exist starting at 8 pounds empty
- Reduces food poisoning risk by separating raw zones
- Compatible with dry ice for extended trips
Cons of Cooler-Only Setups
- Hard ceiling at 72 hours under ideal conditions
- Recurring $20 to $40 ice cost every 2 days
- Meltwater drains required every 12 hours
- Stacking damage destroys produce on rough trails
- Cross-contamination risk increases with overloading
- No freezer mode for ice cream or frozen meats
Ready to Upgrade?
Skip the Ice Runs for Good
The TRP 4×4 Mammoth 40L runs on 12V, 24V, or AC, weighs 15 pounds, and uses Bluetooth control. Three months of overlanding tests show it holds temp through 95°F heat.
Final Verdict
How to pack a cooler for camping comes down to discipline, not capacity. Overloading defeats every other smart move you make on prep day. Consequently, the seven mistakes above account for the bulk of food spoilage incidents reported by overlanding communities over the past five years.
For weekend trips, the fix is simple: pack at 75 to 80%, pre-chill food and vessel, separate raw from ready-to-eat, and drain meltwater regularly. Together, these four habits stretch a $200 cooler to perform like a $400 one.
Beyond two nights, hardware upgrades start paying off. The TRP 4×4 Mammoth 40L fridge solves overloading mistakes 4, 6, and 7 in one purchase, while its 15-pound weight removes the need for a $300 fridge slide. Three months of field testing confirm it holds temperature in extreme summer heat, runs efficiently on solar input, and handles trail vibration without compressor failure. Our full TRP 4×4 Mammoth Freezer Fridge review covers the long-term test results in detail.
Notably, even with a fridge upgrade, the first three mistakes still apply. Pack smart, separate raw proteins, and pre-cool everything. Whether you choose a cooler or a 12V fridge, your food’s survival depends on how you load it. Smart camping food storage habits remain the single most important investment any overlander makes for safe meals on the trail.
Frequently Asked Questions
How to Pack a Cooler for Camping Trips of 3 Days
Pre-cool the cooler for 24 hours, fill it 75 to 80% full with pre-chilled food, layer block ice on the bottom and cubes on top, and drain meltwater every 12 hours. Additionally, park in shade and limit lid opens to under 30 seconds. Under these conditions, a quality rotomolded cooler holds 40°F for 60 to 72 hours, which covers most short trips where knowing how to keep food cold camping makes the difference.
Should ice go on top or bottom of a cooler?
Both. Place block ice on the bottom for sustained cold mass, then layer food in the middle, and top with cubed ice. Cold air sinks, so the top layer keeps middle items chilled while the bottom block prevents the entire cooler from warming once cubes melt.
How long does food last in a 12V fridge without power?
A well-insulated 12V fridge holds safe food temperatures for 6 to 12 hours after losing power, depending on ambient heat and how full the unit is. Keep the lid closed and pre-freeze water bottles inside to extend the safe window. The TRP 4×4 Mammoth’s EPP insulation performs in the upper range of this band.
How to Pack a Cooler for Camping with 4 People
Plan on 50 to 65 quarts for a two-night trip with four adults. Allocate roughly 12 quarts per person plus 25% for ice. For trips longer than two nights, a 40L 12V fridge alongside a small drinks cooler delivers better performance than a single oversized cooler.
Does dry ice work in a regular camping cooler?
Yes, with caveats. Dry ice holds at minus 109°F and freezes anything it touches, so wrap items in newspaper or place dry ice on top with a barrier. Additionally, vent the cooler periodically to release CO2 buildup. Five pounds of dry ice extends a typical cooler by an extra 24 hours.
How to Pack a Cooler for Camping with Smart Organization
Use a three-zone system: heavy and frozen items at the bottom, sealed raw proteins in the middle, and ready-to-eat foods plus produce on top in rigid containers. Pack meals in reverse order of when you eat them. Keep one zone for drinks if possible, since drink coolers get opened most often and lose cold fastest.