



Quick Facts:
- Topic: Setting up a bell tent for the first time
- Skill level: Beginner friendly
- Time required: 30 to 40 minutes (first pitch), 12 to 15 minutes (experienced)
- Featured tent: Elk Mountain Yukon Bell Tent, 16 ft
- Floor space: 201 sq ft (16.3 ft diameter)
- Weight: 95 lbs total
- Cost: $1,074 (16 ft PolyShield canvas)
- Crew size: Solo doable, two people faster
- Best for: Overlanders and family campers wanting a fast, weatherproof basecamp
9 min read
In This Guide
- Why a Bell Tent Pitch Is Different
- Yukon 16 ft Bell Tent Specs at a Glance
- Step 1: Choose Your Bell Tent Pitch Site
- Step 2: Lay Out the 16 ft Footprint
- Step 3: Stake the Perimeter for Even Tension
- Step 4: Assemble the Center Pole and Door Frame
- Step 5: Raise the Center Pole (the Hard Part)
- Step 6: Tension the Guy Ropes
- Step 7: Open Vents and Lock In the Pitch
- How Long a First Bell Tent Pitch Takes
- First-Pitch Mistakes I Made and How You Avoid Them
- Final Verdict on Your First Bell Tent Pitch
- Frequently Asked Questions
Why a Bell Tent Pitch Is Different
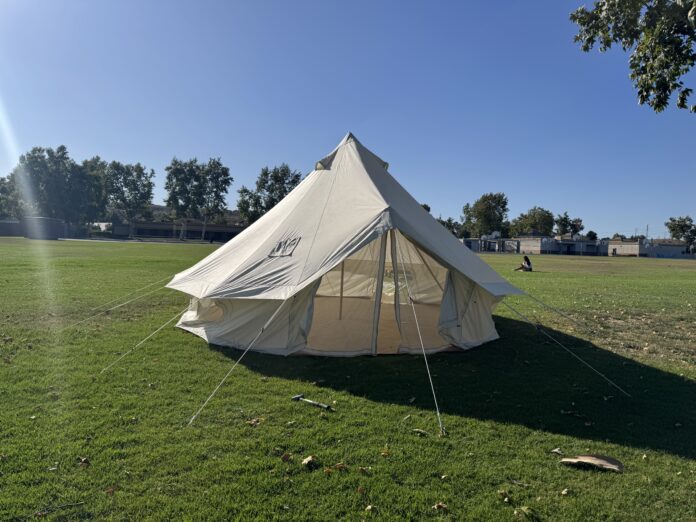
My first solo pitch of the 16 ft Elk Mountain Yukon in a local park ran about 35 minutes. After several pitches, I am down to 12 to 15 minutes solo. Knowing how to set up a bell tent for the first time turns a stressful evening into a 30-minute job, and the video below shows the exact pitch on camera. Below the video, I walk you through how to set up a bell tent in the same seven steps, so your first bell tent setup runs smoothly from bag to bedroll.
A bell tent pitches differently from a backpacking tent because it relies on one tall center pole and a perfectly circular footprint. Backpacking tents use bendy poles and forgive sloppy stakeouts. A bell tent does not. However, once the circle is staked clean and the center pole goes vertical, the canvas takes its shape almost instantly. For context on how this style stacks up against rectangular canvas shelters, see our wall tent vs bell tent comparison.
This guide uses the 16 ft Yukon because it is the most common pick for solo and small-group basecamps. The same steps apply to the 13 ft and 20 ft Yukon and to almost any single-pole canvas bell tent, so the sequence here doubles as a general primer on how to pitch a bell tent of any diameter. For a deeper look at the Yukon’s weather performance, build quality, and four-season verdict, read our in-depth Yukon Bell Tent review.
Yukon 16 ft Bell Tent Specs at a Glance
Before you start, know what you are working with. The 16 ft Yukon’s verified dimensions and weight from Elk Mountain Tents (current 2026 product page) appear in the table below. These numbers shape every step of the pitch, especially your footprint and your stake distance.
| Specification | Details |
|---|---|
| Diameter | 16.3 ft |
| Center pole height | 10 ft |
| Doorway height | 5 ft |
| Wall height | 3 ft |
| Floor space | 201 sq ft |
| Total weight | 95 lbs |
| Canvas | PolyShield polyester blend |
| Groundsheet | PVC 540 g/m² (~16 oz/yd²), zips in, 3.5 in bathtub curve |
| Windows and vents | 4 screened windows, 4 screened peak vents |
| Frame | Galvanized steel center pole (3 segments) plus A-frame door poles |
| Price (16 ft PolyShield) | $1,074 |
Buy Direct From Elk Mountain
The Yukon 16 ft Bell Tent
PolyShield canvas, zip-in PVC floor, stove jack, and a galvanized steel frame. 4.91 of 5 stars from 34 verified owners.
[ VIDEO EMBED ]
Watch the full 16 ft Yukon first-pitch walkthrough in the local park. Embed dropping in tomorrow.
Step 1: Choose Your Bell Tent Pitch Site
Your pitch site decides whether the rest of the steps are easy or miserable. Walk a 20 ft circle around your intended center point and look for three things. First, flatness. Second, no rocks, roots, or pinecones inside the footprint. Third, clear airflow through the door, which you will orient away from the prevailing wind.
Avoid low spots where rain will pool against the canvas walls. Also avoid steep slopes; the 16 ft Yukon needs a roughly level 18 ft circle so the guy ropes have honest tension on every side. For more on laying out a comfortable basecamp around the tent, see our campsite organization ideas.
Step 2: Lay Out the 16 ft Footprint
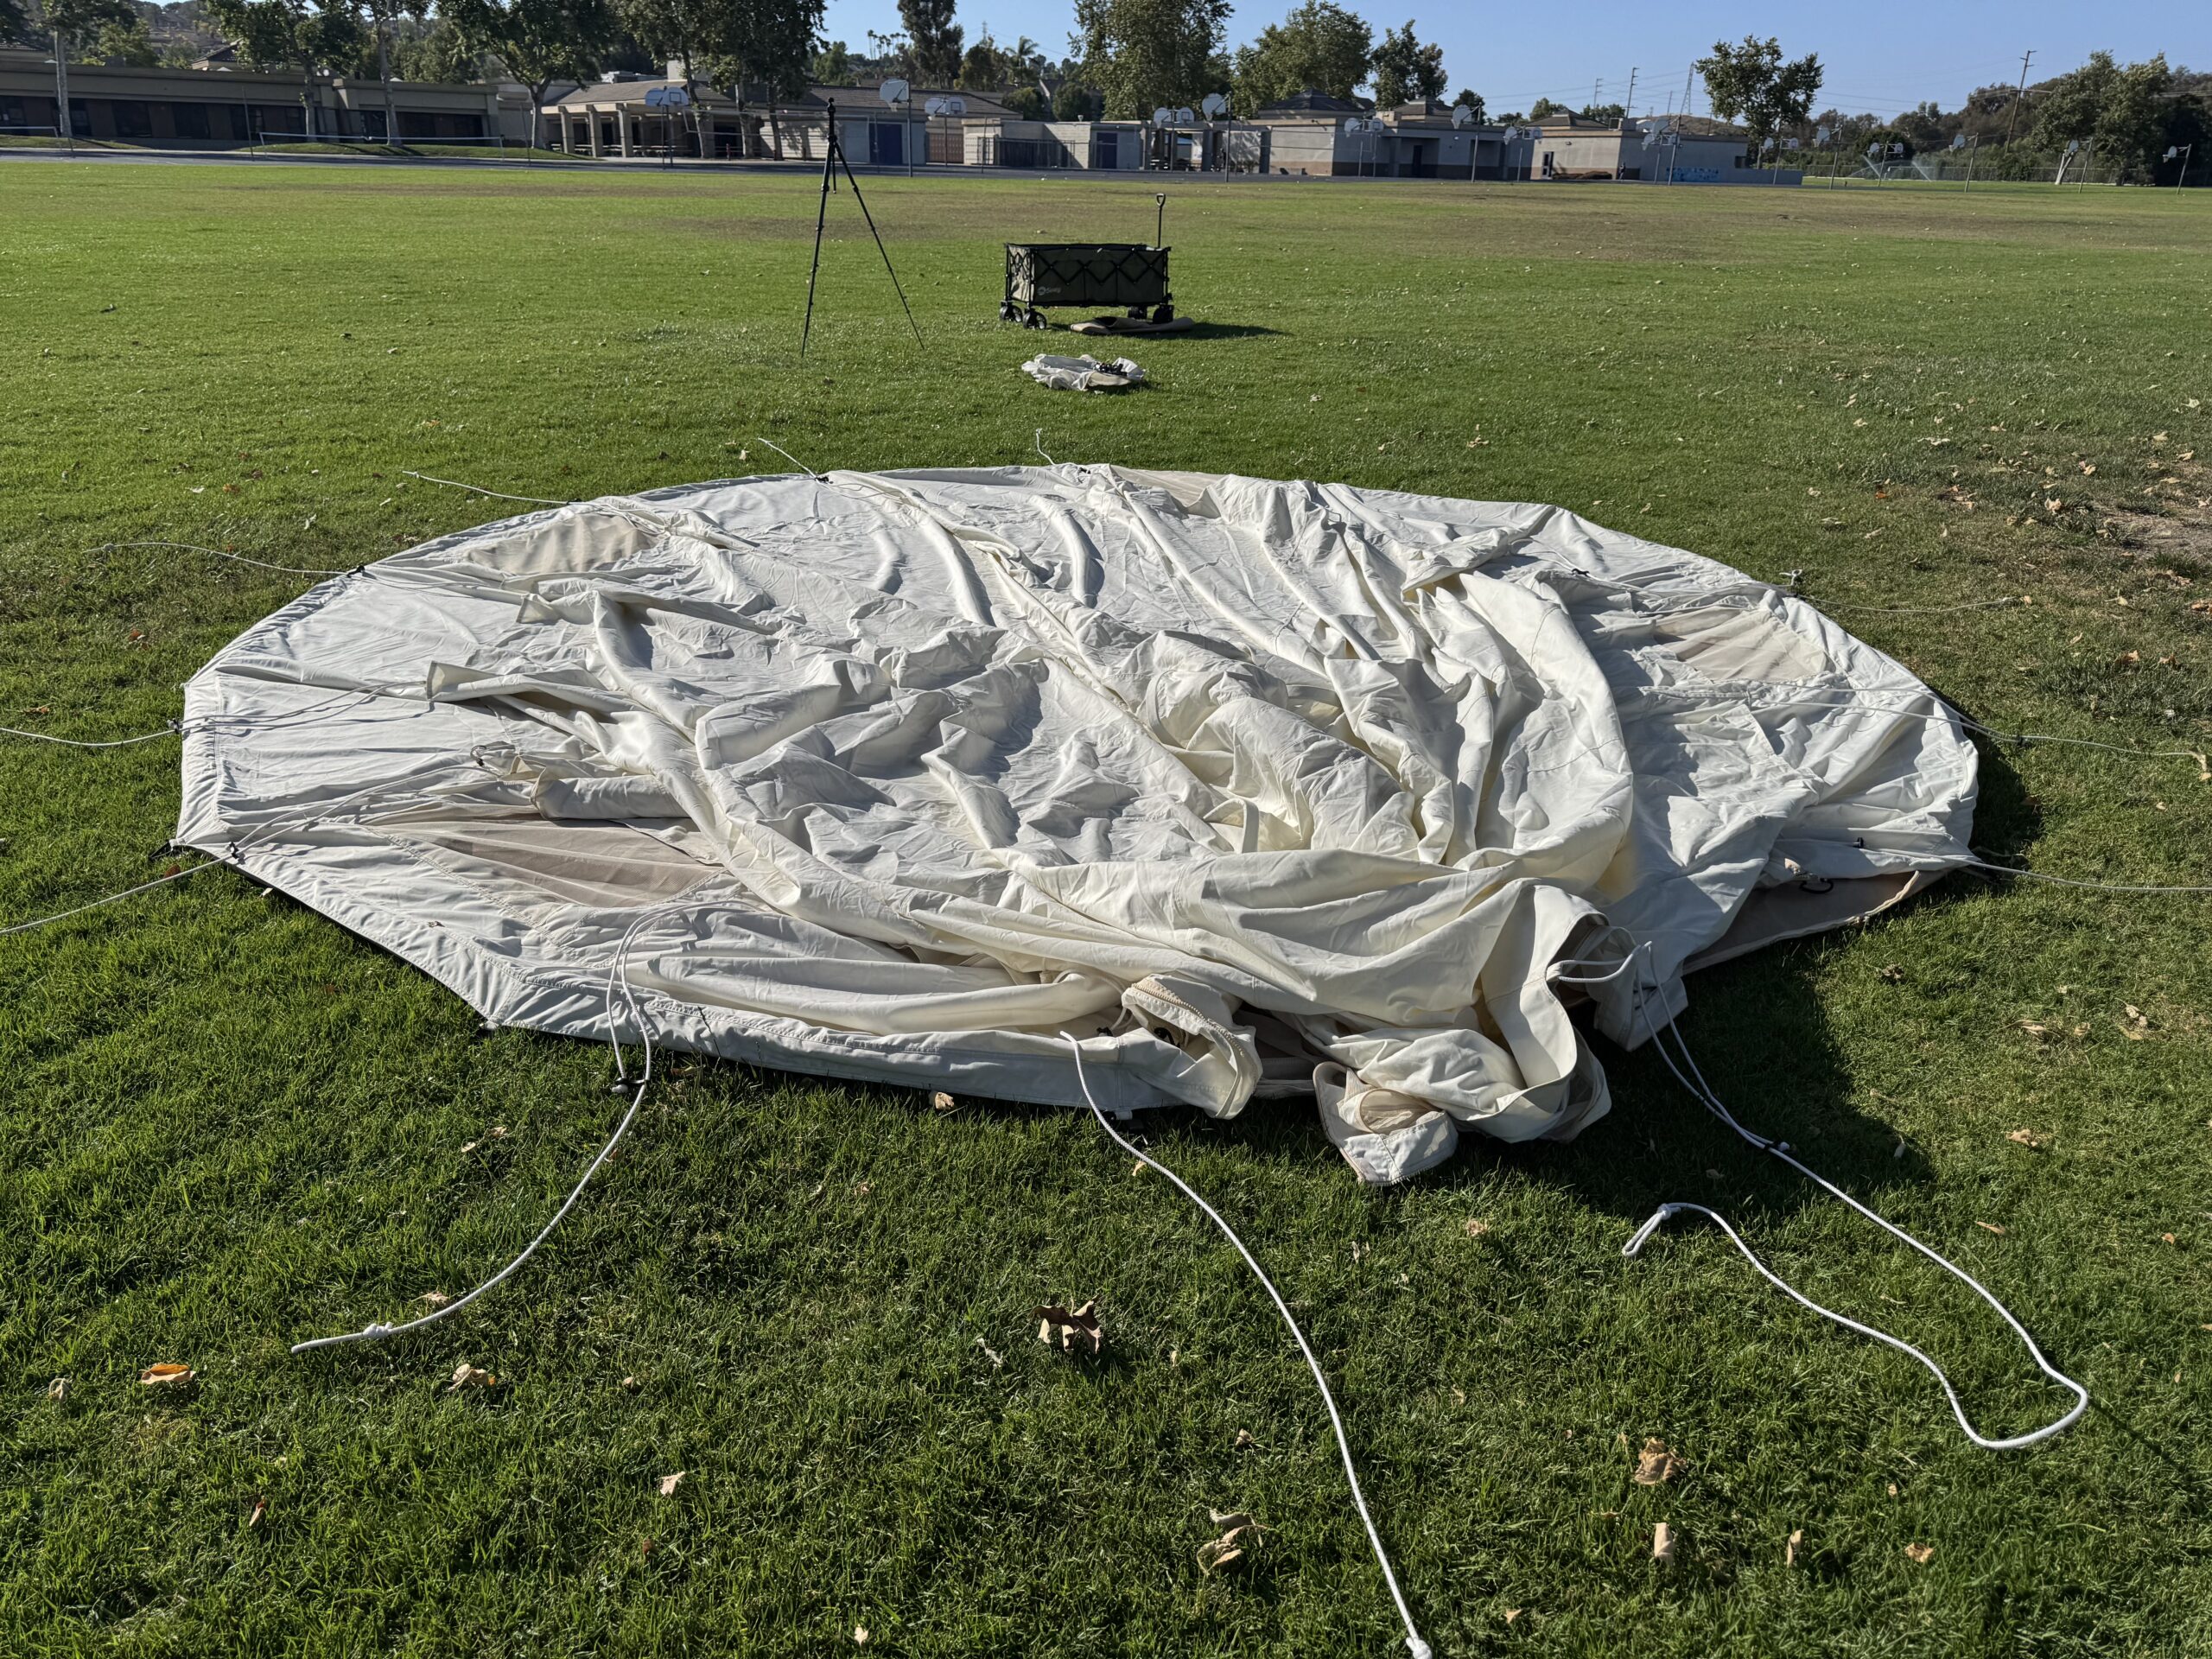
Pull the canvas out of the zippered bag and unfold it on the ground. Walk around the perimeter once and shake out any wrinkles so the circle is roughly round. Position the door where you want it; remember, the A-frame door pokes outward, so leave 6 ft of clearance beyond the door for the door poles and the entry guy rope.
If you have time, lay the canvas inside-out first and zip in the PVC groundsheet before staking. The 540g floor zips into the tent and curves 3.5 inches up the wall like a bathtub. Get this zipper closed cleanly now, because reaching it after the center pole goes up is a chore.
Step 3: Stake the Perimeter for Even Tension
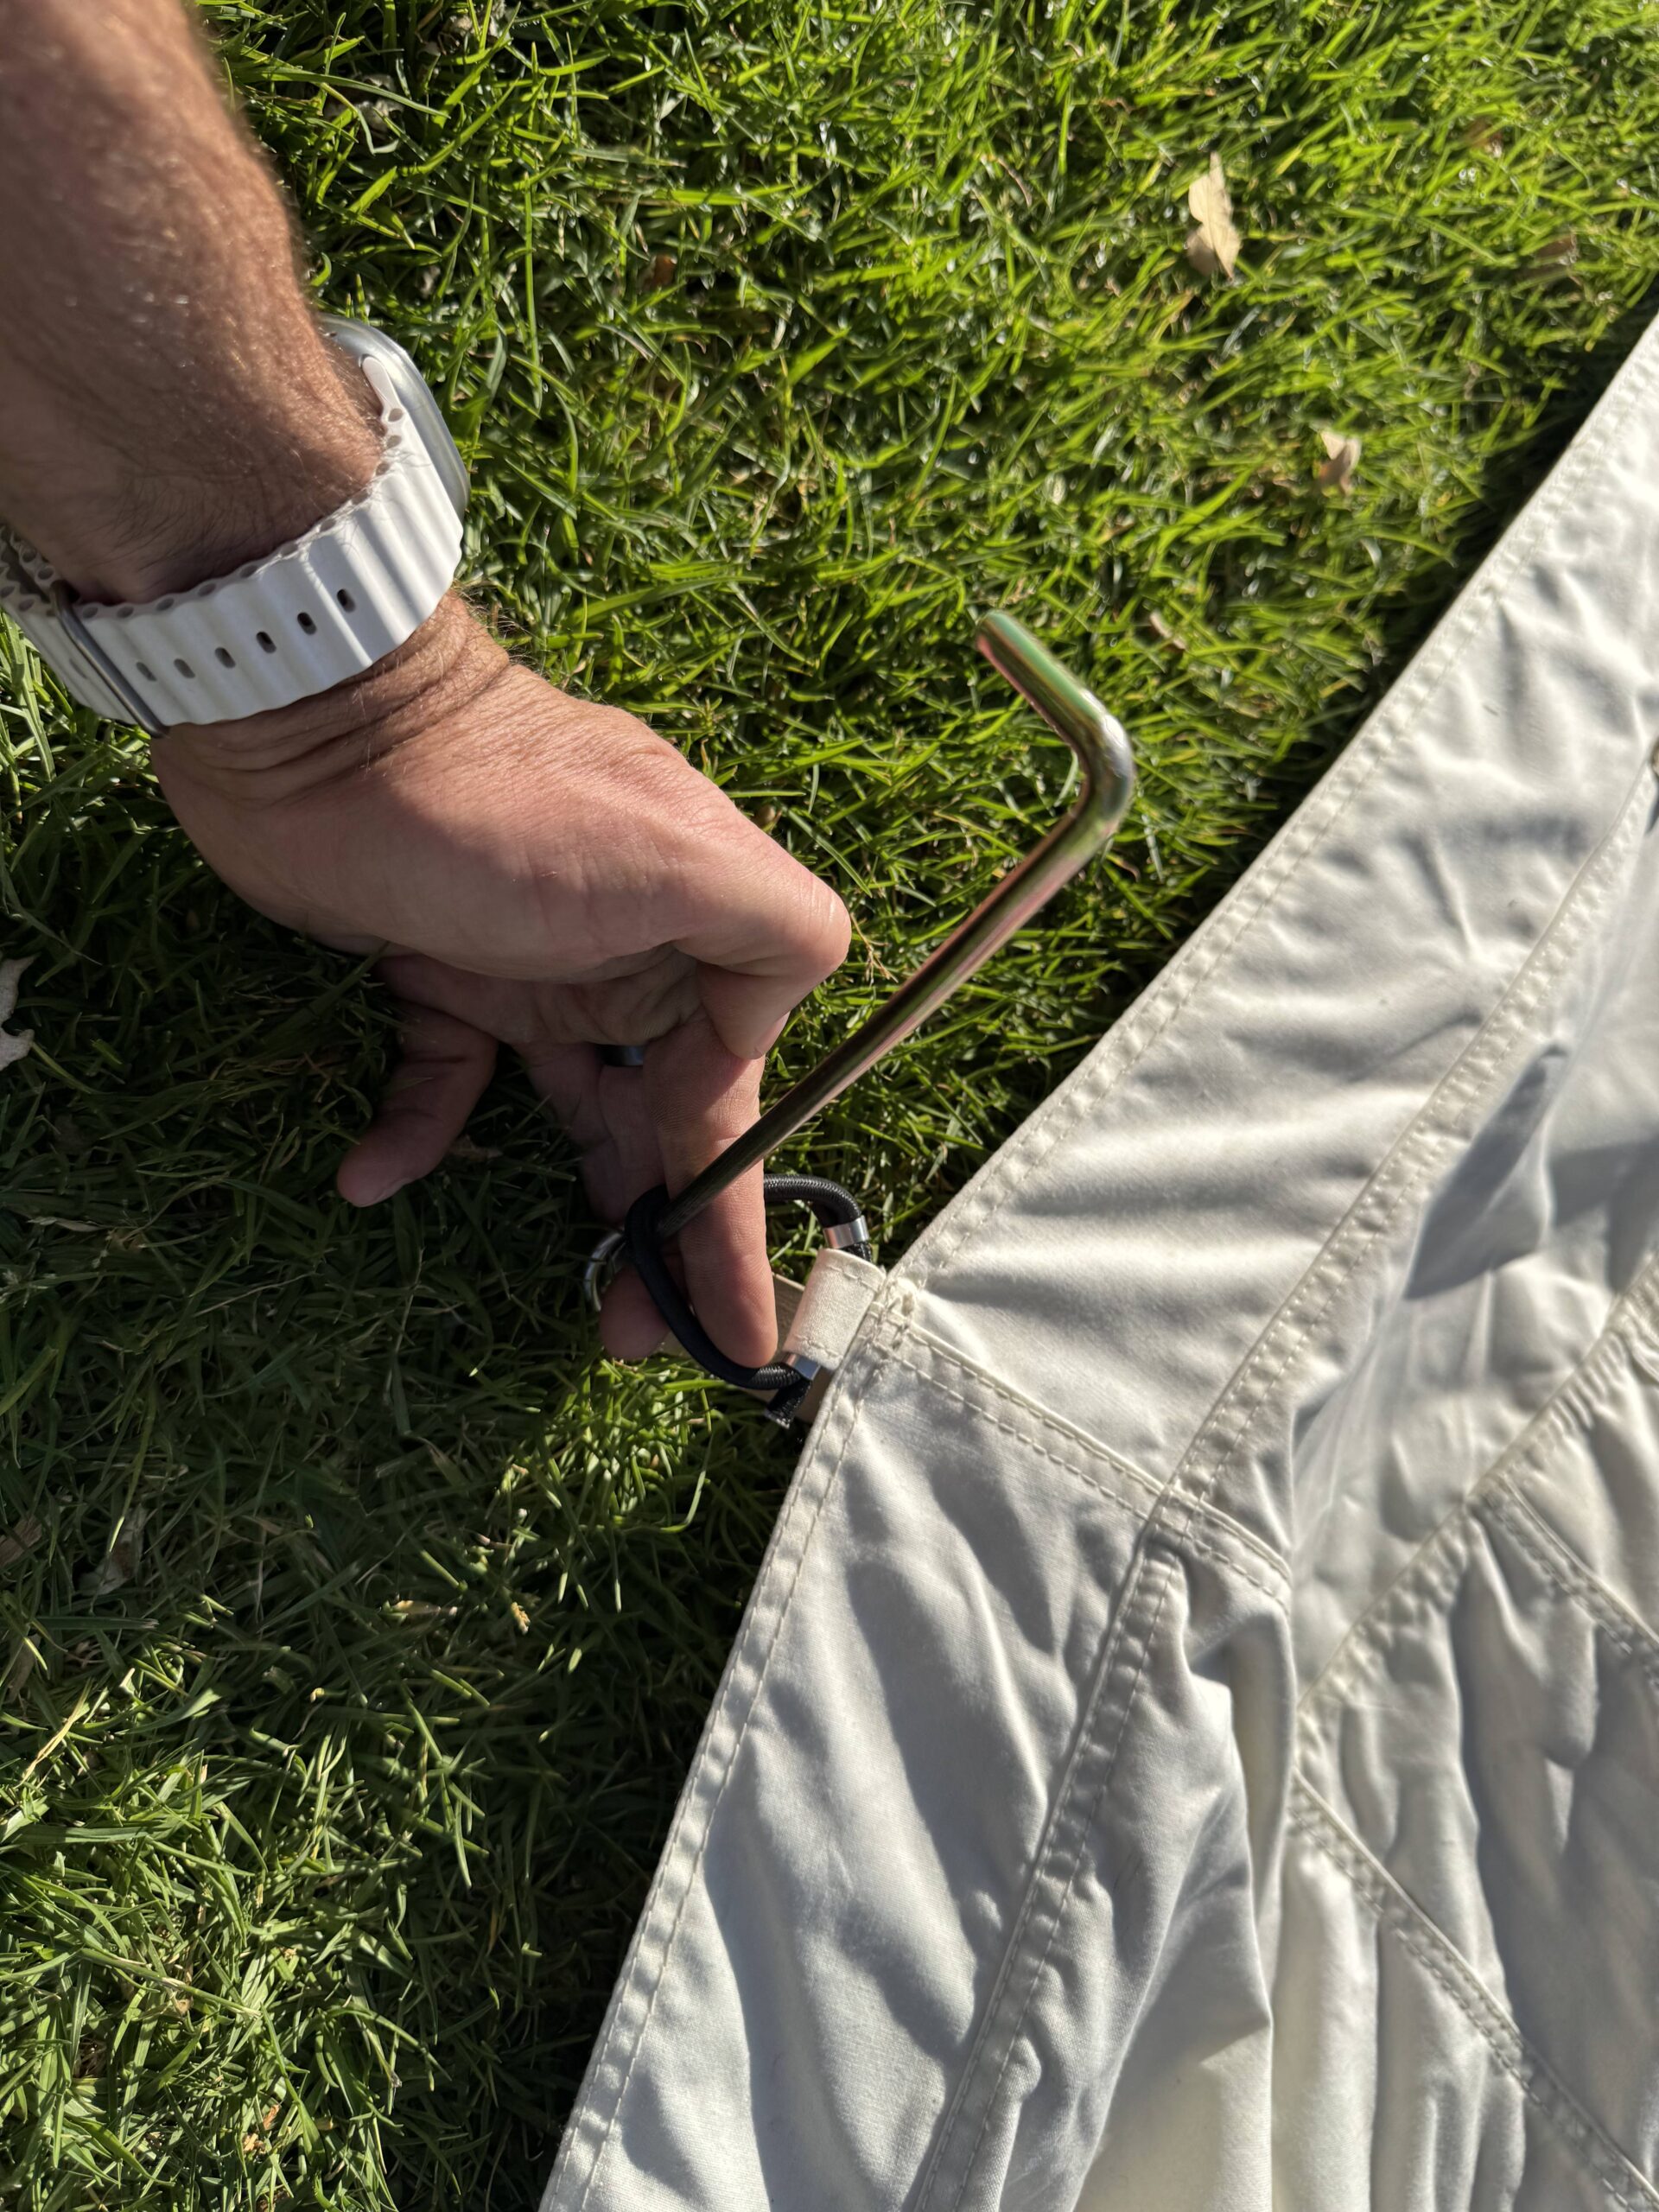
Stake the perimeter before you raise anything. Drop a stake at each cardinal point first: north, south, east, west. Pull the canvas snug between each stake so the floor sits flat. Then fill in the stakes between the cardinals, working around the circle in opposite pairs so tension stays even.
Drive your stakes at a 45-degree angle leaning away from the tent. Stakes pulled straight down will work loose under guy line tension; stakes angled backward grip the soil. On rocky or hard ground, upgrade to longer steel stakes or use rock anchors. Elk Mountain’s own product page also recommends bigger stakes for tough ground, and owner reports from high-wind hunts back this up.
Step 4: Assemble the Center Pole and Door Frame
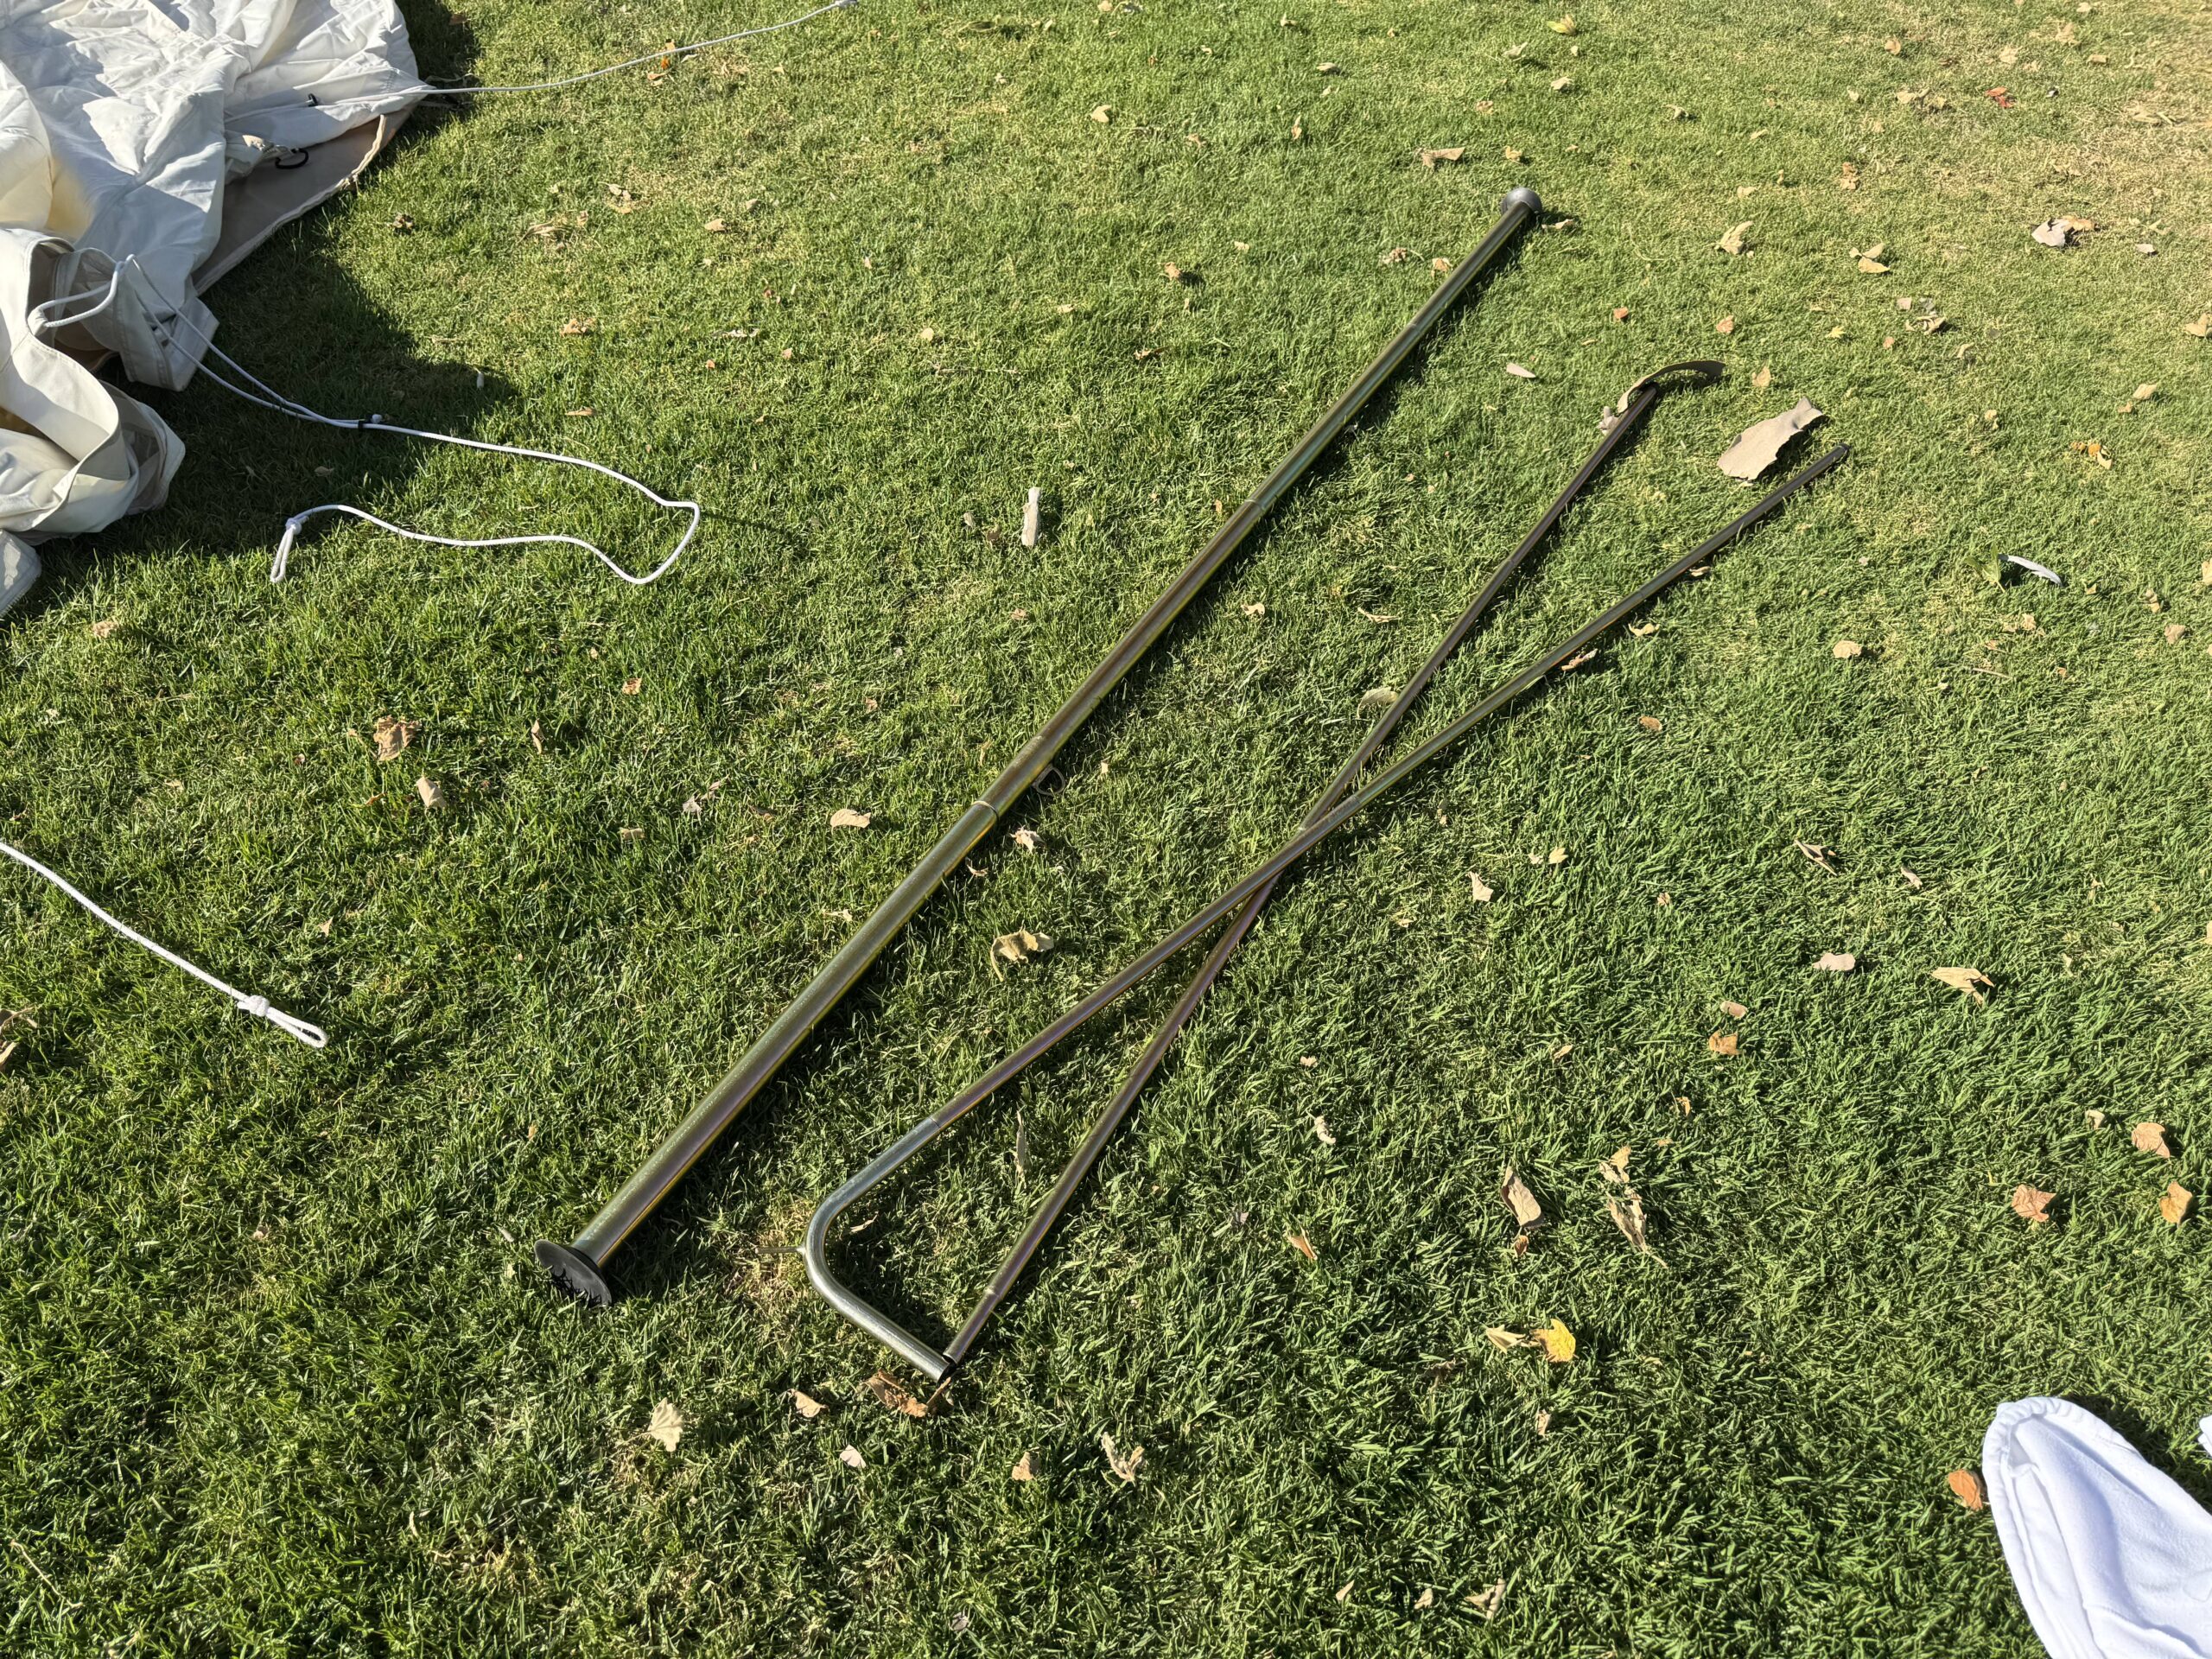
Inside the tent, assemble the three center pole segments end to end. The galvanized steel pole stands 10 ft tall when locked together. Check both rubber gaskets, one at the top and one at the bottom, before you lift anything. The top gasket protects the inside of the canvas peak from steel-on-fabric wear, and the bottom gasket protects the PVC floor. Skipping either will damage the tent.
While you are inside, assemble the two A-frame doorway poles. These hold the door open and shape the entry. Position the feet of the door poles about 1 ft outside the wall so they angle correctly. The poles are held by gravity and the door’s rope ties, so do not overtighten anything until the center pole is up.
Step 5: Raise the Center Pole (the Hard Part)
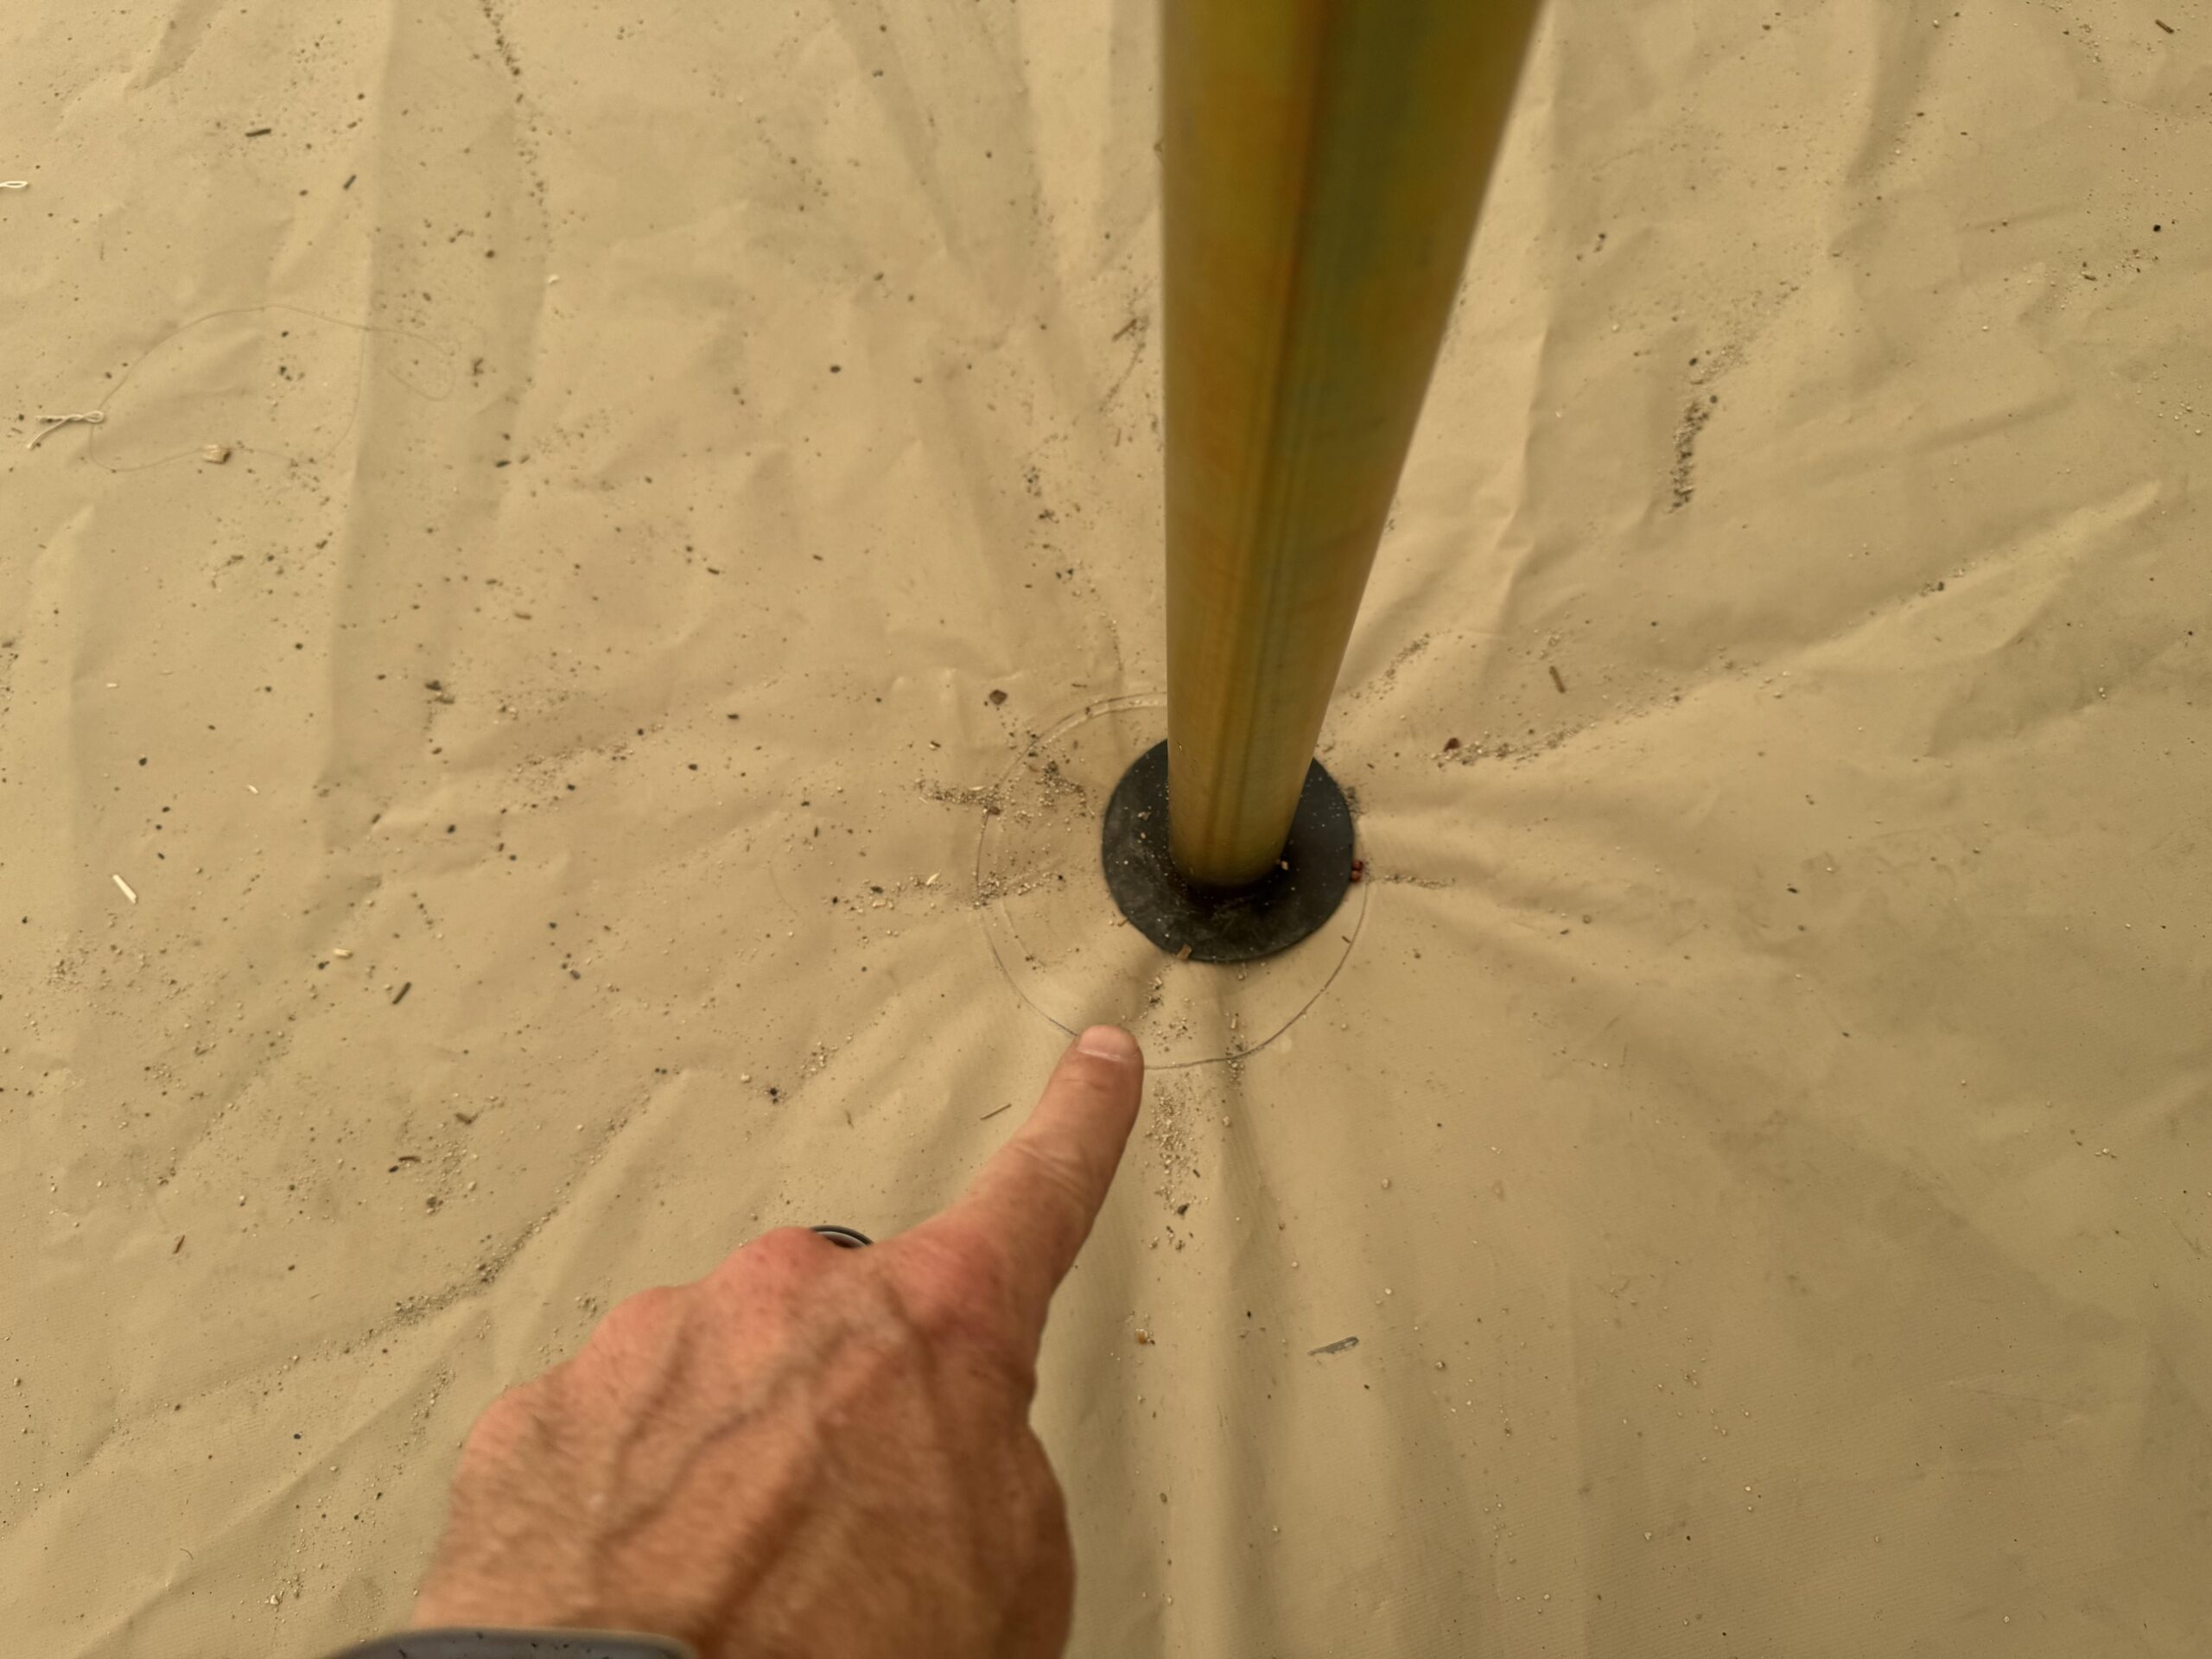
This is the trickiest part of the pitch. The 10 ft center pole is heavy enough to require a real plan for solo lifting. Stand under the canvas peak with the pole vertical at your chest, bottom gasket pressed into the floor. Walk your hands up the pole as you push it skyward. The canvas pulls taut as the peak rises; trust it.
If the canvas catches on the pole top, do not force it. Lower the pole a few inches, reach up to free the snag, and lift again. Once vertical, plant the bottom gasket on the floor near the dead center of the tent. The pole holds itself in place by the canvas tension on every side. For a two-person pitch, one person lifts while the other guides the peak from outside.
Now move outside and check the bell shape. The peak should sit dead center. If the canvas leans, the pole is off-center; reach in, walk the bottom a few inches in the opposite direction, and recheck.
Step 6: Tension the Guy Ropes
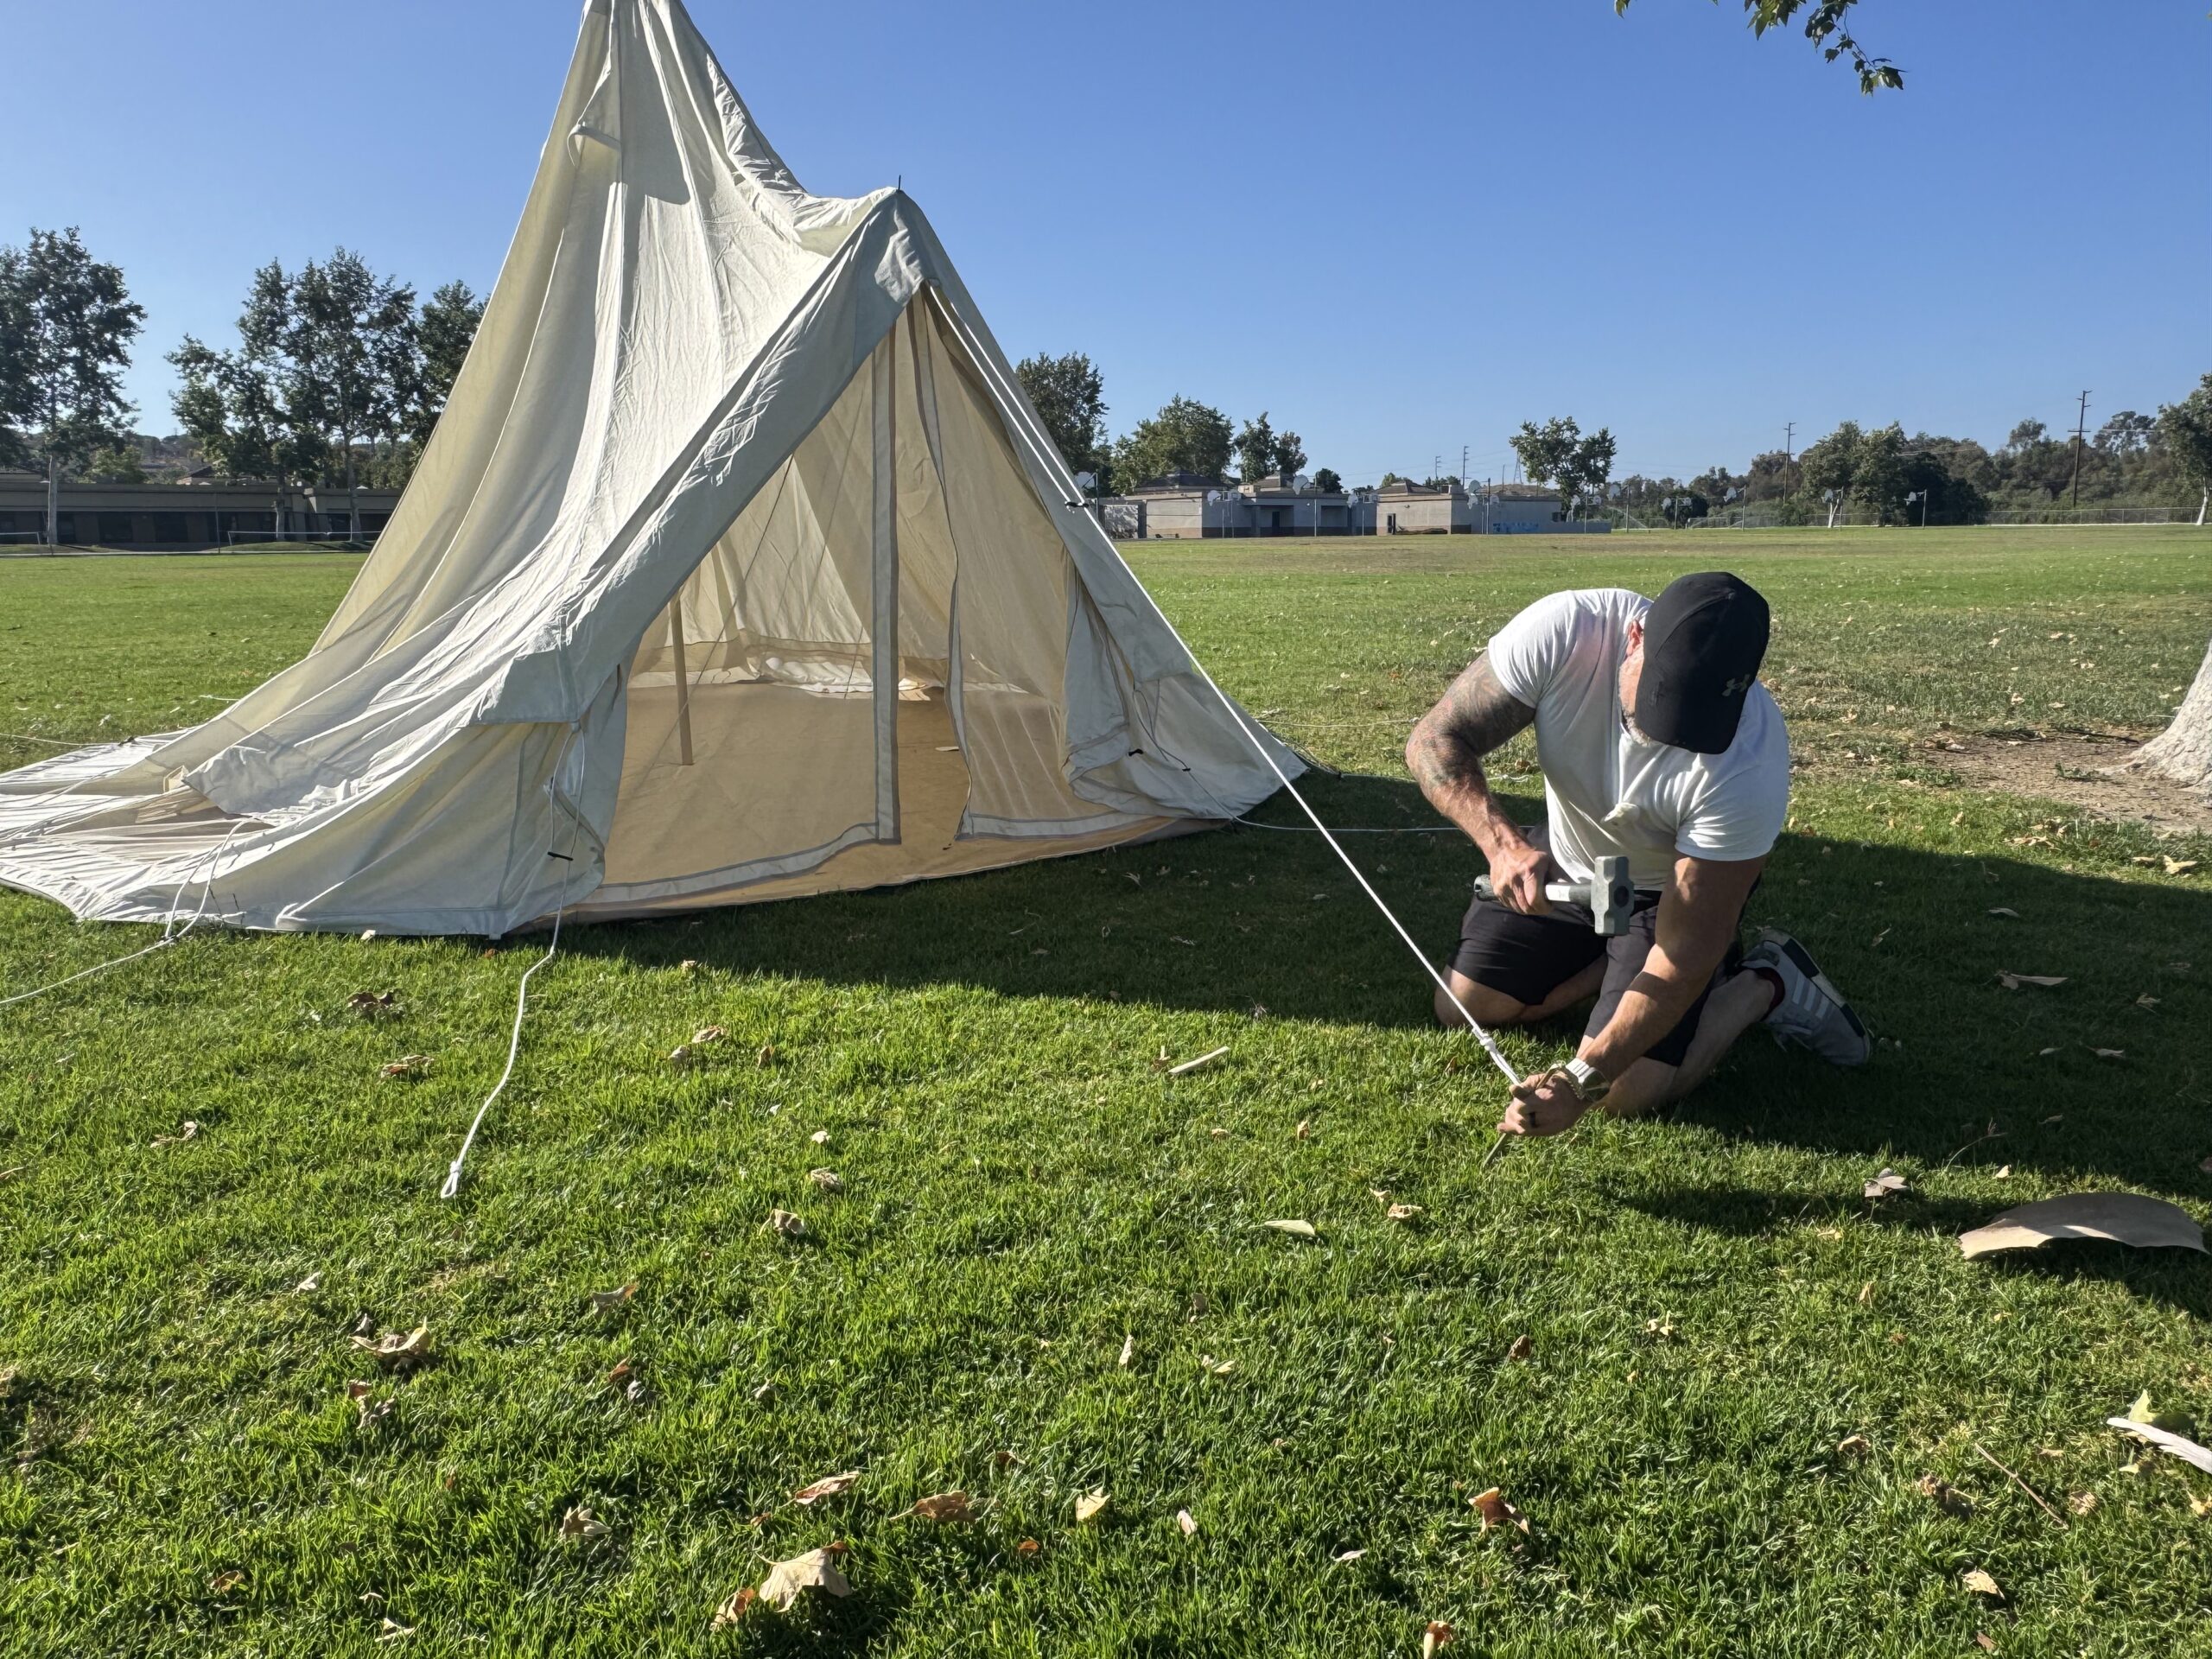
The Yukon ships with guy ropes pre-attached at every peak vent and reinforcement panel. Stake out each guy rope at roughly a 45-degree angle from the wall, about 6 ft from the perimeter. Work in opposite pairs again so the canvas tension stays balanced. The door guy rope is the longest one and runs farthest out to keep the A-frame entry stable.
Each rope has a tensioner slider. Pull the canvas taut but not banjo tight. A bell tent should look like a smooth dome, with no horizontal wrinkles between the wall and the peak. If you see horizontal sag, tighten the nearest guy rope. When vertical wrinkles appear, the perimeter stake on the same side is too tight; back it off.
Step 7: Open Vents and Lock In the Pitch
Walk inside and unzip all four screened peak vents. These vents control condensation. Even on a dry summer night, your breathing and body heat will fog the canvas peak. The four vents create cross-flow and pull moisture out the top. Also unzip the four screened windows if the bugs are tolerable.
If you are pitching for cold weather, this is when you plan the stove jack location. The Yukon’s stove jack is uncut fiberglass with a cover; you cut a 4, 5, or 6 inch hole only when you install your stove. For a deeper read on running a wood stove inside a canvas tent, check our guide on hot tenting basics.
Finally, walk the perimeter once more. Tug each guy rope. Confirm the bottom of the canvas touches the ground evenly all the way around. Look up at the peak; the seams should radiate cleanly from center. If anything looks off, fix it now while the work is fresh.
Ready to Pitch Your Own
Order the 16 ft Yukon Direct
PolyShield canvas tent, full frame, zip-in floor, and stove jack. Ships from Elk Mountain Tents with responsive customer support.
How Long a First Bell Tent Pitch Takes
My first solo pitch in the park ran about 35 minutes from bag to bedroll. Two trips later, I was at 20 minutes. Today I pitch the 16 ft Yukon solo in 12 to 15 minutes. Verified owners on the Elk Mountain product page report similar timing: one owner pitched his 16 ft solo for the first time at about an hour, another reported 30 minutes by his second pitch, and others mention 15 to 20 minute solo pitches after a few trips. So a 30 to 40 minute first attempt is normal.
Two people moving together will cut those times roughly in half. A solo pitcher gains speed mostly by getting better at Step 5, the center pole raise. After three or four pitches, this step drops from minutes of fiddling to under 60 seconds. Stake-driving and guy rope tensioning also speed up with repetition, especially once you stop overthinking the order. By trip three, your full bell tent setup feels routine rather than experimental.
First-Pitch Mistakes I Made and How You Avoid Them
My first attempt was a comedy of small mistakes. First, I staked the perimeter too tight, which left the canvas fighting me when I tried to raise the pole. Loosen those perimeter stakes before lifting; tighten them after the pole is up. Second, I forgot the bottom rubber gasket on the center pole and had to lower the whole thing to install it. Always check both gaskets before the lift.
Third, I oriented the door into the wind. The A-frame doorway acts like a sail, so when the gusts came up, the door rope kept going slack. Point the door at least 45 degrees away from the prevailing wind. Fourth, I tried to muscle the center pole vertical in one motion. Walk it up hand over hand instead; your back will thank you.
Finally, I left the peak vents zipped shut on a humid evening and woke up to interior fog and damp gear. Open all four vents on every pitch unless you are in a sustained windstorm. These are the five bell tent setup mistakes worth fixing on day one, before they cost you a comfortable night. For a related winter-pitch primer, our canvas winter camping tips cover ventilation, stove safety, and snow management in more detail.
Final Verdict on Your First Bell Tent Pitch
Setting up a bell tent for the first time is intimidating only until the center pole goes vertical. Once the pole locks in, the canvas does most of the shaping work for you. The 16 ft Yukon is forgiving because the dimensions are honest, the frame is well-engineered, and the perimeter is large enough so small staking errors do not snowball into a sagging tent.
If you are picking up a bell tent and watching this video before your first weekend, expect 30 to 40 minutes for the first pitch. Pay attention to three things: the perimeter circle, both center pole gaskets, and the order in which you tension the guy ropes. Get those right, and the rest is repetition.
For a hands-on look at how the Yukon performs in real overland weather, read our full Elk Mountain Yukon Bell Tent review. On your first pitch, expect to fumble the center pole walk-up. No problem. Set the perimeter, plant both gaskets, and walk the pole up slowly. By your second pitch, you will already be faster than the manual promises.
Ready to Buy?
Check Today’s Price on the Yukon 16 ft
$1,074 base PolyShield, PolyShield+ upgrade for added mildew, fire, and wear resistance. Direct from Elk Mountain Tents with responsive customer support.
Frequently Asked Questions
How long does it take to set up a bell tent the first time?
Expect 30 to 40 minutes for your first solo pitch of the 16 ft Yukon. Elk Mountain quotes about 30 minutes on the product page, and verified owners report similar first-time numbers. By the third or fourth pitch, most solo campers are in the 15 to 20 minute range. Two people working together will hit roughly half those times.
Is one person enough to set up a 16 ft bell tent alone?
Yes. A solo pitch of the Yukon 16 ft is doable because the center pole holds itself once the canvas tension is balanced. If you have been searching how to pitch a bell tent solo, the hardest single step is walking the 10 ft center pole vertical from inside the tent. Multiple verified Elk Mountain owners pitch the 16 ft solo in under 30 minutes after a few rounds of practice.
How do you raise the center pole on a bell tent without help?
Stand under the canvas peak with the pole vertical at chest height and the bottom gasket pressed onto the floor. Walk your hands up the pole as you push it upward. The canvas pulls tight on every side as the peak rises, which keeps the pole steady. If you feel snagging, lower the pole an inch and free the catch before lifting again.
Do you need a footprint or tarp under a bell tent?
The 16 ft Yukon ships with a zip-in PVC groundsheet rated at 540 g/m² (roughly 16 oz/yd²), with a 3.5 inch bathtub curve up the wall. This floor is your footprint, and it seals to the tent body so water will not creep in along the seam. Some owners add a separate ground tarp for canvas protection on rough terrain. On grass or dirt, the included floor is enough.
Which way should the door of a bell tent face?
Point the door at least 45 degrees away from the prevailing wind. The A-frame doorway acts as a wind catcher when it sits open, and head-on gusts will tug the door rope slack. Facing the door downwind also keeps rain from blowing into the entry when you unzip in bad weather. A morning-sun orientation is also worth considering for cold-weather camps.
Is the Elk Mountain Yukon 16 ft worth the price?
At $1,074 for the PolyShield base, the 16 ft Yukon sits in the middle of the canvas bell tent market, where comparable 16 ft canvas bells run roughly $900 to $1,800 depending on canvas weight and frame quality. The polyester blend resists mildew better than cotton, and the zip-in PVC floor and screened vents reduce the gear you need on top. For a four-season-capable basecamp with 201 sq ft of standing room, the value is strong. The 4.91 of 5 stars from 34 owner reviews on Elk Mountain’s product page supports this read.