


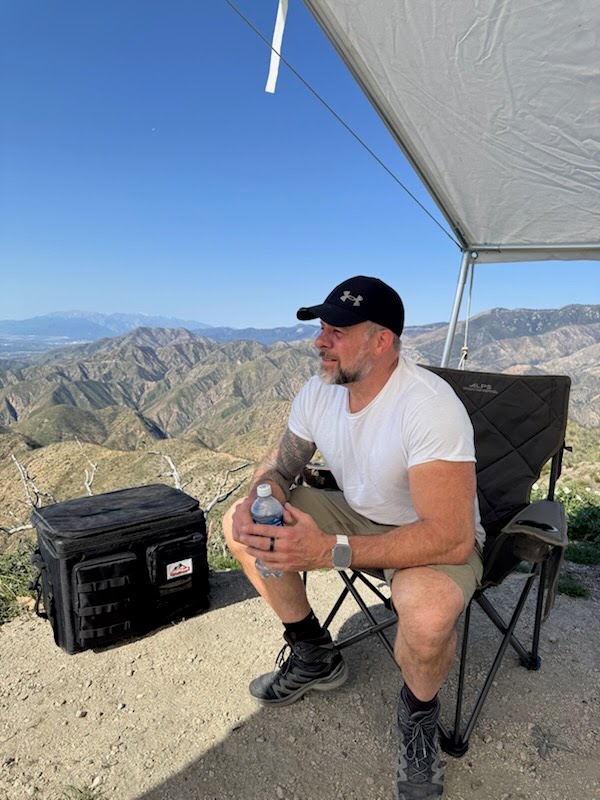
I’ve been camping since I was a kid, spending nights in the mountains, the desert, dense backcountry woods, and everywhere in between. Those early years were tent and sleeping bag simple, relying on whatever fit in a pack or a cooler, and making do with trail mix and canned soup when the ice ran out. Over the decades, as I transitioned from tent camping to rooftop tents and trailers, my approach to food on the trail went through the same evolution my rigs did. Gear improved, systems got smarter, and the gap between what you eat at a trailhead camp versus what you eat at home got a lot narrower.
As the founder of 4WDTalk, I spend considerable time testing gear firsthand and talking with experienced overlanders about what works on extended trips. One theme comes up more than almost any other: food system failures ruin trips faster than mechanical breakdowns. Running out of ice on day three, eating spoiled meat because the cooler drained warm, or forgetting a key ingredient 80 miles from the nearest store are the kinds of problems a well-built overlanding food system prevents. This guide covers everything you need to build one from scratch, covering cold storage, cooking setup, meal planning, and food safety, so you arrive at camp ready to eat well no matter how far off the grid you are.
Quick Verdict: A complete overlanding food system has five components: reliable cold storage, a capable cooking setup, a structured meal plan, a dry goods supply, and a food safety strategy. The biggest single upgrade most overlanders make is switching from a traditional cooler to a 12V compressor fridge, which eliminates ice logistics and keeps food at a precise, safe temperature for the entire trip. For setups where weight and portability matter, the TRP 4×4 Mammoth 40L Fridge Freezer delivers true freezer capability down to 5°F, weighs only 15 lbs, and requires no mounting hardware, making it one of the most flexible cold storage options in its class.
Last updated: May 2026 | 10 min read
In This Guide
- Cold Storage: Cooler vs. 12V Fridge vs. Freezer
- Overlanding Fridge Key Specs at a Glance
- Building Your Overlanding Cooking Setup
- Overlanding Meal Planning: How to Structure Your Menu
- Dry Goods and Pantry Staples for the Trail
- Food Safety in the Field
- Why the Mammoth 40L Works as the Core of Your Food System
- Pros and Cons of a 12V Fridge-Based System
- Final Verdict
- Frequently Asked Questions
Cold Storage: Cooler vs. 12V Fridge vs. Freezer
Cold storage is the foundation of any overlanding food system, and getting this decision right shapes everything else in your setup. Get it wrong and every other part of your setup suffers: your meal plan collapses, you eat through perishables too fast, or you spend hours managing ice in conditions where ice is hard to come by. The decision between a cooler, a 12V compressor fridge, or a fridge with true freezer capability depends on your trip length, group size, and proximity to resupply.
Traditional Coolers
Coolers are inexpensive, require no power, and work fine as camping food storage for weekend trips of two days or fewer when ice is accessible. A quality rotomolded cooler, such as a YETI or RTIC, retains ice for five or more days under ideal conditions. In practice, ambient temperatures, frequency of opening, and sun exposure cut this number significantly. On desert trips in 100-degree heat, a cooler packed with block ice often lasts 48 hours before the contents are sitting in warm meltwater. Food safety rules from the USDA are clear: perishable foods sitting above 40°F for more than two hours enter the danger zone where bacteria multiply rapidly. Below 90°F, you have a two-hour window. Above 90°F, this window shrinks to one hour. A cooler running warm fails on both counts.
12V Compressor Fridges
A 12V fridge for camping eliminates ice logistics entirely. It runs off your vehicle’s 12V system, an auxiliary battery, or solar, and maintains a precise temperature regardless of ambient heat. Most compressor fridges cool to between 32°F and 40°F, giving you camping food storage reliable enough to keep perishables fresh and safe indefinitely as long as power is available. For overlanding trips lasting three days or more, a 12V fridge for camping pays for itself in reduced food waste and the freedom to buy fresh ingredients at the start of a trip without worrying about ice management mid-route.
12V Fridge Freezers
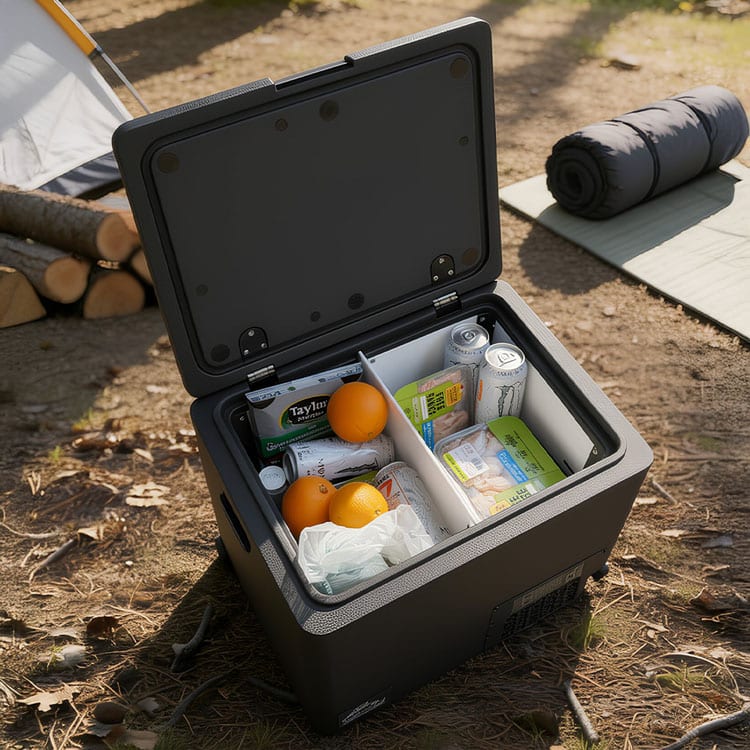
A portable fridge freezer for overlanding is the most capable cold storage option for extended trips. Freezer temps, typically 5°F to 14°F, let you store meat for weeks, keep ice cream in the desert, and pre-freeze entire meals at home before departure. For longer expeditions or group trips, running two units, one set as a fridge and one as a freezer, is a strategy experienced overlanders use to maximize both fresh and frozen storage without compromising on either. The TRP 4×4 Mammoth 40L covers the full range, cooling from 5°F to 50°F, which means it functions as a dedicated freezer, a fridge, or anywhere in between depending on trip requirements.
Overlanding Fridge Key Specs at a Glance
| Specification | TRP 4×4 Mammoth 40L |
|---|---|
| Capacity | 40 liters |
| Weight | 15 lbs |
| Temperature range | 5°F to 50°F (-10°C to 10°C) |
| Power input | 12V/24V DC; 100-240V AC |
| Connectivity | Bluetooth; Mammoth App |
| Cooling modes | ECO and MAX |
| Body material | EPP (Expanded Polypropylene) |
| Mounting required | No |
| Dimensions | 20in (H) x 15in (W) x 16.71in (D) |
| Price | $450 |
| Warranty | 1 year |
Featured Gear
TRP 4×4 Mammoth 40L Fridge Freezer
15 lbs. True freezer capability down to 5°F. No mounting hardware needed. App-controlled ECO and MAX modes. Built for overlanding, tailgating, and base camp.
Building Your Overlanding Cooking Setup

Cold storage keeps ingredients fresh. Your overland camp cooking setup determines what you do with them. After decades of camp cooking across mountains, desert hardpan, and thick backcountry timber, the setup I’ve landed on is simple, versatile, and quick to deploy. Complexity is the enemy of camp cooking, especially after a long day on rough trail.
Stove Options
A two-burner propane stove is the workhorse for most overland camp cooking setups. Propane tanks refill at most gas stations and camping supply stores, and the output is consistent regardless of elevation, unlike some canister stove fuels. A dual-fuel stove adds white gas compatibility for cold-weather trips where propane flow slows below freezing. For groups of four or more, a single-burner stove becomes a bottleneck; two burners let you run a main and a side simultaneously and cut overall meal prep time by 30 to 40 minutes.
A cast iron skillet is the most versatile piece of cookware in any overland kit. Weight is a real consideration in a backpack. In a 4×4 rig, the weight penalty is minimal and the performance is unmatched. A 10-inch cast iron skillet handles eggs, protein, stir fry, and pan sauces equally well. Pair it with a 4-quart stainless pot for pasta, soups, and boiling water, and most overlanding menus become achievable with two pieces of cookware.
Camp Kitchen Organization
How you organize your camp kitchen has as much impact on meal quality as the gear itself. Group all cooking tools and spices into a single dedicated bin or kitchen bag. Avoid spreading them across multiple containers or stuffing them between other gear. A kitchen requiring ten minutes of unpacking before you cook becomes a kitchen you use less often. Chuck boxes and pull-out kitchen modules solve this problem permanently; everything stays organized, accessible, and protected from trail dust and moisture.
Spice management is where many camp kitchens fall short. Bringing full-size containers wastes space. Instead, decant the spices you rely on into small screw-top containers before departure. A lineup of eight to ten spices, including salt, black pepper, garlic powder, cumin, smoked paprika, red chili flakes, dried oregano, and onion powder, covers the flavor base for the majority of camp meals without adding meaningful weight or bulk.
How to Structure Your Overlanding Menu

Overlanding meal planning is a discipline, not an afterthought, and it is the component of your overlanding food system most overlanders underinvest in. The overlanders who eat well in the field are the ones who planned their menu at home, organized ingredients by day, and built in flexibility for days when schedules run long or conditions change. Every experienced overlander I’ve talked with through 4WDTalk has some version of this system, even if the specific meals differ.
The Day-by-Day Approach
Plan every meal for every day of the trip. For each day, identify breakfast, lunch, dinner, and two snack windows. Write it out before you shop. Once you have the full menu written, build your shopping list from it. Shopping from a structured list rather than guessing reduces both waste and forgotten items. Group each day’s perishable ingredients in labeled zip-lock bags or small containers so you pull out exactly what you need for each meal without rummaging through the fridge.
Sequence your perishables strategically through the trip. Day one and two meals use the most delicate proteins, fresh vegetables, and dairy. By day three, shift toward heartier proteins and harder vegetables, such as cabbage, carrots, and bell peppers, which hold up longer under refrigeration. Days four through six or beyond rely more heavily on frozen proteins pulled from the freezer compartment and dry goods supplemented with canned or shelf-stable items.
Pre-Trip Meal Prep
At-home prep is the single biggest time saver in the field. Pre-marinate and freeze proteins in zip-lock bags flat, which conserves space in the fridge and allows them to act as ice packs during the early portion of the trip as they thaw. Pre-cut vegetables, portion dry rubs and sauces, and store everything labeled by day. When you arrive at camp after six hours of driving rough roads, having a marinated protein and pre-cut vegetables ready to cook reduces the mental load and the time between arrival and eating.
Always Build in a Backup Meal
Every overlanding meal plan needs at least one full backup meal per three days of travel. Conditions change, plans shift, and the comfort of knowing you have a reliable meal in reserve removes pressure from the entire trip. My go-to backup is a selection of freeze-dried meals, which require only boiling water and store indefinitely without refrigeration. Carrying four or five freeze-dried dinners on a week-long trip adds minimal weight and takes up virtually no space, but provides a safety net for bad weather days, late arrivals, or unexpected extra nights in the field.
Keep Your Food Cold the Entire Trip
The Mammoth 40L: Freezer-Capable, Lightweight, Mount-Free
ECO and MAX cooling modes, Bluetooth app control, and a 40L capacity sized right for solo and two-person overlanding setups. No slides or mounting brackets required.
Dry Goods and Pantry Staples for the Trail
A well-stocked dry goods supply is the backup system for your perishables and a non-negotiable part of any overlanding food system built for trips of three days or more. On a trip where fresh food runs out, gets damaged, or needs to be supplemented, your dry goods bin carries the meal. Keeping a consistent, trip-ready dry goods kit in your rig means you never start from scratch when packing.
Core dry goods for an overlanding pantry include: rolled oats (breakfast staple, fast to prepare), pasta in two or three varieties, rice, dried lentils, instant mashed potatoes, canned beans, canned tomatoes, olive oil in a small sealed container, soy sauce and hot sauce in travel bottles, nut butter packets, mixed nuts and jerky, energy bars, and instant coffee or tea. This base covers breakfast and a variety of lunches and dinners without requiring refrigeration.
Canned proteins, specifically tuna, salmon, chicken, and sardines, extend your protein options significantly beyond the fresh and frozen items in your fridge. A can of tuna, a packet of instant rice, some soy sauce, and a squeeze of hot sauce produces a complete, high-protein meal in under ten minutes with no refrigeration required. For desert or high-heat trips where the fridge works harder and power consumption rises, having dry and canned options ready reduces how often you open the fridge and how hard the compressor runs.
Food Safety in the Field
Food safety rules are non-negotiable in any overlanding food system. Getting sick 60 miles from pavement is a serious situation. The USDA defines the bacterial danger zone as 40°F to 140°F, where bacteria multiply to dangerous levels within two hours, or one hour when ambient temperature exceeds 90°F. Every decision in your overlanding food system should be oriented around keeping perishables below 40°F at all times.
Avoid cross-contamination by keeping raw proteins in sealed containers or zip-lock bags, never in contact with ready-to-eat foods. Pre-portioning proteins at home into single-use servings eliminates the need to handle raw meat in the field, which reduces both contamination risk and cleanup time. Bring biodegradable soap and a water container with a spigot for hand washing before and after food prep; sanitizer is a supplement, not a substitute.
Defrost proteins inside the fridge compartment, not on a cutting board at ambient temperature. A frozen steak pulled from the freezer and left to sit in 85-degree shade goes through the danger zone twice: once as it warms up, and again if any portion reaches temperature before cooking. Moving frozen proteins to the fridge section 12 to 24 hours before you plan to cook keeps the defrost process within a safe temperature range throughout.
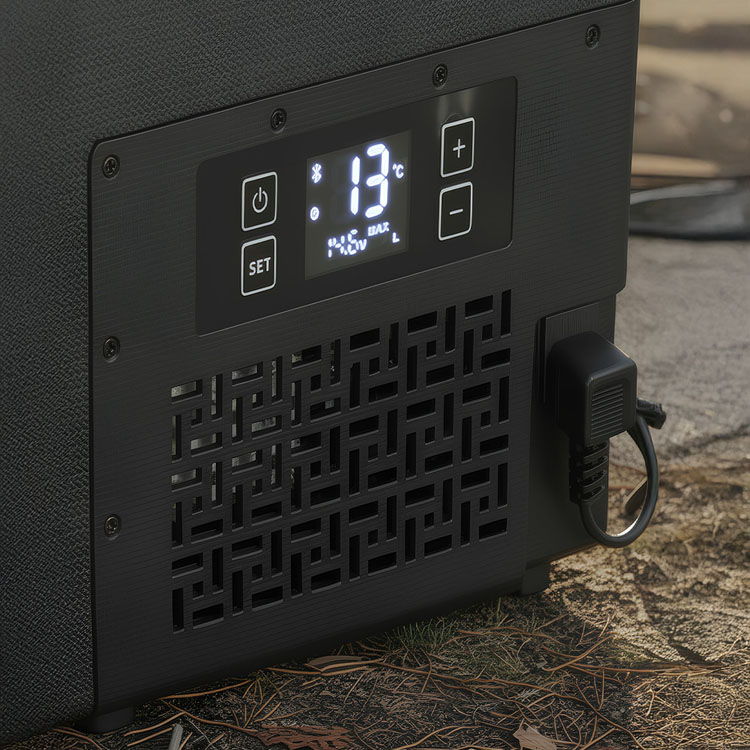
Monitor fridge temperature actively, especially in extreme heat. Many 12V fridges, including the Mammoth 40L, allow Bluetooth monitoring through a smartphone app, which means you check internal temperature without opening the lid. Each lid opening adds warm ambient air to the fridge interior and increases compressor run time. On a hot day on a multi-day trip, minimizing lid openings meaningfully extends battery life and reduces temperature fluctuations inside the unit.
Why the Mammoth 40L Works as the Core of Your Overlanding Food System
Most portable fridge freezer overlanding options make you choose between portability and performance. Heavy units with robust compressors require mounting hardware, fridge slides, and a permanent location in the cargo area. Lighter units often sacrifice insulation quality or temperature range. The Mammoth 40L from TRP 4×4 resolves this trade-off through its EPP expanded polypropylene body, which provides high insulation efficiency at a fraction of the weight of traditional fridge housings. At 15 lbs, it is one of the lightest true compressor fridge-freezers in the 40L category.
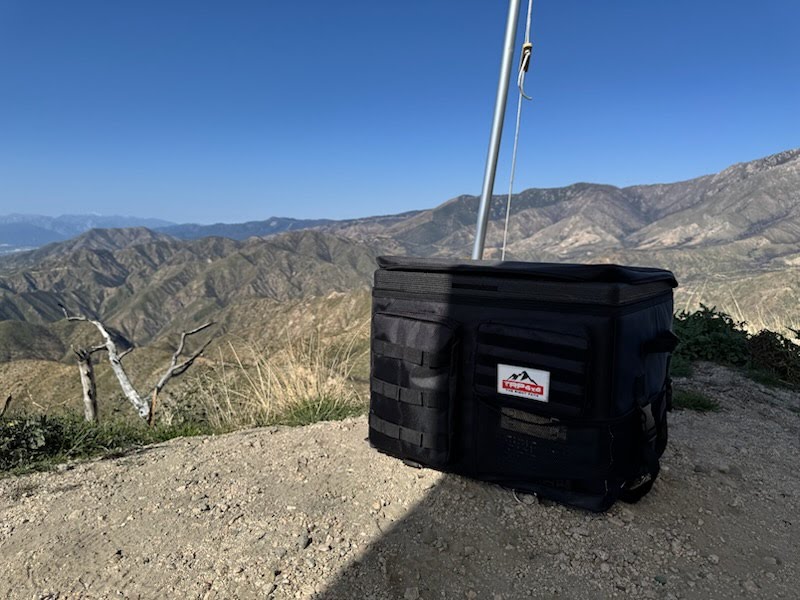
The no-mount design is a meaningful practical advantage for overlanders who run multiple setups or switch between vehicles. There is no need to build a dedicated fridge drawer or install brackets. The Mammoth moves from the Jeep to the truck bed to base camp on its own. For overlanders using rooftop tents, trailers, or any setup where cargo space is fluid from trip to trip, a fridge requiring permanent installation creates logistical complexity a portable unit avoids entirely.
The Bluetooth app control and ECO/MAX cooling modes add operational flexibility. In ECO mode, the compressor runs conservatively, drawing less power during mild ambient conditions. Switching to MAX mode on a hot desert day where the fridge is working against 100-degree ambient keeps internal temps stable without manual intervention. Monitoring and adjusting both modes remotely, without opening the lid, is a practical feature experienced overlanders use regularly, not a novelty. The 40L capacity is sized correctly for one to two people on trips of five to seven days, making the Mammoth a practical portable fridge freezer overlanding solution as either a primary unit or a dedicated freezer in a two-fridge group setup.
Pros and Cons of a 12V Fridge-Based Overlanding Food System
Pros
- Eliminates ice logistics entirely: no sourcing, managing, or draining meltwater mid-trip.
- Maintains precise temperature down to 5°F, keeping food safely below the USDA danger zone of 40°F indefinitely.
- Expands your overlanding meal planning options to include fresh produce, dairy, and frozen proteins for the full trip duration.
- The Mammoth 40L weighs 15 lbs and requires no mounting hardware, making it fully portable across multiple vehicles and setups.
- ECO mode reduces power draw during mild conditions, extending battery and solar runtime on longer off-grid trips.
- Bluetooth app monitoring lets you check and adjust temperature without opening the lid, reducing compressor load and temperature swings.
- True freezer capability down to 5°F supports pre-frozen meal prep at home, reducing in-camp cooking time significantly.
- The 40L capacity handles one to two people for five to seven days, or functions as a dedicated freezer in a two-unit group setup.
Cons
- Requires a reliable power source: 12V/24V DC or AC. Running from a vehicle’s primary starter battery without an auxiliary battery risks a dead start in the morning.
- 40L suits solo and two-person trips well; groups of four or more need a second unit or a larger-capacity fridge.
- A compressor fridge adds complexity to your electrical system. Pairing with a dedicated auxiliary battery or lithium power station is strongly recommended.
Final Verdict
A complete overlanding food system is not a single purchase, and no single product makes up for weak planning in the other components. It is a set of decisions across cold storage, cooking, meal planning, dry goods, and food safety, each one reinforcing the others. The overlanders who eat well in the field are the ones who treat overlanding food system planning with the same seriousness they give to recovery gear or navigation. In my experience both personally and from years of conversations with the 4WDTalk community, food system failures are among the most avoidable problems on the trail, and among the ones with the highest morale cost when they happen.
Switching from a cooler to a 12V compressor fridge is the single highest-impact upgrade in this system for anyone doing trips of three days or more. It changes what you eat, how you plan, and how much time you spend managing cold storage versus enjoying the trip. For solo overlanders, couples, and anyone running a rooftop tent or trailer setup without a permanent fridge mount, the Mammoth 40L’s combination of true freezer performance, 15-lb portability, and Bluetooth app control makes it a strong core for the cold storage component of the system.
Pair the fridge with a structured overlanding meal plan built around sequenced perishables, a solid dry goods base, and strict food safety practices, and you have a food system built for any length of trip across any terrain. The goal is simple: arrive at camp at the end of a hard day on the trail and eat a real meal without a fight.
Frequently Asked Questions
How much power does a 12V fridge draw on an overlanding trip?
Power draw varies by model, ambient temperature, and how often the lid opens. Most compressor fridges in the 35-50L range draw 30 to 50 watts under normal operating conditions, though draw spikes at startup and during active cooling cycles. On a hot day at 100°F ambient, expect the compressor to run more frequently. The Mammoth 40L includes an ECO mode for battery-conscious operation and battery protection circuitry to prevent over-discharge. For trips of two or more nights without shore power, a dedicated auxiliary battery or lithium power station is strongly recommended alongside a solar input to replenish during the day.
How do I keep my overlanding food system organized in the field?
Label everything before departure. Pre-package each day’s perishable ingredients in labeled zip-lock bags or small containers and load them into the fridge in reverse order: day one meals accessible at the top, later meals toward the bottom. Keep a separate dry goods bin with consistent contents so you always know what is in it without digging. A dedicated spice kit, a small cutting board, and a single kitchen bag for utensils and tools keep your cooking area functional in five minutes or less after arriving at camp.
Is 40 liters enough capacity for overlanding?
For one to two people on a trip of five to seven days, 40 liters is sufficient when combined with a dry goods supply and smart packing. Pre-portioning ingredients in flat zip-lock bags rather than bulky containers recovers substantial space. Groups of three or more benefit from a larger unit or running two units: one dedicated to refrigeration and one to freezing. The Mammoth 40L’s specs place it squarely in the solo and two-person sweet spot, with its 20in x 15in x 16.71in footprint fitting comfortably in most truck beds, cargo areas, and trailer setups.
What is the best overlanding meal planning approach for beginners?
Start with a written menu covering every meal for every day of the trip. Shop from the menu, not from general categories. Organize ingredients by day in labeled bags before loading the fridge. Sequence perishables so fresh and fragile items appear in the first two days of meals and hardier proteins and produce fill the middle days. Keep freeze-dried backup meals for the final days or for schedule disruptions. This structure eliminates the most common beginner problem: arriving at day three with nothing logical to cook because food was used out of order.
Does the Mammoth 40L require a fridge slide or mounting bracket?
No. The EPP expanded polypropylene body keeps the unit lightweight enough at 15 lbs to carry, load, and position without dedicated mounting hardware or slides. This makes it significantly more flexible than heavier units requiring permanent installation. It fits in a truck bed, the rear cargo area of an SUV, a trailer, or a base camp setup without any modifications to your rig. For overlanders who use multiple vehicles or frequently reconfigure their setup, this is a practical advantage over bracket-dependent alternatives.
What food safety rules are most important for overlanding?
Keep perishables below 40°F at all times. The USDA danger zone for bacterial growth runs from 40°F to 140°F, and bacteria reach dangerous levels within two hours in this range, or one hour above 90°F ambient. Defrost proteins in the fridge section, not at ambient temperature. Pre-portion raw proteins in sealed bags at home to avoid handling them in the field. Wash hands before and after food prep with soap and running water, not only sanitizer. Monitor your fridge temperature actively, and avoid leaving the lid open longer than necessary to prevent temperature spikes inside the unit.
Just so you know, some of the cool stuff we mention comes with affiliate links, meaning we earn a commission if you buy (no extra charge to you!). Plus, we occasionally feature sponsored content, but rest assured, we only shout out products we genuinely stand behind.