


Quick Verdict: A complete off-road lighting setup uses five lighting zones: forward driving, peripheral/cornering, fog/dust, scene/camp, and undercarriage. Start with a combo-beam LED light bar on your bumper for forward coverage (Zone 3), add ditch lights on the A-pillars for peripheral visibility (Zone 2), and finish with rock lights for wheel placement on technical terrain. Wire everything through a relay kit with proper fuse sizing, and you have a system covering every trail condition from high-speed desert to slow-speed rock crawling.
Last updated: March 2026 | 12 min read
In This Article
- Why Your Stock Headlights Fail on Trails After Dark
- Key Specs at a Glance
- The Five Lighting Zones Every Off-Road Rig Needs
- Beam Patterns Explained: Spot, Flood, Combo, and Fog
- Off-Road Light Mounting: Where Each Light Belongs
- Light Bar Wiring: Relays, Fuses, and Wire Gauge
- Build Order: How to Prioritize Your Off-Road Lighting Setup
- Five Common Off-Road Lighting Mistakes and How to Avoid Them
- Pros and Cons of a Full Lighting System
- Final Verdict
- Frequently Asked Questions
Why Your Stock Headlights Fail on Trails After Dark
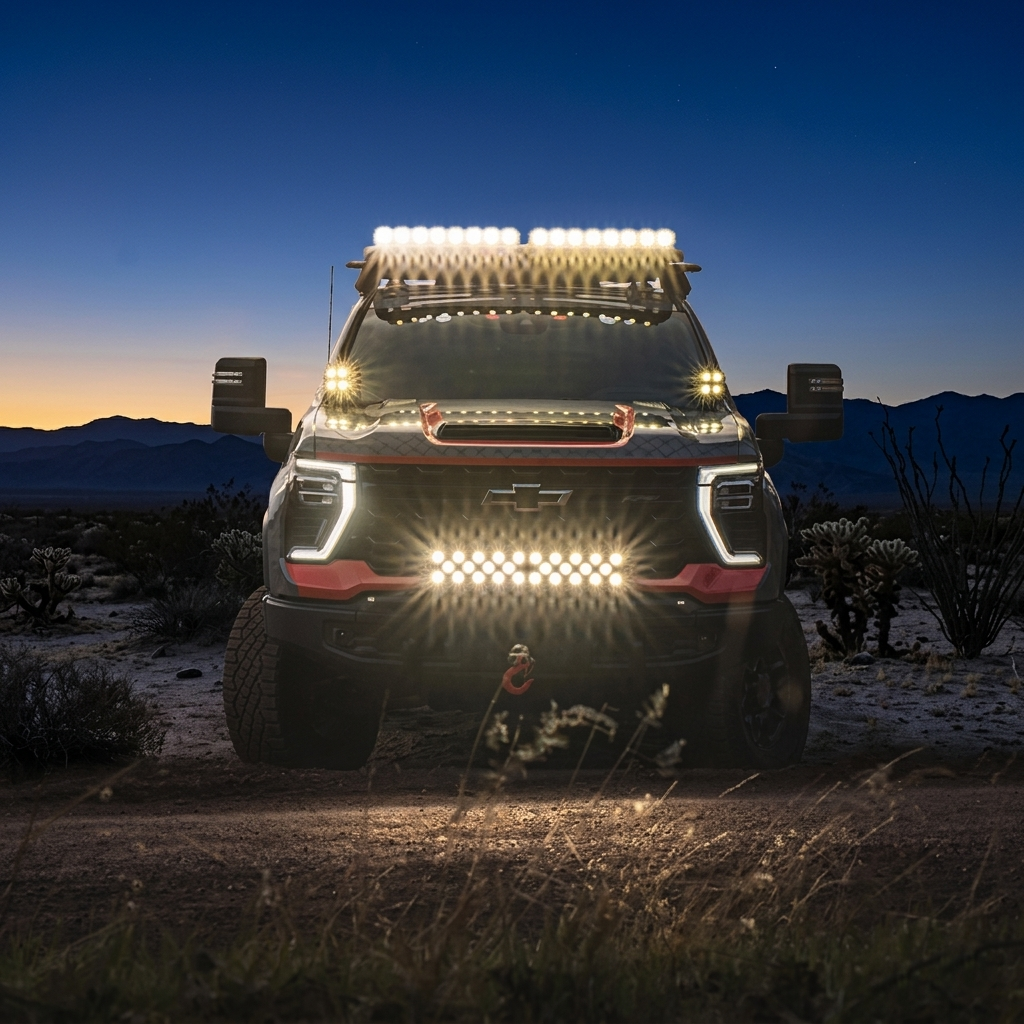
You turn off the pavement at 7 PM, and within 200 yards your stock headlights prove they were designed for lane-marked highways, not unmarked trails. Factory low beams on most trucks project 150-250 feet ahead in a narrow cone optimized for oncoming traffic courtesy. However, high beams extend reach to 350-500 feet but still leave your peripheral vision dark. In addition, on a winding forest trail at 15 mph, where fallen branches, washouts, and boulders sit 10 feet off the center line, peripheral blind spots become a real problem.
A proper off-road lighting setup solves this by layering multiple lights across different zones on your vehicle. Each light covers a specific area: forward distance, peripheral sides, fog zone below bumper height, scene lighting around the truck, and ground-level illumination for tire placement. Ultimately, the goal is not more lumens in a single direction but distributed coverage across every angle you need on the trail.
This approach to off-road lighting setup transforms your night-driving capability. Rather than guessing at light types and positions, zone-based off-road lighting setup planning ensures every dollar spent addresses a real visibility gap. Notably, build your system over time as budget allows.
The guide below breaks down each zone, explaining where to mount your lights, walking through the wiring fundamentals, and giving you a prioritized build order so you spend money on the lights producing the biggest safety improvement first.
Key Specs at a Glance
| Lighting Zone | Light Type | Mount Position | Beam Pattern |
|---|---|---|---|
| Zone 1: Fog/Dust | Fog pods or SAE fog lights | Below bumper, low mount | Wide horizontal, narrow vertical |
| Zone 2: Peripheral | Ditch lights / pods | A-pillar or hood cowl | Driving or wide spot (20-40 degree) |
| Zone 3: Primary Driving | Light bar or driving pods | Bumper or grille | Combo (spot center, flood edges) |
| Zone 4: Distance | Spot bar or laser pods | Roof rack or upper bumper | Spot or pencil beam |
| Ground: Undercarriage | Rock lights | Wheel wells, skid plates | Wide flood (unfocused) |
Featured Partner
Boss Lighting: Complete Off-Road Lighting Systems
Boss Lighting builds light bars, ditch light pods, and driving lights engineered for every zone on your rig. CNC-machined 6061 aluminum housings, patented cooling technology, and a limited lifetime warranty on every product.
The Five Lighting Zones Every Off-Road Rig Needs
Professional desert racers and experienced overlanders organize their off-road lighting setup into zones, with each zone covering a specific area around the vehicle. This zone-based approach, popularized by Baja Designs and adopted across the industry, prevents the common mistake of dumping all your budget into one massive light bar while leaving critical areas dark.
Zone 1: Fog and Dust Coverage
Zone 1 lights mount low on the bumper and project a wide, flat beam pattern aimed below headlight height. Because they sit below headlight height, their purpose is cutting through fog, dust, rain, and snow without scattering light back into your eyes. Amber lenses work especially well here because 590-625nm wavelengths pass through airborne particles with less backscatter. Our amber vs white off-road lights breakdown covers the performance science. In particular, Zone 1 is most critical for desert convoy driving where the lead truck’s dust cloud hangs in the air for trailing rigs.
Zone 2: Peripheral and Cornering
Zone 2 covers the area 30-60 degrees off your vehicle’s center line. Your ditch lights setup on the A-pillars or hood cowl handles this zone, angled outward to light up trail edges, ditches, and obstacles entering your path from the sides. Without peripheral lighting, you drive with tunnel vision, unable to see the washed-out shoulder or low-hanging branch 15 feet to your left. On switchback trails, cornering visibility becomes critical where your headlights point straight while the trail curves away.
Zone 3: Primary Forward Driving
Zone 3 is your foundation. A combo-beam light bar or pair of driving pods on the bumper or grille provides the primary forward illumination supplementing your headlights. Combo beams concentrate a spot pattern in the center for distance throw while flood segments on the edges fill in the mid-range. For most overlanders, a 20-30 inch combo bar on the bumper covers Zone 3 effectively. Therefore, this is the first light to buy when building your off-road lighting setup from scratch.
Zone 4: Long-Distance Spot
Zone 4 extends your vision to 1,000+ feet for high-speed desert running or long straightaways. Dedicated spot beams or laser-hybrid pods mount on the roof rack or upper bumper position. However, most trail drivers below 45 mph on forest or mountain trails rarely need Zone 4 lighting. Ultimately, this zone is the lowest priority for the average overlander and the highest priority for desert racers.
Ground Zone: Rock Lights and Undercarriage
Rock lights off-road are compact LED pods mounted in wheel wells, on skid plates, or along rocker panels. They light up the ground directly beneath and beside your tires, which is essential for night rock crawling where precise tire placement determines whether you clear an obstacle or drag your skid plate across granite. Mount one light per wheel well at the 12 o’clock position for direct downward illumination, or use two per well at 10 and 2 o’clock for broader coverage. Consequently, choose IP67 or IP68 rated units to survive mud, water crossings, and trail debris.
Beam Patterns Explained: Spot, Flood, Combo, and Fog
Beam pattern determines how your light distributes its output, and choosing the wrong pattern for a mounting position wastes lumens where you do not need them. This distribution affects your visibility in every zone.
Spot beams concentrate light into a narrow cone (8-15 degrees), projecting maximum distance at the expense of width. These work for Zone 4 distance lighting and roof-mounted bars on open terrain. In contrast, at slow trail speeds, a pure spot beam creates a bright tunnel with dark edges.
Flood beams spread light across a wide arc (40-60 degrees), covering more area with less throw distance. They work well for scene lighting, campsite illumination, and backup lights. In particular, on technical trails at walking speed, flood beams give you the widest view of your immediate surroundings.
Combo beams blend spot and flood by using spot optics in the center LEDs and flood optics on the outer LEDs. Using this hybrid approach, a single combo bar delivers both distance and width. For Zone 3 primary driving, this pattern represents the most versatile option and the best choice for a first light bar purchase.
Fog beams project a wide horizontal spread (60-100 degrees) with a narrow vertical cut. This pattern avoids bouncing light upward into fog, dust, or precipitation. Therefore, fog beams belong exclusively in Zone 1, mounted low on the bumper.
Off-Road Light Mounting: Where Each Light Belongs
Mounting height and angle determine how effectively each light serves its intended zone. The right light in the wrong position underperforms, and the wrong light placement wastes your budget.
Bumper and Grille Mounts
Your primary Zone 3 light bar belongs at bumper or grille height, approximately 24-36 inches above the ground. At this height, the beam projects along the trail surface with minimal upward scatter. Bumper-level placement also reduces the glare effect on dust and fog compared to roof-mounted positions. Moreover, most aftermarket bumpers include light bar cutouts or tab mounts sized for 20-30 inch bars, making installation straightforward.
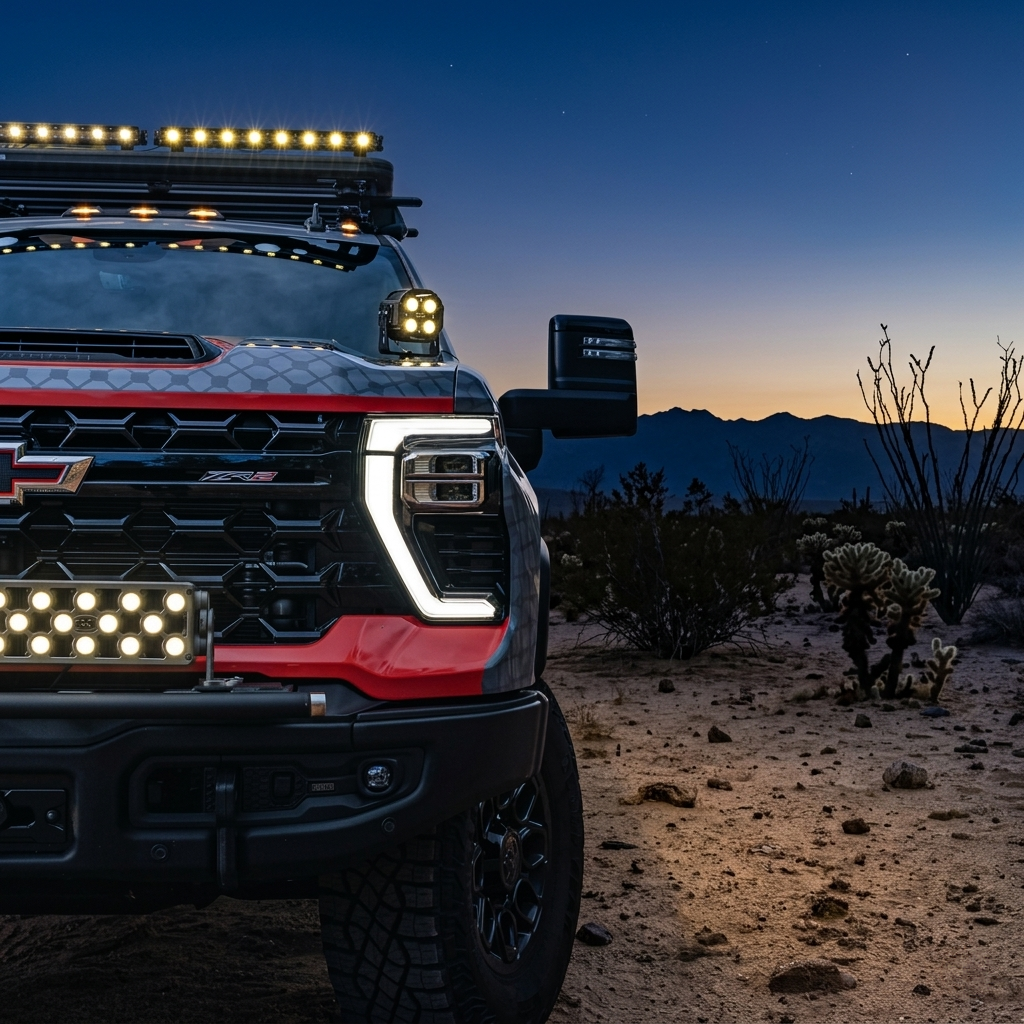
A-Pillar and Ditch Light Mounts
Ditch lights mount at the base of the windshield, typically on A-pillar brackets or hood cowl mounts. Aim the pods approximately 30 degrees outward from the vehicle center line and 10 degrees below horizontal. This angle projects the beam 50-100 feet ahead and 15-30 feet to the side, covering the peripheral zone your headlights miss. Therefore, A-pillar pod setup in this position delivers the single largest visibility improvement per dollar on most trail rigs, since peripheral blind spots cause more close-call incidents than forward distance limitations.
Roof Rack Mounts
Roof-mounted light bars sit 6-7 feet above the ground, giving them maximum throw distance but creating two problems. First, the high angle generates significant hood glare, bouncing light off your own hood and windshield back into your eyes. Second, roof lights light up dust, rain, and snow particles from above, making adverse conditions worse. For these reasons, roof mounting works best with spot-pattern bars aimed for pure distance on clear nights. Avoid roof-mounting flood or combo bars unless your hood has a matte-black finish to reduce glare.
Wheel Well and Undercarriage Mounts
Rock lights off-road mount inside wheel wells at the top center (12 o’clock) using existing bolt holes, self-tapping screws, or adhesive brackets. For skid plate mounting, attach lights to existing skid plate bolts pointing downward. Ensure all wiring routes away from moving suspension components, exhaust heat, and tire contact areas. Also, use wire loom or split tubing to protect exposed runs along the frame.
Featured on Boss Lighting
Excel Cube 4 Ditch Light Package
The Excel Cube 4 delivers focused driving optics in a CNC-machined housing built for A-pillar and cowl mounting. Add Zone 2 peripheral coverage to your rig with one bolt-on package.
Light Bar Wiring: Relays, Fuses, and Wire Gauge
Every aftermarket off-road light needs a dedicated wiring circuit with three safety components: a fuse, a relay, and a switch. Running lights directly off your headlight circuit or a dashboard accessory port risks blown fuses, melted wires, or electrical fires. However, wiring the circuit correctly takes 1-2 hours per circuit and protects your entire electrical system.
Why You Need a Relay
Essentially, a relay is an electrically operated switch allowing a small control current (from your in-cab toggle) to activate a larger power circuit (from the battery to the lights). Most in-cab switches handle 5-10 amps safely. However, a 20-inch LED light bar drawing 120 watts pulls 10 amps at 12 volts, and a 50-inch bar pulling 300 watts draws 25 amps. Without a relay, those amps flow through your thin switch wiring and melt the insulation. Consequently, a standard 12V DC 30/40-amp automotive relay solves this by routing full battery power directly to the lights while your switch only triggers the relay coil (drawing under 0.5 amps).
Fuse Sizing
Calculate your fuse size with this formula: total watts divided by 12 volts, then add 20% buffer. For example, a light bar drawing 180 watts at 12V pulls 15 amps, so a 20-amp fuse provides proper protection. Place the fuse as close to the battery positive terminal as possible. If the wire shorts against the frame anywhere between the battery and the lights, the fuse blows before the wire melts. However, skipping this step or oversizing the fuse defeats the safety purpose entirely.
Wire Gauge Selection
Wire gauge depends on amp draw and wire run length. For runs under 10 feet at 10-15 amps, 14-gauge wire handles the load. When runs exceed 10 feet or draws rise above 15 amps, step up to 12-gauge or 10-gauge. In particular, smaller gauge numbers indicate thicker wire. As a result, when in doubt, go one size thicker since undersized wire creates resistance, heat, and voltage drop at the light. Most pre-made light bar wiring kits ship with 14-gauge or 16-gauge wire suitable for single bars under 200 watts. Subsequently, if you run multiple lights on one circuit exceeding 200 watts total, you’ll need to upgrade to a heavier kit or wire your own with 10-gauge.
Build Order: How to Prioritize Your Off-Road Lighting Setup
Budget matters, and you do not need to build all five zones at once. Specifically, the priority order below is based on safety impact per dollar, from highest to lowest.
Priority 1: Zone 3 primary driving light. A combo-beam LED light bar on the bumper delivers the single biggest improvement over stock headlights. Start here with a 20-30 inch bar and a quality wiring kit. Therefore, this approach addresses your most critical gap: forward visibility beyond your headlight range.
Priority 2: Zone 2 ditch lights. A pair of driving-pattern pods on A-pillar mounts fills your peripheral blind spots. This is the most underrated upgrade in any off-road lighting setup. Specifically, ditch lights reveal trail edges, wildlife, and side obstacles your bumper bar and headlights miss entirely. Additionally, these ditch lights setup kits include vehicle-specific brackets, pods, and a wiring kit for $200-400.
Priority 3: Zone 1 fog lighting. If you regularly drive in dust, fog, or precipitation, amber fog pods below the bumper transform your low-visibility performance. Notably, for clear-weather-only drivers, this drops lower in priority.
Priority 4: Rock lights. For night crawlers and technical trail drivers, rock lights off-road provide essential tire placement visibility. Moreover, a 4-pod kit (one per wheel well) runs $80-200 and installs in under an hour.
Priority 5: Zone 4 distance lighting. Spot bars or laser pods for high-speed distance. Ultimately, unless you run desert at 40+ mph at night, this is a luxury zone for most trail drivers.
Five Common Off-Road Lighting Mistakes and How to Avoid Them
Mistake 1: Roof-mounting your only light bar. A single roof bar creates maximum hood glare and lights up every dust particle between you and the trail. Instead, mount your primary bar at bumper height and save the roof for a dedicated spot bar (if needed at all). Specifically, our light bar sizing guide walks through the measurements.
Mistake 2: Skipping the relay. Running 10+ amps through a thin dashboard switch wire is a fire risk. Always wire through a relay, even for small pod lights. Therefore, the relay and kit cost $15-30 and take 20 minutes to install.
Mistake 3: Ignoring beam pattern for the position. Flood beams on the roof bounce light everywhere and light up dust. Spot beams at bumper level create a narrow tunnel with no peripheral coverage. Therefore, match the beam pattern to the mounting zone as described in the zone chart above.
Mistake 4: Oversizing the fuse. A 50-amp fuse on a 15-amp circuit does not protect anything. Size your fuse 20% above the circuit’s rated draw. Consequently, a wire short will melt the wire before a grossly oversized fuse blows.
Mistake 5: No independent switching. Wire each light zone to its own switch so you activate only the zones needed for current conditions. Running all lights simultaneously drains your battery faster, creates excess glare in certain conditions, and wastes output where you do not need it. In fact, in fog, you want Zone 1 active and Zone 3/4 dimmed or off. For broader understanding of light laws on public roads, check our light bar laws by state reference.
Pros and Cons of a Full Lighting System
Pros of a Multi-Zone Setup
- Eliminates peripheral blind spots responsible for most close-call trail incidents at night
- Layered zones let you adapt lighting to conditions: fog, dust, clear, or technical terrain
- Spreads electrical load across multiple circuits, reducing single-point failure risk
- Modular build order lets you add zones over time as budget allows
- Independent switching prevents battery drain from running unnecessary lights
- Proper off-road light mounting at bumper height reduces glare compared to single roof bar
Cons of a Multi-Zone Setup
- Full five-zone systems run $800-2,500+ depending on brand and quality tier
- Wiring multiple circuits adds complexity and installation time (4-8 hours for a full build)
- More lights mean more potential failure points on the trail (connectors, switches, fuses)
- Aerodynamic drag from bumper and roof-mounted bars increases fuel consumption at highway speed
Final Verdict
Building an off-road lighting setup is a zone-by-zone process, not a single-product purchase. Start with a Zone 3 combo-beam light bar on the bumper for your foundation. Add Zone 2 ditch lights for peripheral coverage. Subsequently, expand to fog lights, rock lights, and distance spots as your trail needs and budget grow. Overall, a complete off-road lighting setup covering all five zones makes night driving on technical terrain safe and enjoyable.
Indeed, the most important principle is to match the beam pattern to the mounting position, and wire every circuit through a fuse and relay. Notably, these two fundamentals separate a safe, effective lighting system from a mess of bright lights creating glare, dead spots, and electrical problems.
Boss Lighting builds products for every zone in your off-road lighting setup. Their Premier Series light bars cover Zone 3 forward driving, the Excel Cube 4 ditch light package handles Zone 2 peripheral coverage, and their full product lineup includes amber configurations for Zone 1 fog duty. Every unit ships with CNC-machined 6061 aluminum housings, patented cooling technology, and a limited lifetime warranty. Notably, our off-road light types breakdown covers the full product landscape for a comprehensive comparison of light technologies across these zones.
Featured on Boss Lighting
Build Your Complete Trail Lighting System
From Premier Series light bars to Excel Cube ditch lights, Boss Lighting covers every zone on your rig. Designed, engineered, and manufactured in the USA with a limited lifetime warranty on every product.
Frequently Asked Questions
Where is the best place to mount an off-road light bar?
Bumper or grille height (24-36 inches above ground) is the best primary off-road light mounting position. At this height, the beam projects along the trail surface with minimal upward scatter into dust or fog. Roof mounting creates more throw distance but generates hood glare and lights up airborne particles. Consequently, start with bumper mounting for your primary bar and add a roof bar later only for dedicated distance lighting on open terrain.
How do I wire off-road lights without damaging my truck’s electrical system?
Always wire through a relay and fuse. The relay lets a small switch current control the full battery-to-light circuit, protecting your switch wiring from high amp loads. Size the fuse at 20% above your light’s amp draw (watts divided by 12 volts). Place the fuse within 12 inches of the battery positive terminal. Moreover, use 14-gauge wire for circuits under 15 amps and 10-12 gauge for higher loads. For example, a pre-made light bar wiring kit includes the relay, fuse, switch, and connectors for $15-30.
What is a ditch lights setup and why does it matter?
A ditch lights setup places small LED pods at the base of your windshield on A-pillar brackets, aimed 30 degrees outward and 10 degrees below horizontal. This covers the peripheral zone (15-30 feet to each side of the vehicle) your headlights and bumper bar miss entirely. Notably, ditch lights deliver the second-highest safety improvement in any off-road lighting setup because peripheral blind spots cause more trail incidents than forward distance limitations.
Do I need rock lights for off-road driving?
Rock lights off-road are essential for night rock crawling where precise tire placement determines clearance on obstacles. If you drive technical trails after dark, a 4-pod kit (one per wheel well) gives you ground-level visibility for $80-200. However, for overlanders sticking to graded forest roads and moderate trails, rock lights are a lower priority behind your primary bar and ditch lights.
What beam pattern should I choose for my first light bar?
Combo beam is the best starting pattern for a first light bar purchase. These hybrid bars use spot optics in the center LEDs for distance throw and flood optics on the outer LEDs for width. This single-bar solution covers most trail conditions without requiring additional lights. Therefore, pure spot bars work for high-speed desert only, and pure flood bars lack the forward throw needed for moderate-speed trails.
How many amps do LED off-road lights draw?
Calculate amp draw by dividing total wattage by 12 volts. A 120-watt light bar draws 10 amps. Pair a 60-watt ditch light pod set (drawing 10 amps combined) with a full five-zone system. Notably, systems with 400-600 total watts draw 33-50 amps. Most truck alternators output 120-160 amps, leaving sufficient headroom for a complete off-road lighting setup alongside your vehicle’s standard electrical loads.