


Quick Verdict: Most camp cooking guides skip the hard parts. This one covers briquette counts by temperature, water rations per person per day, altitude adjustments above 5,000 ft, and the cooler strategy keeping meat safe for 48 hours without an ice run. Everything here has been tested in the Big Bear backcountry, the Mojave, and the Sierras from a Jeep Gladiator and Chevy Colorado ZR2. For overlanders sleeping out of the rig more than two nights at a stretch, this camp cooking system earns its space.
Last updated: April 2026 | 22 min read
Written by Alex Schult
Editor in Chief of 4wdTalk.com. 15+ years of off-road and overlanding experience with 1,000+ hours on the trail. Tests gear extensively in Big Bear backcountry on a Jeep Gladiator and Chevy Colorado ZR2.
We tested every method in this guide on actual overland trips. Amazon affiliate links support 4wdTalk.com at no extra cost to you.
In This Guide
- Why Camp Cooking Matters for Overlanders
- The Overland Camp Kitchen: Complete Setup
- Fuel and Heat Sources: Decision Framework
- Food Storage Without a Fridge
- Cooking Methods: The Five Systems
- Meal Planning for Multi-Day Trips
- Altitude and Weather Adjustments
- Water Management
- Cleanup and Leave No Trace
- 10 Field-Tested Pro Tips
- Frequently Asked Questions
Why Camp Cooking Matters for Overlanders

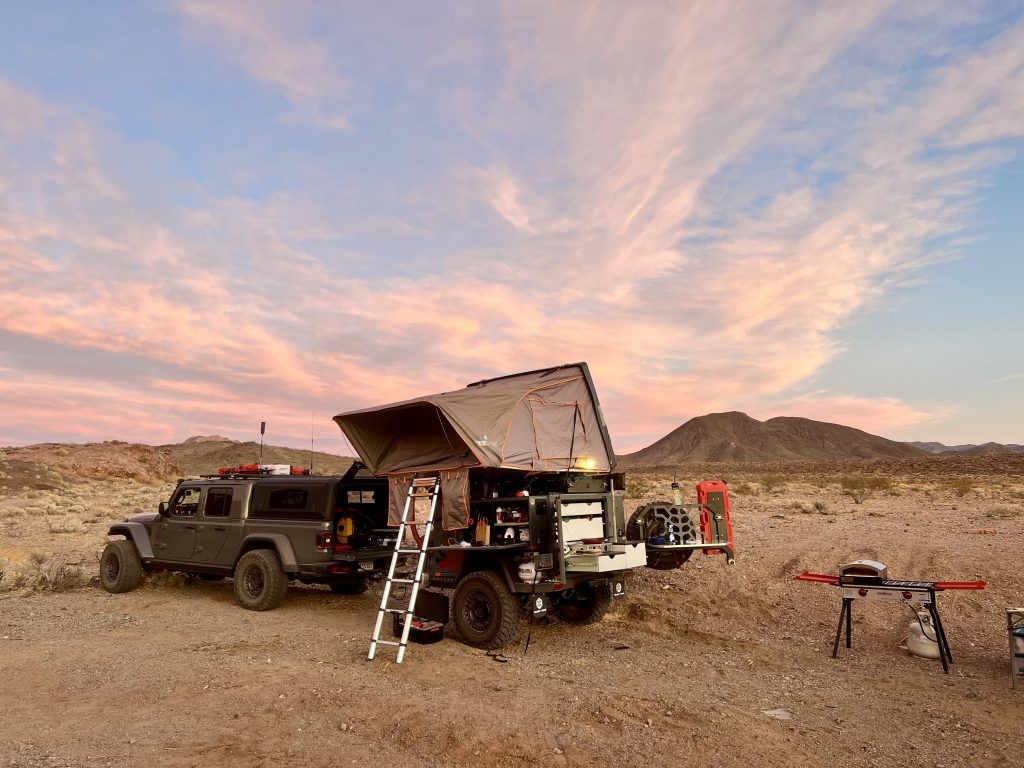
Camp cooking is the single biggest comfort factor on a multi-day overland trip. After a long day of trail driving, a solid hot meal resets your morale, your energy, and your sleep quality. A bad meal does the opposite. Moreover, after 1,000+ hours of base camp cooking across places like the Sierras, Mojave, Sedona and Big Bear backcountry, I learned one thing fast: generic camping food advice fails overlanders because it assumes a campground, a cooler full of ice, and a neighbor with a bag of charcoal. Overlanders operate with none of those safety nets.
This guide covers overland camp cooking as an engineering problem. Specifically, every section gives you numbers, tested protocols, and field-proven methods. You get briquette counts for Dutch oven temperatures, water rations by person and day, altitude adjustments above 5,000 ft, ice block math for coolers, and a structured meal plan framework for 3-day, 5-day, and 7-day trips. Nothing is theoretical. Every protocol here has been tested at base camp with a Jeep Gladiator or Chevy Colorado ZR2 as the supply truck.
The audience is overlanders sleeping out of their rig for 2 to 14 nights. If you car camp at campgrounds with power hookups, much of this exceeds your needs. However, if you run fire roads into remote base camps and need to eat well without resupply, every section earns its word count. Similarly, overlanding meals built around the frameworks below scale from a weekend run to a two-week expedition without structural changes.
The Overland Camp Kitchen: Complete Setup
The overland camp kitchen is a system, not a pile of gear. Specifically, a complete camp cooking setup consists of five functional zones: cooking surface, food prep, storage, water, and cleanup. Each zone has weight and space tradeoffs. As a result, getting the system right means faster meal prep, less gear thrash, and a camp staying organized across multiple nights of vehicle camping.
Cooking Surface
Your cooking surface determines every meal capability downstream. For base camp overlanding, a two-burner propane stove beats every other option on reliability, output, and ease. The Camp Chef Everest 2X pumps 20,000 BTU per burner and handles wind better than most competitors thanks to its enclosed burner design. Moreover, pairing it with a tabletop or a drop-down tailgate table gives you a complete stovetop kitchen rivaling your home range.
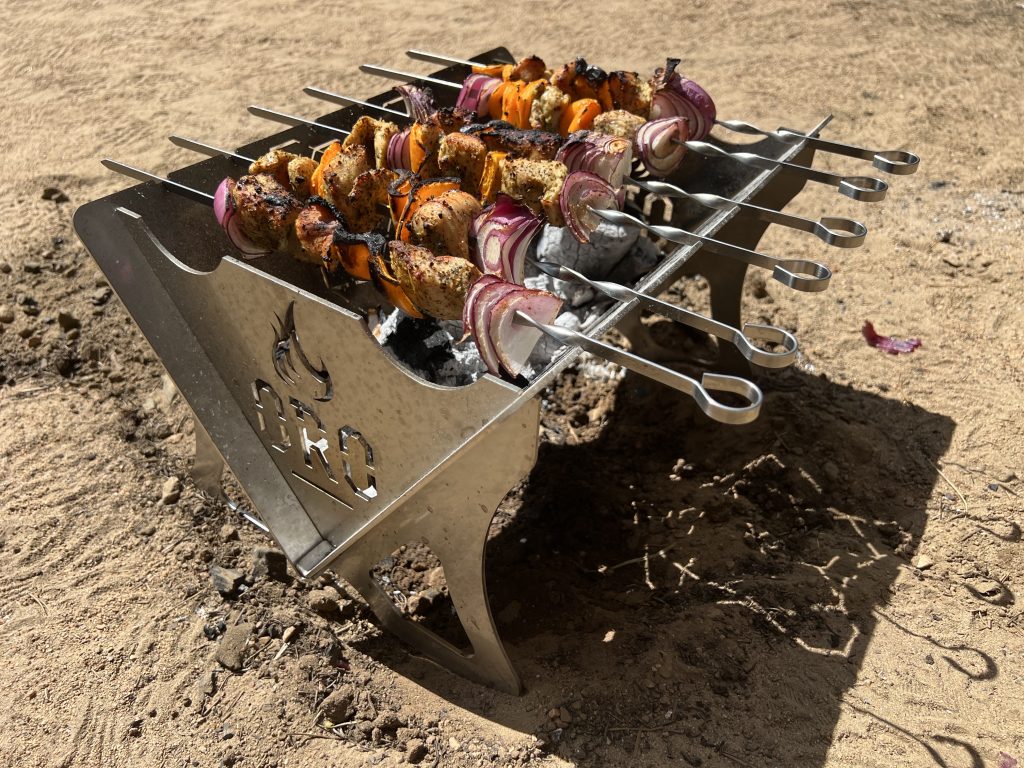
For live-fire cooking, a collapsible grill grate over a Pop-Up Fire Pit from Fireside Outdoor gives you direct-heat grilling plus ember-raking for Dutch oven work. The grate measures 18 inches wide, which fits a Lodge 12-inch cast iron skillet with room for a coffee pot alongside.
Food Prep Zone
A dedicated food prep surface prevents the worst camp cooking failure: chopping vegetables on a cooler lid which warps, slides, and contaminates. Specifically, the Front Runner Outfitters Drop Down Tailgate Table clamps to the Gladiator tailgate in under 30 seconds and gives you 24 by 36 inches of stable work surface. For Tacoma and 4Runner owners, the Snow Peak IGT system offers similar footprint with better modularity. Alternatively, if budget is tight, a Coleman camp table with adjustable legs gets the job done for under $60.
Storage
Drawer systems organize a camp kitchen across multiple trips. A set of pull-out drawers in the cargo bay keeps utensils, spices, pots, and pans accessible without unloading the vehicle. Notably, Goose Gear, Decked, and Front Runner all make drawer systems for Jeep Gladiator, Tacoma, 4Runner, and Colorado ZR2 platforms. Budget alternative: three Plano Sportsman’s Trunks labeled “cookware,” “pantry,” and “consumables.” Cost around $150 total versus $2,500+ for a full drawer system. For truck camping setups where weight matters, the Plano approach also saves 80+ pounds over a full drawer build.
Water
Water handling gets its own section later in this guide. For setup purposes, plan on a dedicated 7-gallon jerry can (Scepter MWC is the standard) for drinking water, plus a RotopaX 4-gallon for dish water. Importantly, keep them separate. Cross-contamination between dish water and drinking water ruins trips.
Cleanup
A two-basin wash setup cuts water use by 40% versus single-basin washing. Specifically, one basin holds soapy wash water, the second holds rinse water with a drop of bleach. Wash, rinse, air dry on a collapsible drying rack. Altogether, the whole system fits in a milk crate.
Fuel and Heat Sources: Decision Framework
Fuel selection determines range, reliability, and cost per trip. For overland camp cooking, four viable heat sources exist: propane, white gas, charcoal briquettes, and hardwood coals. Each wins in a different scenario. Therefore, the decision framework below cuts through the debate.
When Does Propane Win?
Propane wins for 80% of overland cooking scenarios. It lights instantly, produces clean heat, scales from simmer to boil, and refills at any hardware store. Specifically, a 1-pound green propane cylinder runs a two-burner stove for roughly 1.5 hours of moderate use. For multi-day trips, carry a 5-pound refillable tank and a Flame King adapter hose. Moreover, the 5-pound tank provides approximately 7.5 hours of burn time at 10,000 BTU output.
Weakness: propane performs poorly below freezing. At 0F, pressure drops 30% and burner output weakens. Solution: insulate the tank with a foam sleeve and store it inside the rig overnight during cold trips.
My Stove: Three Years With the Camp Chef Everest 2X
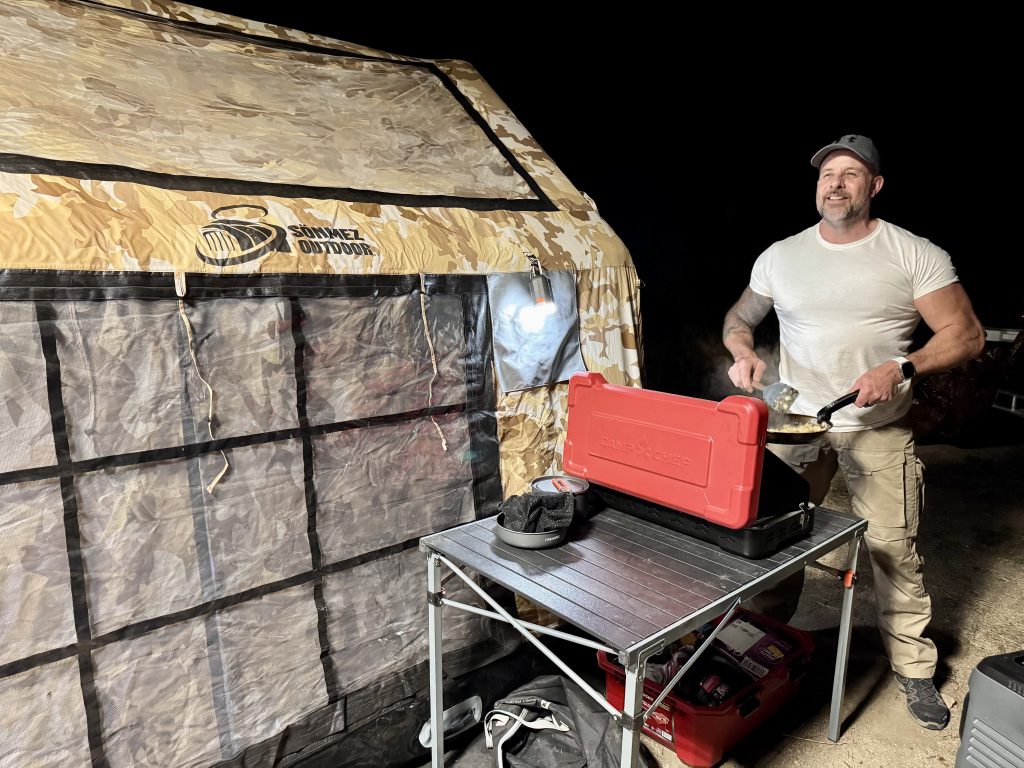
The Camp Chef Everest 2X has been my primary overland stove for three years. It lives in the Gladiator’s rear cargo drawer and gets pulled out for every base camp dinner from Big Bear to the Mojave to the eastern Sierras. Over 40+ trips, the matchless ignition has fired on the first try every time, including a soaked setup after a surprise summer storm at 8,200 ft.
The 20,000 BTU per burner output handles a Lodge 12-inch cast iron skillet and a full stockpot running at the same time without either losing heat. I have tested the Everest 2X against the Coleman Classic, the Primus Tupike, and the Partner Steel 2-Burner. The Everest wins on wind resistance specifically because of the enclosed burner chassis. In a 20 mph crosswind in the Alabama Hills, it was the only stove I have run where the flame stayed locked without a supplemental wind screen.
Weaknesses I have hit after three years: the piezo igniter on burner 2 started showing hesitation around month 28 (a 5-minute fix with a cheap Bic lighter as backup). The drip tray benefits from a pre-trip degreaser scrub, otherwise baked-on splatter builds up fast. Neither issue changes the recommendation. The stove is the single most-used piece of cooking gear in either rig.
What Alex Uses (3 Years)
Camp Chef Everest 2X Two-Burner Stove
20,000 BTU per burner, matchless ignition, enclosed burner design for wind resistance. My primary stove for 40+ overland trips across Big Bear, Mojave, and the eastern Sierras.
When Does White Gas Win?
White gas wins at altitude and in cold. For example, MSR WhisperLite International and Coleman dual-fuel stoves burn Coleman fuel, unleaded gasoline, or kerosene. At 10,000 ft and 20F, a white gas stove outperforms propane by roughly 40% on boil time. Therefore, for expedition-grade trips into the Sierras or Rockies in shoulder season, white gas is the reliable choice for camp cooking.
Weakness: white gas requires priming, produces soot when misadjusted, and costs more per BTU than propane. As a result, the complexity is not worth the tradeoff for standard summer trips.
When Do Charcoal Briquettes Win?
Charcoal briquettes win for Dutch oven cooking. The heat is steady, the temperature is controllable through briquette count, and stacking coals on the lid gives you even baking. Specifically, a standard Kingsford briquette produces approximately 25F of heat at the oven surface for 45 minutes of cook time.
Briquette math for a 12-inch Lodge Camp Dutch Oven: for 325F, use 15 briquettes on top and 7 underneath (22 total). To reach 350F, stack 16 on top and 8 underneath (24 total). Finally, for 375F, use 17 on top and 9 underneath (26 total). Additionally, add 1 briquette per side for every 1,000 ft above 3,000 ft elevation.
When Do Hardwood Coals Win?
Hardwood coals win for flavor. Oak, mesquite, and apple wood embers produce a smoke profile charcoal briquettes do not match. Grilled steaks, fish, and vegetables taste distinctly better over hardwood coals. However, the tradeoff: hardwood fires take 45 to 60 minutes to burn down to coals, versus 15 to 20 minutes for briquettes.
For overlanders, the practical approach is to use propane for breakfast and lunch (speed and efficiency), then briquettes or hardwood for dinner Dutch oven work (when the meal becomes part of the experience).
Food Storage Without a Fridge
The biggest camp cooking failure is food spoilage. For instance, a cooler without a strategy lasts 24 hours in summer heat. A cooler with the right ice strategy and pre-chill protocol lasts 48 to 72 hours. Meanwhile, a 12V fridge extends the window indefinitely. Here is the framework for overland camp cooking food safety.
Cooler Strategy With Ice Block Math
Ice blocks last 3x longer than ice cubes. Specifically, a 10-pound frozen ice block in a Yeti Tundra 45 maintains sub-40F temperature for approximately 60 hours at 85F ambient. The same cooler filled with 10 pounds of ice cubes lasts about 22 hours at the same ambient temp. Because the surface-to-volume ratio of a block is a fraction of cube ice, the melt rate drops dramatically.
Pre-chill the cooler for 12 hours before loading with a sacrificial ice block. As a result, the cooler’s internal temperature drops from 75F to 45F before any food goes in. Skipping this step costs you 12 hours of cold capacity because your food ice has to cool the cooler walls before cooling the food.
Load order matters. First, frozen meats go on the bottom layer. Next, ice blocks sit on top of the meats. Then, dairy and produce go on top of the ice blocks. Finally, drinks go in a separate cooler (dedicated to frequent opens) so the food cooler stays closed most of the trip.
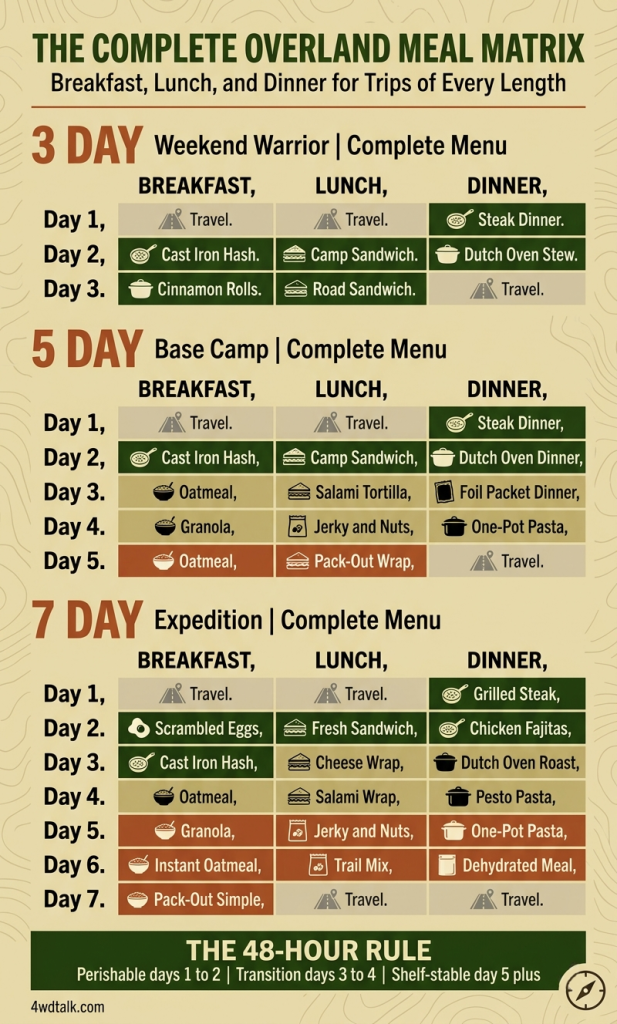
The 48-Hour Food Safety Rule
Perishable food in a properly iced cooler stays safely under 40F for roughly 48 hours. After the window, trust drops fast. The rule: plan perishable-heavy meals (raw meat, dairy) for days 1 and 2. Then shift to shelf-stable meals on day 3 and beyond. This is the foundation of overland meal planning, and every framework in this camp cooking guide builds on the 48-hour safety envelope.
Shelf-Stable Pantry Staples
A well-built overland pantry extends your trip range without refrigeration. Stock includes hard salami, vacuum-sealed cheddar (lasts 1 week unrefrigerated below 85F), tortillas, instant rice, instant oatmeal, dried pasta, shelf-stable pesto, peanut butter, jerky, dried fruit, nuts, instant coffee, powdered milk, bouillon cubes, hot sauce, olive oil, and spice kit. Consequently, this pantry covers days 3 through 14 without a fridge.
When a 12V Fridge Earns Its Weight
A 12V fridge costs $700 to $1,300 and weighs 40 to 60 pounds. It earns the weight if you trip more than 5 nights regularly, travel in summer heat above 90F, or carry high-value ingredients (steak, fresh fish, gourmet produce). However, for weekend warriors, a high-quality cooler is the better investment. Conversely, for 14-day expedition setups, the fridge pays back immediately.
My Fridge: Two Years With the ICECO VL75 ProD
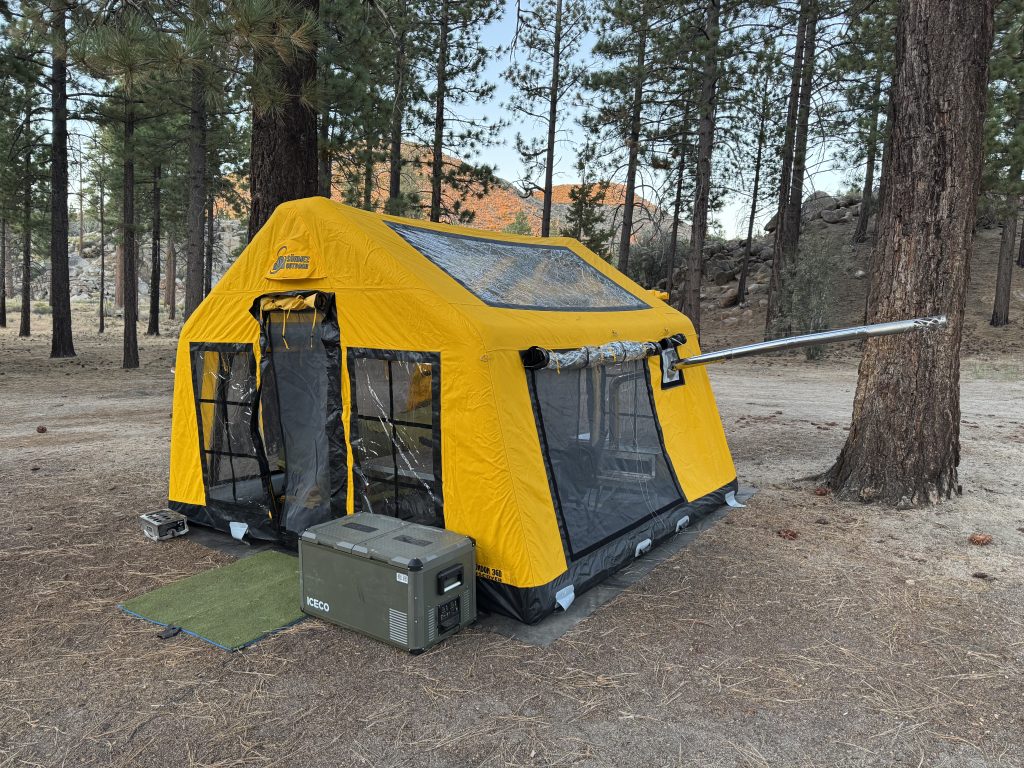
The ICECO VL75 ProD has been my overland fridge for two years. It lives in the Colorado ZR2 bed under a Front Runner slide tray and runs off the dual-battery setup. The 75-liter dual-zone design splits into a fridge and a freezer, which means I carry ice cream on a 6-day trip and still have room for fresh produce on the other side.
Performance numbers from my field tracking: set at 38F for the fridge side and 10F for the freezer, the VL75 ProD pulls an average 1.8 amps per hour in 85F ambient and 2.4 amps in 105F Death Valley heat. On a standard 100Ah lithium auxiliary battery, this translates to 3 to 4 days of fridge operation without solar input. With the 100W roof panel, the system runs indefinitely.
The multi-directional lid is the feature I underrated before buying it. On the ZR2, the bed layout meant a standard single-hinge lid would have hit the bed rail 4 inches before full open. The VL75 ProD’s dual-side opening solved the clearance problem without any build modification. For anyone running a mid-size truck with a drawer system, the lid flexibility is the deciding factor over the Dometic CFX3 75, which has a single-hinge lid.
Weaknesses after two years: the SECOP compressor buzz is audible inside a rooftop tent when the rig is parked directly below the tent footprint. Not a dealbreaker, but light sleepers should plan the fridge location accordingly. The compressor also cycles harder above 95F, which means solar sizing matters more in desert summer than spring or fall.
What Alex Uses (2 Years)
ICECO VL75 ProD 75L Dual-Zone Fridge
SECOP compressor, dual-zone (fridge + freezer), multi-directional lid for bed and drawer mounting. My primary fridge on the Colorado ZR2 through 2 years of Sierra, Mojave, and Baja trips.
Cooking Methods: The Five Systems
Overlanders rely on five camp cooking methods for 95% of camp meals. Each method has strengths, gear requirements, and ideal use cases. Additionally, understanding the five systems lets you match the method to the trip condition and the meal type. The sections below summarize each method. Full recipe collections for each camp cooking approach live in dedicated category guides linked from each section.
Dutch Oven Cooking
Dutch oven cooking is the gold standard for base camp dinners. Specifically, a 6-quart or 8-quart camp Dutch oven (legs included, flat-bottomed models fail on uneven coal beds) handles everything from chili and stew to bread, cobbler, and lasagna. The briquette math covered above gives you consistent temperature control. Expect 45 minutes of cook time for most Dutch oven recipes, plus 20 minutes for briquette prep.
Dutch oven wins for multi-hour braises, baked goods, and one-pot meals for 4 or more people. Moreover, the full library of dutch oven camping recipes covers 20+ tested dishes with overland-specific briquette counts and prep notes.
Cast Iron Skillet Cooking

Cast iron skillet cooking is the overland equivalent of a home sauté pan. For example, a 10 or 12-inch Lodge pre-seasoned skillet handles eggs, hash, seared steak, fajitas, and anything benefiting from a hot direct cooking surface. Cast iron outperforms stainless at camp because it holds heat through wind gusts killing a thinner pan.
Specifically, cast iron wins for breakfast hash, fajitas, seared proteins, and one-pan skillet dinners. Moreover, the skillet doubles as a serving platter, which cuts dishes. See our full collection of cast iron camping recipes for 15+ tested overland skillet dishes.
Foil Packet Cooking
Foil packet cooking is low-prep, low-cleanup, and travel-friendly. Specifically, wrap protein, vegetables, seasoning, and a pat of butter in heavy-duty foil, toss on coals for 25 minutes, and eat. No dishes. For large groups, prep foil packets at home and freeze them. They thaw in the cooler and cook over any heat source.
Foil packet wins for trip nights when you are exhausted, cleanup-averse, or cooking for picky eaters who want their own ingredients. Our foil packet camping recipes collection covers 12+ packet meals tested across solo trips and group base camps.
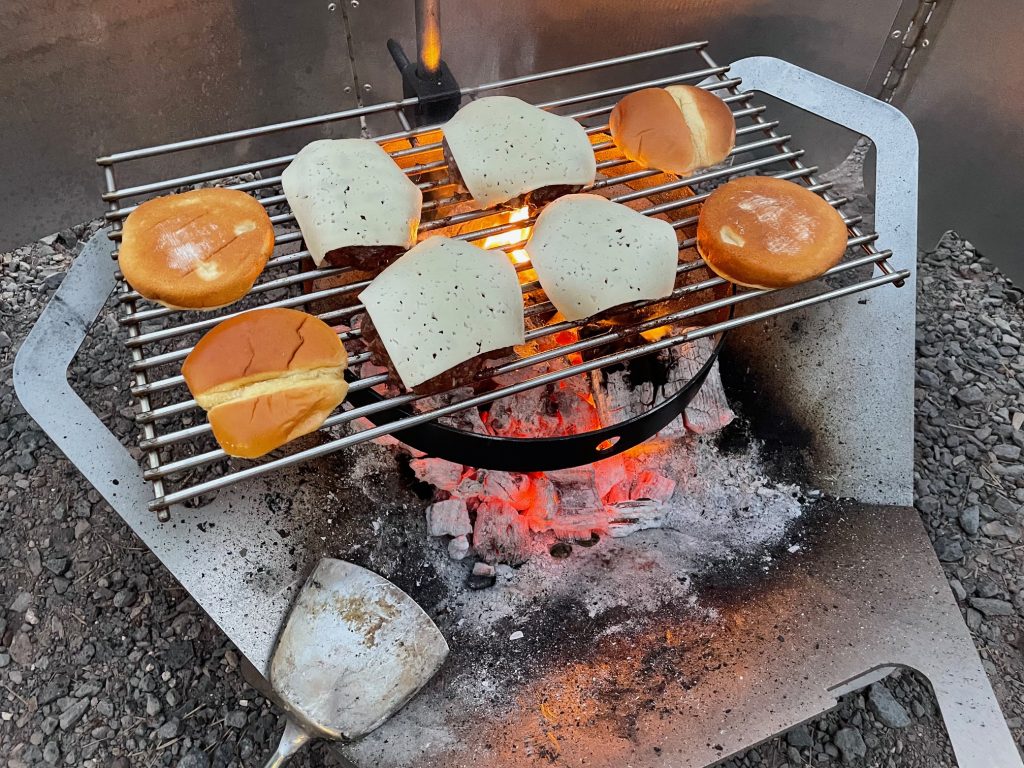
Campfire Cooking
Campfire cooking is direct-heat grilling, skewer cooking, pie iron sandwiches, and tripod stew work. It requires fire-making skill and more time than propane. However, the tradeoff is flavor and experience. Nothing replaces the smoke profile of food cooked over real wood.
Campfire wins for ribeye steaks, fish, grilled vegetables, s’mores, and social dinners where the fire is the gathering point. Browse the full campfire recipes library for 18+ direct-fire tested dishes.
No-Cook Meals
No-cook meals solve three problems: arrival nights when camp is dark and exhausted, fire restriction days when open flame is banned, and pure speed when the trail takes longer than planned. Specifically, charcuterie plates, pre-made wraps, cold grain bowls, and sandwich setups all fall in this category.
No-cook wins for day 1 setup night, mid-day lunches, fire-ban compliance, and solo trips where cooking feels like overhead. Our no-cook camping meals collection includes 10+ zero-flame meal setups for any trip scenario.
Meal Planning for Multi-Day Trips
Meal planning is the difference between eating well and scrambling on the trail. Additionally, the camp cooking framework below scales to any trip length. The rule: plan by day block, not by meal. Specifically, Day 1 is arrival day. Days 2 through 4 are peak cooking days. After day 5, the plan shifts toward shelf-stable and simple. Every camp cooking framework here rolls up cleanly into this scaffold.
3-Day Trip Framework (Weekend Warrior)
A 3-day trip runs Friday evening through Sunday afternoon. Notably, your cooler stays cold the entire trip with one ice block.
- Friday dinner: No-cook or one-pan simple (charcuterie board, pre-marinated steak on propane, pre-made chili reheated)
- Saturday breakfast: Cast iron hash with eggs and bacon
- Saturday lunch: Sandwiches or wraps (no cooking)
- Saturday dinner: Dutch oven centerpiece (chicken fried steak, beef stew, lasagna)
- Sunday breakfast: Dutch oven cinnamon rolls or breakfast casserole
- Sunday lunch: Leftovers or sandwiches on the road
5-Day Trip Framework (Base Camp)
A 5-day trip stretches your cooler strategy. Therefore, plan perishable-heavy meals days 1 and 2, then shift toward shelf-stable starting day 3.
- Day 1: Arrival dinner, simple (pre-marinated steak)
- Day 2: Cast iron breakfast, sandwich lunch, Dutch oven dinner with fresh ingredients
- Day 3: Oatmeal breakfast, shelf-stable lunch (tortillas with salami and cheddar), foil packet dinner
- Day 4: Instant coffee + granola breakfast, jerky and nuts lunch, one-pot pasta dinner
- Day 5: Oatmeal breakfast, pack-out lunch on the road
7-Day Trip Framework (Expedition)
A 7-day trip requires a 12V fridge or a serious cooler strategy with ice resupply planning. Consequently, shelf-stable meals dominate the second half.
- Days 1-2: Perishable-heavy (steaks, chicken, dairy, fresh produce)
- Days 3-4: Transition (dried pasta with pesto, foil packets, cured meats)
- Days 5-6: Shelf-stable (instant rice with dehydrated vegetables, oatmeal, dried fruit, nuts)
- Day 7: Pack-out simple
Calorie Math for Overland Trips
Plan 2,500 to 4,000 calories per person per day. Notably, active overlanding (trail work, recovery, camp setup) runs on the higher end. Cold-weather trips add another 500 calories per day because the body burns more to maintain core temperature. Additionally, pack 10% over your calorie target to buffer delays.
Shopping List Simplification
The fastest meal planning approach: build a standard 5-day food bin pre-packed in the garage. Refresh perishables 24 hours before departure. As a result, this cuts trip prep from 3 hours to 45 minutes. Contents: 5 breakfasts, 5 dinners, 5 lunches, 10 snacks, full spice kit, shelf-stable staples.
Altitude and Weather Adjustments
Altitude and weather break camp cooking protocols faster than any other variable. For example, above 5,000 ft, water boils at 203F instead of 212F. At 8,000 ft, it drops to 197F. Consequently, camp cooking times extend proportionally. Baking leavening loses effectiveness. Moreover, wind kills stove performance and rain changes everything.
Altitude Cooking Chart
- Below 3,000 ft: Standard cooking times. No adjustments needed.
- 3,000 to 5,000 ft: Extend boiling times 10%. Reduce baking soda/powder by 10%.
- 5,000 to 7,000 ft: Extend boiling times 20%. Reduce leavening 15%. Add 1 tablespoon liquid per baking recipe.
- 7,000 to 10,000 ft: Extend boiling times 30%. Reduce leavening 25%. Add 2 tablespoons liquid per baking recipe. Cover rice and pasta tightly to retain pressure.
- Above 10,000 ft: Pressure cooker becomes the practical solution. Boiling point alone cannot cook beans, tough meat, or dense grains effectively.
Wind Management
Wind at 15 mph reduces propane stove output by approximately 40%. Three methods fix this. First, use a three-sided wind screen. Specifically, the Camp Chef Everest has an integrated wind screen blocking crosswind. For open stoves, aluminum wind screens from MSR or REI block wind effectively for under $25. Second, position the stove with the wind blowing across the burner, not at it. Third, stack gear on the upwind side to create a larger wind block when wind exceeds 20 mph.
Rain Protocols
Cooking in rain requires a tarp or awning. For instance, every overland vehicle should carry a rear-door awning (ARB Deluxe 2000 or Alu-Cab Shadow) or a lightweight tarp setup for emergency coverage. Never cook inside a tent or enclosed rig. Carbon monoxide accumulates fast and kills faster. Therefore, cook under an open awning with cross-ventilation at minimum.
Cold-Weather Adjustments
Below 20F, propane pressure drops significantly. Store the tank inside the rig overnight. Additionally, butane canisters fail entirely below 32F, so switch to a white gas stove for winter trips. Pre-heat cast iron and Dutch ovens near the fire for 5 minutes before adding oil. Otherwise, cold metal strips seasoning when hot oil contacts it.
Water Management
Water is the hardest resource to scale on overland trips and the most overlooked variable in camp cooking plans. For instance, food fits in a cooler and fuel fits in a tank. However, water takes volume, weight, and planning. As a result, the framework below keeps you hydrated without running short.
Water Ration Math
Plan 1 gallon per person per day for drinking, cooking, and cleanup combined. Notably, hot weather above 90F pushes this to 1.5 gallons per person per day. Conversely, cold weather drops it to 0.75 gallons. Multiply by trip length plus a 20% buffer. For example, a 3-day trip for 2 people needs 6 gallons (standard) to 9 gallons (hot weather) plus 2 gallons buffer. Carry the full 10 gallons. Running out of water ends trips fast.
Storage Options
The Scepter 20-liter military water can (roughly 5 gallons) is the gold standard. It seals reliably, stacks cleanly in a cargo bed, and comes with a removable spigot cap. Specifically, two stacked Scepters cover 4 people for 2.5 days. For longer trips, add a WaterPort 3.5 or 7-gallon pressurized water tank. Additionally, the WaterPort’s 40 PSI output lets you wash dishes instead of pouring water from a jug.
Sourcing Water on Trail
Natural water sources become drinkable with a filter or purifier. For example, the MSR Guardian Purifier pumps 2.5 liters per minute and removes viruses, bacteria, and protozoa. Boiling works for 1 minute at elevations below 6,500 ft, or 3 minutes above. Additionally, chemical treatment (iodine or chlorine dioxide tablets) adds a backup option. Never drink unfiltered water from any source.
Graywater Disposal
Graywater (dish water, wash water, rinse water) gets scattered in a broad fan pattern at least 200 feet from water sources, camp, and trails. Importantly, never dump concentrated graywater in one spot. Concentrated graywater attracts wildlife and creates scent trails affecting future campers. Strain solids out and pack them out in a sealed trash bag.
Cleanup and Leave No Trace

Leave No Trace principles apply to camp cooking cleanup as strictly as to fire management. For instance, an overlander who leaves food waste, greywater, or fire scars behind is the reason access gets restricted on public lands. Therefore, the protocol below meets LNT standards and should be part of every camp cooking session.
Dish Cleanup Protocol
First, scrape solids into a sealed trash bag. Second, wipe pans with a paper towel to remove grease before water touches them. Next, wash in basin 1 with biodegradable soap (Campsuds, Dr. Bronner’s). Then rinse in basin 2 with clean water and a drop of bleach. Finally, air dry on a rack. Total water use: 1 gallon for a meal for 4 people.
Fire Cleanup
Only use fires in existing rings or portable fire pits like the Fireside Outdoor Pop-Up. Burn wood completely to ash. Then pour water over the ash, stir, pour again until cold. Next, scatter ash in a broad fan outside the fire area. Otherwise, if using a portable fire pit, pack out the ash in a sealed metal tin once fully cold.
Food Waste Handling
Pack out everything. Specifically, orange peels, apple cores, and coffee grounds take months to decompose in dry climates. Wildlife learns to associate human camps with food, which creates problems for future visitors. Therefore, use dedicated trash bags, stow them inside the rig (not in the bed), and dispose at the first service station.
10 Field-Tested Pro Tips
After 1,000+ hours of trail cooking, these ten tips deliver the highest return on effort. Specifically, each one solves a specific failure mode and tightens the whole camp cooking loop.
- Pre-chop vegetables at home. Diced onions, peppers, and garlic in zip bags save 20 minutes of camp knife work and produce no dirty cutting board in the field.
- Freeze pre-made meals as ice blocks. A 1-quart bag of frozen chili doubles as a cooler ice block and becomes day-2 dinner. Kill two problems with one item.
- Carry a butane lighter as backup. Camp Chef electronic ignitions fail in cold and moisture. A cheap Bic lighter in the kitchen kit costs $2 and prevents a $0 dinner.
- Always bring foil. Heavy-duty Reynolds foil fixes emergencies: makes a pan, lines a dirty surface, builds a wind block, wraps leftovers.
- Spice kit in a fishing tackle box. A small tackle box with 15 pre-filled compartments (salt, pepper, garlic powder, cumin, chili powder, Italian seasoning, etc.) beats full-size jars on weight and breakage.
- Paper towels are cheap calories of convenience. A full roll weighs 5 ounces and prevents dishwashing, wipes pans, and handles spills. Never trip-skip them.
- Keep a “first meal” bag accessible. Arrival nights are the hardest. Pre-pack a zip bag with one easy dinner (pre-cooked chili, pasta sauce and dried pasta, or pre-marinated meat) on top of the cooler so dinner takes 20 minutes on a tired night.
- Use a cast iron lid as a second pan. A cast iron Dutch oven lid inverts into a 10-inch skillet. One piece of cookware, two functions.
- Label your water cans. “DRINK” and “WASH” in big marker prevents the catastrophic mix-up where dish water lands in your coffee.
- Cook the biggest meal first. Big meals create leftovers. Leftovers become day-2 breakfast or lunch. One cook, two meals.
The Workhorse
Lodge 6-Quart Camp Dutch Oven
Pre-seasoned cast iron, three legs for coal bed stability, flanged lid for stacking briquettes. Serves 4 to 6. The single most versatile piece of overland cookware.
Frequently Asked Questions
What is the best camp stove for overlanding?
The Camp Chef Everest 2X is the best camp stove for overlanding because of its 20,000 BTU per burner output, enclosed burner design for wind resistance, and matchless ignition. Additionally, it handles everything from a 4-gallon stockpot to a 10-inch cast iron skillet and runs off standard 1-pound propane cylinders or a 5-pound refillable tank via adapter hose.
How many briquettes do you need for 350F in a Dutch oven?
For a 12-inch Lodge Camp Dutch Oven at 350F, use 16 briquettes on the lid and 8 underneath, for 24 total. On a 10-inch Dutch oven, reduce to 14 on top and 6 underneath. Additionally, add 1 briquette per side for every 1,000 ft above 3,000 ft elevation to compensate for thinner air and lower burn temperature.
What food doesn’t need refrigeration for camping?
Shelf-stable overland food includes hard salami, vacuum-sealed aged cheddar, tortillas, instant rice, instant oatmeal, dried pasta, peanut butter, jerky, dried fruit, nuts, shelf-stable pesto, bouillon cubes, and dehydrated meals. Notably, these staples safely store at ambient temperatures up to 85F for 7 to 14 days and form the foundation of meals on day 3 and beyond of any overland trip.
How much water should you carry per person per day overlanding?
Carry 1 gallon per person per day for standard conditions, 1.5 gallons in temperatures above 90F, and 0.75 gallons in cold weather. Additionally, add 20% buffer for delays and spills. For example, a 3-day trip for 2 people needs 10 gallons total to cover worst-case scenarios. Water is the single hardest resource to scale, so err on the high side.
Is it safe to cook inside an overland vehicle?
Never cook inside a tent or enclosed overland vehicle. Specifically, carbon monoxide from propane, butane, and white gas accumulates in enclosed spaces and kills quickly. Always cook outside under an open awning, a tarp with cross-ventilation, or the open sky. Moreover, an awning extension off the rig costs $200 to $600 and solves the rain cooking problem permanently.
How long does a cooler stay cold on an overland trip?
A high-quality cooler (Yeti Tundra, RTIC, Pelican Elite) pre-chilled for 12 hours and loaded with a 10-pound ice block maintains sub-40F internal temperature for 48 to 72 hours at 85F ambient. However, without pre-chill, the window drops to 24 to 36 hours. Notably, ice blocks outperform ice cubes by 3x because of the surface-to-volume ratio difference.
What is the best Dutch oven size for overlanding?
A 6-quart Lodge Camp Dutch Oven serves 4 to 6 people and fits in most drawer systems. For solo or couple trips, a 4-quart is adequate. Conversely, for groups of 6+, step up to 8-quart. Always choose a camp Dutch oven with three legs and a flanged lid for coal stacking. Otherwise, flat-bottomed “kitchen” Dutch ovens fail on uneven coal beds and lack the flanged lid required for proper temperature control.
How do you wash dishes while overlanding without water access?
Use the two-basin method with 1 gallon of water total for a meal for 4. First, scrape solids into trash, wipe pans with paper towels to remove grease, wash in basin 1 with biodegradable soap, rinse in basin 2 with clean water and a drop of bleach. Finally, scatter greywater in a broad fan 200 feet from water sources, camps, and trails. Total cleanup time: 10 minutes.